Lists of frequently asked questions
Business products
My Dr.Web Portal for business (Portal)
How do I get access to the Portal (the administrator password)?
Portal access credentials are granted to a single authorized employee of the customer. To gain access to the Portal (login and password), follow these steps: 1) Activate your Dr.Web serial number (the license must be active) and 2) request access to the Portal by creating a support ticket containing your serial number.
How can I access the Portal from any page on Doctor Web site?
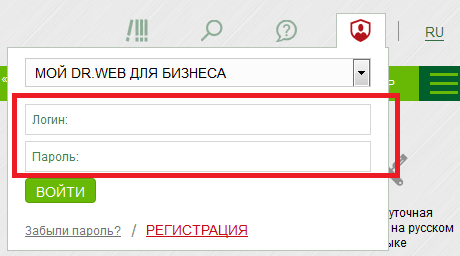
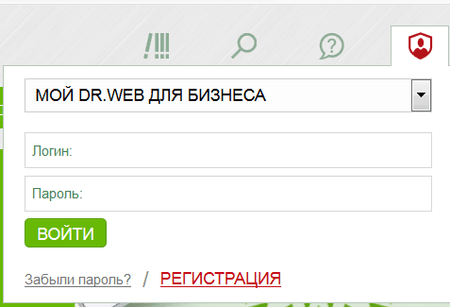
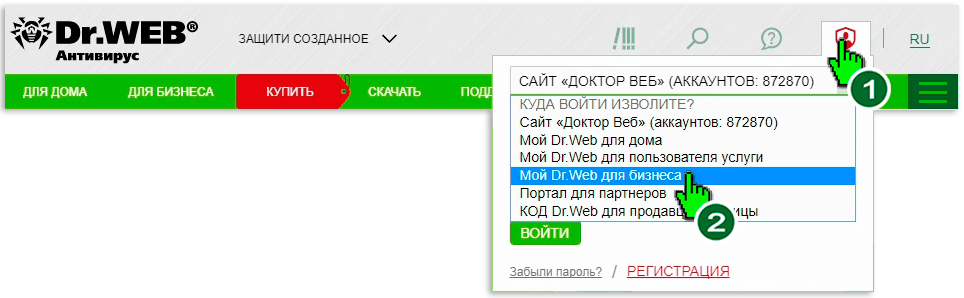
You don't need to memorise the Portal address. Just don't forget the Doctor Web site URL: https://drweb.com. You can use the Profile widget to sign in to the Portal on any page on Doctor Web's site.

Open the widget, and in the list, select My Dr.Web for Businessand enter your login and password.
If you link your Doctor Web and social media accounts, you will be able to sign in using your social networking credentials.
How can I restore a Portal administrator password?
If you forgot/lost the password, you can reset it as follows: go to the Portal's sign-in page and open the Forgot your password link. Fill in the form and follow the instructions in the email you receive. The message will be sent to the address specified in your administrator account profile.
If the email address is no longer being used, submit a support request to regain access to the Portal. In the request, specify the information about the license (serial number) owned by your company. The license can be inactive (expired and yet to be renewed). You will be able to regain access to the Portal anyway.
How can an administrator issue Portal access credentials to other company employees?
If you requested access to the option to create employee accounts and now have that ability, the New account option will be available to you.
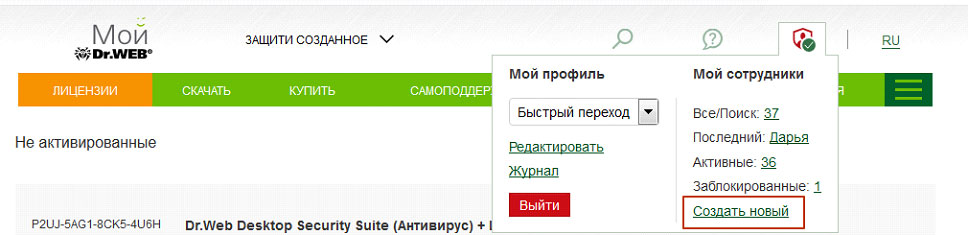
To create an account for an employee, in the widget, select Profile, go to My employees and open the New account link.
In the New account tab, fill out the employee information form.
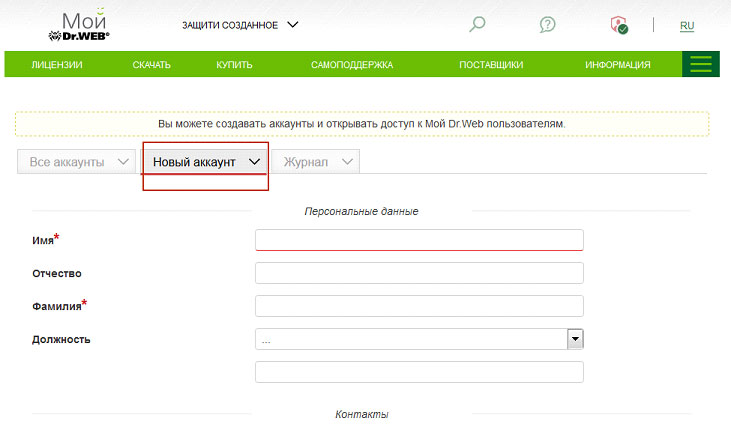
The Portal login and password (generated automatically) will be sent to the specified email address.
The administrator can create any number of employee accounts. Accounts created by the administrator are assigned the User role. Users are unable to edit administrator account information. The administrator can edit user account information.
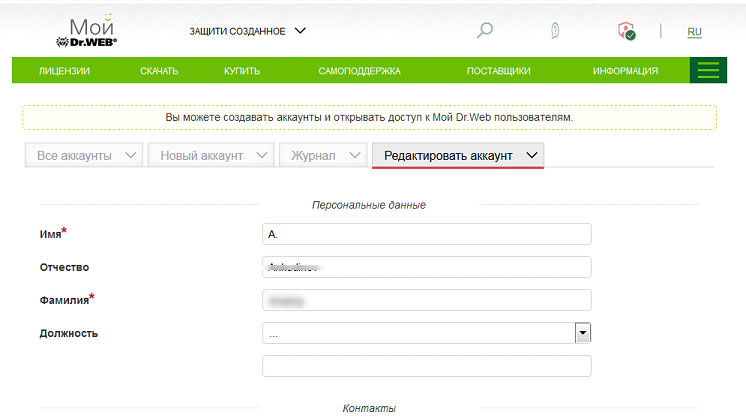
How can the administrator edit user account information?
Open the Profile widget and go to All/Search to view the account list.

Locate the account whose information you need to change and click on the edit icon (the pencil).
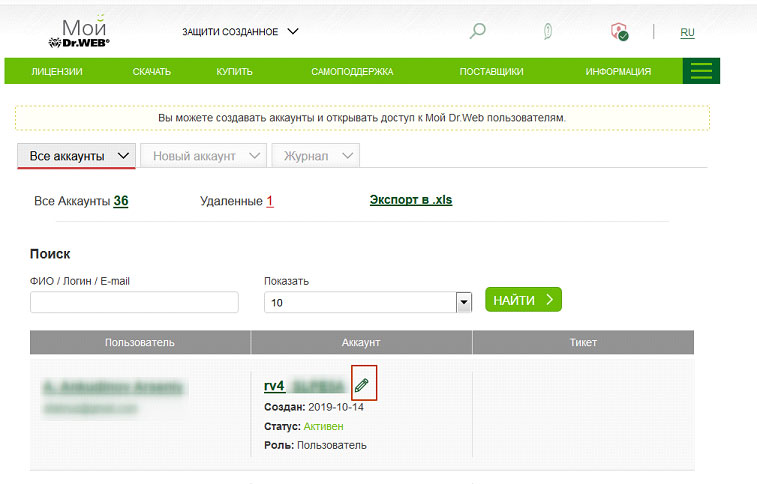
The account card will appear. Edit the fields as you see fit.
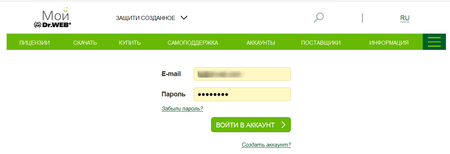
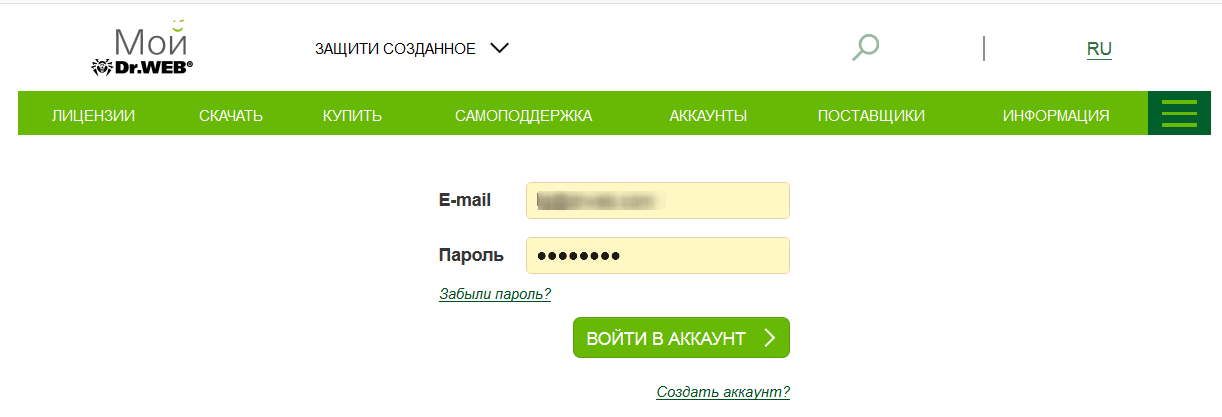
How do I sign in to My Dr.Web Portal?
Do one of the following:
-
Open this link: https://my.drweb.com/biz
-
Or go to https://drweb.com and open the Profile widget in the upper-right corner of the page. In the drop-down list, select My Dr.Web for Business.

In the sign-in dialogue box, enter your Portal login and password.

To access the Portal as an administrator, submit a request.
A Portal administrator issues User role access credentials.
How can I submit a support request via the Portal?
Use the Contact Us widget in the top-right corner of the Portal page to contact our support service.
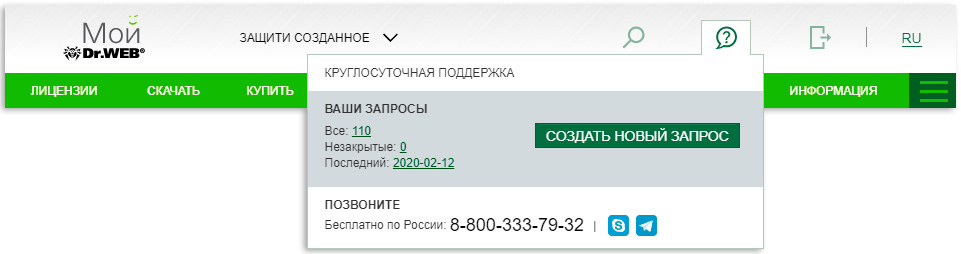
Click on the New ticket button to create a new ticket or open links to quickly access your previous requests:
- Total [number] is the number of tickets that have ever been created in the Portal (associated with your company and created by its employees via the Portal). Tickets submitted by corporate customers are stored on the Portal indefinitely.
- Active [number] indicates the number of tickets that Doctor Web’s support staff are currently working with as well as the tickets that haven't yet been closed by their respective initiators.
- Latest [date] points to the most recently created ticket.
! Do not provide information about multiple unrelated issues in one request. Different issues may require the attention of different Doctor Web divisions, and each request can only have a single operator. If necessary, create multiple tickets. That way Doctor Web’s staff will help you solve your problems more quickly.
Does a request that is not sent from my Portal end up in my company’s request history?
How can I get the list of all the tickets submitted by a specific employee?
In the All accounts section, locate the employee's account. In the Ticket column, open this link All.

Contact Us widget
Use the widget to quickly access your company's tickets and the support request form. It can be found at the top of the page, above the main menu. It looks like an icon with a question mark on it.
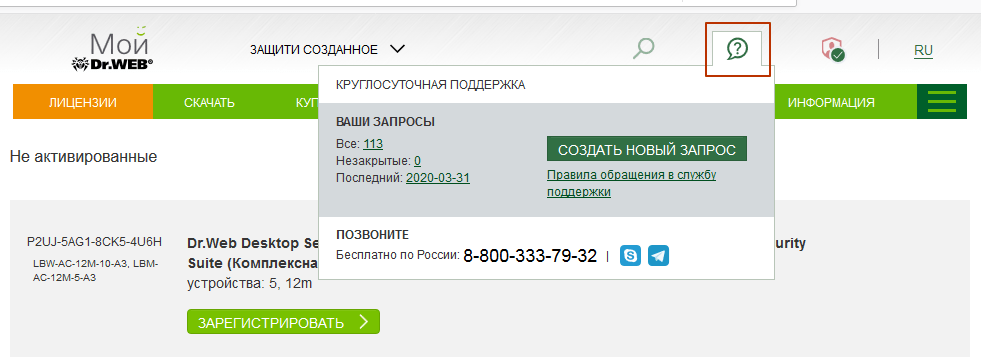
Contact Us widget features
The New ticket button is used to access the support request form.
Your tickets links. Requests are grouped according to their status.
- Total [number] shows your company’s total number of tickets.! Employees who are assigned the Administrator role can see the tickets associated with all your company's accounts. Employees whose accounts are assigned the User role can only see their own tickets. An Administratormay grant Users permission to view all the tickets.
- Active [number] shows the number of tickets that are currently being processed (have active statuses).
- Latest [date] points to the last created ticket.
Product features
About Dr.Web software possibly conflicting with other applications
Dr.Web products are developed for the purpose of maximising anti-malware protection. Before being released, all of our programs are tested in the Doctor Web test laboratory. Many Dr.Web products are certified at the highest state level (by the Federal Service for Technical and Export Control of Russia, the Russian Federal Security Service, and other organisations)— this also confirms that our products are compatible with the supported operating systems. In addition, we have compatibility certificates from many Russian developers of operating systems, platforms and cloud services: the complete list.
However, any software can conflict with other software, and, with hundreds of thousands of customers, we cannot possibly reproduce a unique software environment in our test laboratory for each one of them. Moreover, other software vendors do not pay enough attention to verifying that their software is compatible with anti-virus software, and they do not notify us about their upcoming new versions. As a result, we learn about their release after receiving messages from users about problems they are having.
That is why we strongly advise you to test Dr.Web anti-virus software before purchasing it (for example, by using the trial version) And in case it conflicts with the software your company uses, contact Doctor Web's technical support service for free consultations. Your request will help us improve Dr.Web, and it will also help other users to work comfortably with Dr.Web.
By the way, if you are unable to set up a testing environment, you can take advantage of our online Dr.Web LiveDemo service, which lets you remotely test Dr.Web software.
Is a separate server required for the Dr.Web Control Center?
Using a dedicated server is recommended. If the internal database that is shipped with the Dr.Web server and the dedicated hardware for Dr.Web server are used, up to 1,000 protected objects can be simultaneously connected. The minimum server hardware requirements (excluding the system requirements of the OS itself) must be no less then:
- a CPU of 1.3 GHz or higher that supports SSE2 instructions.
- RAM: at least 2 GB.
- Free disk space: at least 80 GB.
A complete list of all the OSs supported by the server is indicated in the article.
How can I periodically scan the network folders on our server for the appearance of any new files and neutralise any malicious files that are detected?
Use Dr.Web for file servers. It needs to be installed on the server where the folders are located. You can also scan these folders remotely over the network. This feature is included in the Dr.Web for workstations Anti-virus scanner, for example.
If you want to scan files remotely so that the anti-virus scanning does not affect the performance of the server on which the files are located, you can use Dr.Web for Unix file servers version 11.1. This product can send files to a remote server for testing and organize a scan cluster.
To remotely scan the server on which the controlled network folders are located, you must install the Dr.Web Spider Guard component. It will send all the files you select to the remote server for scanning. You do not need to install the anti-virus scanning module on this server, but it must be installed on the remote server.
The settings for scanning different folders may also vary.
Dr.Web UNIX file servers documentation. You can select which components you want to install during the installation process.
Dr.Web Enterprise Security Suite
When does a license need to be split according to the number of subnets?
If your company's local network is divided into multiple isolated, independent networks and if the previously installed anti-virus server cannot be accessed from each new subnet, and you’ve decided to install independent anti-virus servers, your license needs to be split according to how many subnets you have. You can do this by contacting your supplier. After splitting your license, your old license will be blocked.
The anti-virus server is provided free of charge.
When does a license not need to be split according to the number of subnets?
If your company's local network is divided into multiple isolated, independent networks and you have a hierarchical system of servers, you can distribute to each network server the number of licenses needed to protect your network’s workstations without splitting your license. You can install and use as many servers as you need. The anti-virus server is provided free of charge.
Corporate products for GNU/Linux or FreeBSD
Getting distributions and installing them
Obtaining a distribution
Distributions can be obtained:
- Using the Control Center (see the documentation). Starting with Dr.Web Enterprise Security Suite version 13.0, remote installation is available via ssh (for more information refer to the section "Remote Installation of Dr.Web Agent on UNIX system-based OS").
- Using the official Dr.Web repository.
- Using the Download Wizard on the official website (a serial number is required).
How to obtain a distribution via the Control Center
- Create a station according to the instructions in the official documentation.
- To create a station, save:
- The install.cfg configuration file containing the target station’s connection details to Dr.Web Server (login/password of the target station, key (certificate), and server address).
- If necessary, a personal distribution of the product to be installed (in this case, the .run archive will already include the install.cfg file and the .sh script for automatically connecting to the server).
Installing and connecting end stations to Dr.Web Server
The standard installation method — via the command line using the drweb-ctl utility.
Note: Dr.Web anti-virus for Linux can be installed and connected to Dr.Web Server via the graphical interface (if available). The parameters for connection and authorisation on the Server are entered in the “Mode” tab, which is on the Dr.Web Anti-virus for Linux window's settings page.
For more information about connecting in the graphical interface, refer to the official documentation.
If necessary, you can connect the installed product to Dr.Web Server as soon as the installation is complete. A previously installed anti-virus can also be connected to Dr.Web Server.
The utility "help" feature:
drweb-ctl esconnect -h
Options for connecting an existing station:
- Connect the station as a new one. In this case, the settings of the group to which it is assigned will be applied to it:
- Connect the station as an already existing one and get the existing settings:
drweb-ctl esconnect 192.168.1.1 --Certificate /path/to/certificate/drwcsd-certificate.pem --newbie
192.168.1.1 should be replaced with the actual Server address.
Drwcsd-certificate.pem — Server certificate.
drweb-ctl esconnect --CfgFile /path/to/configuration/file/install.cfg
If there is no CfgFile key, the option exists to load the certificate of the Server drwcsd-certificate.pem and execute drweb-ctl esconnect with the full set of parameters for this station:
drweb-ctl esconnect 192.168.1.1 --Certificate /path/to/certificate/drwcsd-certificate.pem --Login 52068a12-e1f2-413a-060a-000000000000 --Password password
192.168.1.1 should be replaced with the actual Server address.
Drwcsd-certificate.pem — Server certificate.
52068a12-e1f2-413a-060a-000000000000 should be replaced with the actual Station ID.
Working with universal .run packages
The entire text of this section refers to the following Dr.Web products:
- Dr.Web Anti-virus for Linux
- Dr.Web for UNIX Internet Gateways
- Dr.Web for UNIX Mail Servers
- Dr.Web for UNIX File Servers
- If your version of the OS distribution supports neither .deb nor .rpm.
- If the mandatory use of certified assemblies is required.
- If a user wants to perform an installation on a station with no external network access.
In all other cases, the easiest way to install a product is from the repository.
Remote installation of .run packages is available via ssh for the following products (for more information refer to the documentation):
- Dr.Web Anti-virus for Linux
- Dr.Web for UNIX File Servers
For Dr.Web Enterprise Security Suite Server (hereinafter, "Dr.Web Server") version 12.0 and later, select the appropriate check boxes in the repository settings. To enable this feature, an extra package (also known as an extra distribution kit) must be installed on Dr.Web Server version 11.0. Find out more about the extra package in the documentation.
Installation of the extra Dr.Web Server distribution kit is carried out according to the instructions and does not require the Server to be stopped.
To perform the installation in this way, you must be able to:
- Connect to a remote station via ssh.
- Elevate privileges on the remote station.
This installation method has two important restrictions:
- Remote installation of the Agent is not available on a computer running the Server from which the installation process is started.
- The installation time may exceed the duration of the session due to the large amount of data. If the session expires before the installation is complete, the process will be terminated automatically and the packages will not be installed.
Dr.Web Server's pre-configuration to receive .run packages:
The path to the required settings is shown in the example of Dr.Web Enterprise Security Suite 13.0.
- In the settings Administration → General repository configuration → Dr.Web installation packages → Dr.Web corporate products, find the desired product on the list:
- Dr.Web Anti-virus for Linux
- Dr.Web for UNIX File Servers.
Next to the found product, select the appropriate check box (you are thus allowing it to be uploaded to the repository).
Next, you need to expand its content and make sure that the check boxes for the required OSs (Linux, FreeBSD) and assemblies for the required platforms are selected.
After that, .run packages can be distributed via http(s). Section address (https://*:9081/install/unix/workstation), where * is the address of Dr.Web Server.

For more information about installing the universal package, refer to the official documentation..
Remote installation of .run packages is available via ssh for the following products (for more information refer to documentation):
- Dr.Web anti-virus for Linux
- Dr.Web anti-virus for UNIX file servers
For Dr.Web Server version 12.0 and later, select the appropriate check boxes in the repository settings (for more information refer to the instructions). To enable this feature, an extra package (also known as an additional distribution package) must be installed on Dr.Web Server version 11.0. Find out more about the extra package in the documentation.
Installation of the additional Dr.Web Server distribution package is carried out according to the instructions and does not require the Server to be stopped.
The selected method of initial installation affects how further updates are obtained. After installing Dr.Web anti-virus for Linux using any of the possible ways, the package manager automatically connects to the Dr.Web package repository. This can cause problems when installing the universal .run package on a station that lacks access to an external network. In this case, the solution is to temporarily disconnect from the repositories during the installation process.
If you encounter any difficulties with the repositories after installing the .run package, please contact our technical support.
By default, the virus databases are updated automatically if you have Internet access.
During the initial installation from the repository, the components will be automatically updated from it (provided that automatic updating is allowed and the station has access to it).
If the installation was performed from the universal .run package, the ability to get automatic updates from the repository depends on the specifics of the user's operating system. In this case, updating from Dr.Web Server actually means installing a new .run package over the existing one. The Dr.Web Enterprise Security Suite repository and the repository https://repo.drweb.com, to which the package manager is connected, are different objects with different content.
If a product installed using the .run package is not updated automatically
In this case, the zypper package manager (included in the installed Dr.Web anti-virus for Linux package) should be used to perform a manual update. If this method is not suitable for some reason, you should apply the update commands of the package manager used in your OS.
Updating using zypper, included in the product in Linux distributions, is performed by the following commands:
# /opt/drweb.com/bin/zypper refresh
# /opt/drweb.com/bin/zypper update
For FreeBSD:
# /usr/local/libexec/drweb.com/bin/zypper refresh
# /usr/local/libexec/drweb.com/bin/zypper update
At the same time, repo.drweb.com should be available from the station where the updating process is launched.
Details and examples of commands can be found in the official documentation.
If a new version of Dr.Web anti-virus for Linux is released, packages containing its components are placed in the section of the Dr.Web repository that corresponds to the new version. In this case, the package manager should be switched to the new section of the Dr.Web repository (for more information refer to "Upgrading to a new version").
A utility for creating a local update mirror is available so that updates can be received on isolated stations. Instructions on its use and more information on this topic can be found here.
The updating process is performed as follows: updates are downloaded to a computer connected to the Internet, copied to a USB drive or network drive, and then installed on another computer that is not connected to the Internet.
The updating process is performed via the command line.
Instructions for receiving updates
- On a computer connected to the Internet, run the following command:
- Copy the received updates to a USB drive or a network drive.
- Mount a network drive or a USB drive on the computer on which you want to install updates. If you receive updates from a USB drive, you will need to run the following commands:
- Install updates using the following command:
$ drweb-ctl update --Path <path to the directory to which updates will be downloaded>
# mkdir /mnt/usb
# mount <path to device> /mnt/usb
$ drweb-ctl update --From /mnt/usb
You can also download new .rpm packages on any other PC with access to https://repo.drweb.com and then transfer them to the target station.
In this case, the zypper package manager (included in the installed Dr.Web anti-virus for Linux package) should be used. If this method is not suitable for some reason, you should apply the update commands of the package manager used in your OS.
Conditions for the example shown below: there is a second station with Internet access and a .run package installed on it.
- Checking the content of the repository (without updating) for Linux:
- Download everything new by listing all the packages in the command (for Linux):
- Transfer this entire directory with all the attachments to the station with the product that needs updating. The name and path to the directory on the target station are of no importance (for example /tmp/1).
Then, enter the following command (for Linux) on the isolated station:
# /opt/drweb.com/bin/zypper up
For FreeBSD:
# /usr/local/libexec/drweb.com/bin/zypper up
The answer “N” to the question "Continue? [y/n/...? display all parameters] (y):" will complete the command without installing updates.
# /opt/drweb.com/bin/zypper download …
For FreeBSD:
# /usr/local/libexec/drweb.com/bin/zypper download ...
After that, all updates for our run package are available in the catalogue /var/opt/drweb.com/cache/zypp/packages/drweb-11.1/ (for Linux) or /var/drweb.com/cache/zypp/packages/drweb-11.1/ (for FreeBSD).
# /opt/drweb.com/bin/rpm -Uhv /tmp/1/*
For FreeBSD:
# /usr/local/libexec/drweb.com/bin/rpm -Uhv /tmp/1/*
Dr.Web topics for MS Exchange
Why is an anti-virus required to protect a mail server?
Every day the Doctor Web virus monitoring service collects more than 250,000 new malicious programs, the most dangerous of which have been developed by professional virus writers who are members of criminal organizations. These programs focus on stealing money from single companies (or a series of “targeted” companies); the creators of these programs know what security systems are in use, and devise their malware accordingly.
It is commonly believed that by installing a protection system on a mail server, one can reduce the inflow of spam and the number of viruses in a company network, and speed the delivery of important emails. But apart from solving these problems, a modern mail server anti-virus also affords the opportunity to delete previously unknown malicious programs from mailboxes. Only by installing an anti-virus on a company mail server can one escape situations in which the server becomes a source of infection. An anti-virus can’t protect a server file system, because such anti-viruses can’t cure databases, including mail server databases.
How is it possible to protect a company's network against previously unknown malicious programs?
The latest malicious programs, undetected by all heuristic mechanisms, reach the virus monitoring laboratory, and thus their victims, only after criminals have begun spreading them.
It is imperative to take into account the probability of criminals being able to bypass a company’s security systems and access its network (or employees’ PCs) and also the possibility of criminals being able to impact the protection systems in use, with the goal of stopping their operation.
To minimize risks to mail servers in particular, user mailboxes should be scanned regularly with an anti-virus to check for the presence of previously unknown malicious programs.
How can I prevent criminals from bypassing the system?
No anti-virus can detect the newest malicious programs 100 percent of the time. Even tests designed to detect malicious programs created after the latest anti-virus update say nothing about an anti-virus’s capacity to reveal the ‘infection’ created by criminals familiar with the anti-virus. Such anti-virus programs will not be detected by an anti-virus right up to the moment the necessary update is received.
That’s why the choice of an anti-virus should not be based on “test” results, but on an understanding of the following features of an anti-virus system:
- An anti-virus has to have a reliable system of self-protection— criminals must not be able to disable the anti-virus (or one of its components).
- Anti-virus updating and control systems must be completely under the control of the anti-virus’s self-protection system and must not use system components that are not under its control.
Once a company’s computers fall into a botnet, they often become a source of spam, and that harms the company’s reputation among its partners. Using Dr.Web Mail Security Suite and Dr.Web Desktop Security Suite will significantly reduce a company’s risk of becoming compromised by being blacklisted and disconnected from the Internet for acting as a spam bot.
A system for scanning mail traffic must be installed on the server as well as on the work stations, because incoming and outgoing messages go not only through a company’s mail server, but also directly through employees’ PCs (via SMTP, pop3/imap4 and closed links). In addition, the mail server (or the programs installed on it) can create mailings, including unwanted messages.
How can I test Dr.Web for MS Exchange before I buy it?
For evaluation purposes, you can use the trial version. Download the distribution from Doctor Web's site at https://download.drweb.com/demoreq. The demo license period is 30 days.
You can also take advantage of the Dr.Web LiveDemo remote testing service by filling out an application at https://download.drweb.com/live_demo. It should be noted that when testing a product via Dr.Web LiveDemo, the accompanying step-by-step instructions on how to test the product’s basic functionality are tremendously helpful.
Dr.Web ATM Shield
The following routes of infection are typical for embedded systems:
The following routes of infection are typical for embedded systems:
- An infected company intranet, if embedded systems can be accessed from it;
- Vulnerabilities that exist due to the absence of security updates;
- Employee removable data-storage devices (including those that have been used for purposes other than embedded systems maintenance);
- Hacker-owned removable data-storage devices, if the hackers have unauthorized access to ATM equipment compartments;
- Internet sites visited by company personnel during maintenance periods.
Therefore, anti-virus protection that includes a traffic control module and an access restriction module for removable data-storage devices and Internet resources is essential for embedded systems to operate normally.
Can Dr.Web ATM Shield be used for Embedded OSs?
Yes. Dr.Web ATM Shield can be used not only for conventional OSs—Windows® XP Professional, Windows® Vista, Windows® 7 and Windows® 8—but also for Windows® XP Embedded, Windows® 7 Embedded, and Windows® 8 Embedded.
It must be remembered that some devices may lack various operating system components. This is a feature of Embedded OSs.
Can Dr.Web ATM Shield run on weak and obsolete configurations of embedded systems?
Dr.Web ATM Shield was developed with low-end platforms in mind¬¬¬. Dr.Web ATM Shield can run on an embedded device with just 512 MB of RAM.
It should be noted that Dr.Web products, including Dr.Web ATM Shield, are distinguished by compact virus databases and small size updates that make it possible to protect remote devices with ‘narrow’ Internet channel or a company network.
When do I need to use Dr.Web ATM Shield?
Dr.Web ATM Shield is required in all embedded devices that are subject to the requirements of PCI DSS and STO BR RF, and in all systems that can be infected through unknown vulnerabilities.
Is Dr.Web ATM Shield enough to protect embedded devices?
A peculiarity of the way embedded devices work (including ATMs) is that you cannot carry out updates (specifically, updates to the OS and applications launched on them) on them that may at some point require a device reboot as soon as update data is available — even if the system is busy.
Therefore, Dr.Web ATM Shield has two types of updates: virus database updates (that don’t require system restarts) and updates for Dr.Web ATM Shield’s basic components, including the drivers. Basic components updates, carried out when new types of malicious programs appear, may require a reboot of the protected device.
Because updates that potentially require a system restart can only be carried out during routine maintenance checks, it’s essential for employee home and work PCs to be protected by an anti-virus in order to prevent the newest malicious programs from penetrating removable data-storage devices used for routine maintenance.
Does Dr.Web ATM Shield comply with regulatory requirements?
Dr.Web ATM Shield conforms to the anti-virus program requirements of the Federal Law on Personal Data (No. 152-FZ), FSTEC Russia’s orders No. 17 and No. 21, and other regulatory demands in the sphere of personal data protection.
When applied, Dr.Web ATM Shield meets the anti-virus program requirements of PCI DSS v2.0 and v3.0 standards.
Does your anti-virus have a PCI DSS certificate of compliance?
PCI DSS standards require only the fact that an anti-virus is being used and don’t make any claims about the functionality and features of the solution being used. Moreover, these standards stipulate the requirements for protecting devices in general, not their separate components. Therefore, the certificate isn’t provided for anti-viruses.
‘But Symantec has a PCI DSS certificate of compliance!’
Symantec has more than just anti-viruses in its portfolio. And the certificate you mentioned doesn’t belong to anti-virus software.
Dr.Web CureNet!
Can I launch Dr.Web CureNet! from CD/DVD?
No, you cannot, because Dr.Web CureNet! requires the Wizard to be installed on a LAN PC. This is, however, a great advantage of Dr.Web CureNet! — and you can launch the utility from USB data storage
How can I update Dr.Web CureNet!?
In order to update Dr.Web CureNet!, you need to log into the Dr.Web CureNet! user personal area and download the latest version from there. Since a PC from which a LAN is scanned might not have an Internet access or its an access blocked by the provider, we strongly recommend to download an actual Dr.Web CureNet! version before scanning your network. Unique Dr.Web CureNet! distribution files are generated for each user.
How can I download Dr.Web CureNet!?
If the Dr.Web CureNet! serial number is not registered yet, please register it on this page. At the final stage of registration a link to download Dr.Web CureNet! personal distribution file will be generated.
If the Dr.Web CureNet! serial number is already registered, go to Dr.Web CureNet! personal area and download your Dr.Web CureNet! personal distribution file.
How can I register Dr.Web CureNet! serial number?
You can register it on this page. At the final stage of registration a link to download Dr.Web CureNet! personal distribution file will be generated.
I am a Dr.Web Enterprise Suite user. How can I use Dr.Web CureNet! for free?
Register the serial number for the valid Dr.Web Enterprise Suite license.
You are allowed to use Dr.Web Enterprise CureNet! free of charge as long as the Dr.Web Enterprise Suite serial number is valid. However, your Dr.Web CureNet! personal distribution file will only be valid for 1 day. Therefore, you will have to register the serial number every time you need Dr.Web CureNet!. Every time a new Dr.Web CureNet! personal distribution file will be generated for you.
What is the difference between this new product and Dr.Web CureIt! or Dr.Web Enterprise Suite?
Dr.Web CureIt! is used to scan individual PCs and can fulfil needs of small companies. However, if there are many computers in the company, scanning each of them will take a lot of system administrator time and distract employees form their work. Dr.Web CureNet! allows performing scanning remotely over a network in the background so that a user can remain unaware of it. System administrator can operate from the single computer thus minimizing anti-virus influence on the performance of computers being scanned.
Dr.Web Enterprise Suite is designed to permanently protect the network. It is a very powerful product rich of numerous features. In order to use Dr.Web Enterprise Suite one has to deploy it on all hosts while with Dr.Web CureNet! you won’t need to deploy or install anything. Moreover, scanners will remove themselves from target hosts upon completion of scanning.
How can I get a demo key?
Download the program distribution demo file to evaluate Dr.Web CureNet! Remote curing is not available in demo version so you need to purchase a license to download fully functional Dr.Web CureNet! version.
How is Dr.Web CureNet! licensed?
The product is licensed per number of workstations on which scanning followed by curing will be performed for 10, 30 or 365 days of use. Such license periods are used because Dr.Web CureNet! is designed for regular scanning but not to provide resident protection.
Can I use Dr.Web CureNet! together with anti-virus products from other vendors simultaneously?
Yes, you can. Dr.Web CureNet! is designed to operate in a network environment protected with other security products.
I already have an anti-virus installed. Why should I use Dr.Web CureNet!?
No anti-virus can detect all malicious programs currently in the wild, let alone the fact different anti-viruses vary significantly in terms of detection and curing capabilities. The number of viruses in the Internet is huge and new species appear very quickly. Regular local network “health” checks with Dr.Web CureNet! will help you verify reliability of your anti-virus software and cure computers in emergency situations when your anti-virus fails to neutralize a threat.
How can I use this product?
You can use Dr.Web CureNet! for regular scans of your local network hosts if they are not protected by any other anti-virus, or if you suspect that the installed product doesn't detect some viruses.
Caution! Dr.Web CureNet! is not designed to provide constant anti-virus protection but perform only one-time scans. It doesn’t prevent malicious programs from infiltrating into a network between scanning sessions.
Nothing found