Lists of frequently asked questions
Installation
How can I install anti-virus?
Prior to the installation, we strongly recommend doing the following:
- Install all the critical updates released by Microsoft for your operating system (updates can be downloaded from the Microsoft update site);
- Use system tools to check the file system and fix problems, if any;
- Close other running applications.
To run the installation in normal mode, use one of the following:
- If the installation kit is a single executable file, launch the file.
- If the installation kit is furnished on a branded disk, insert the disk into your optical drive. If autorun is enabled, the installation procedure will start automatically. If autorun is disabled, launch the autorun.exe file located on the disk. The autorun window will appear.
Then proceed with the following steps:
- Press Install.
Follow the installation wizard instructions. At any installation step before file copying process is started you can use the two buttons:
- Press Back to return to the previous step;
- Press Next to move to the next step;
- Press Cancel to cancel the installation.
How can I know the version of the anti-virus I have installed?
In order to check the version number, right-click on the Dr.Web icon in the notifications area and select About. In the next window, you will see the Dr.Web version number and all the modules versions as well.
How do I install the anti-virus?
Before you start installing Dr.Web Security Space, review the system requirements (see system requirements for version 12.0). In addition, we recommend that you:
- install all critical updates released by Microsoft for your operating system (read more about the Windows updating process);
- if the manufacturer has discontinued support for your operating system, it is recommended that you upgrade to the latest version of the operating system;
- use system tools to check the file system and fix discovered problems;
- remove any other anti-virus programs to prevent their components from possibly conflicting with Dr.Web’s components;
- if you are going to install Dr.Web Firewall, you need to remove other firewalls from your system;
- close all running applications.
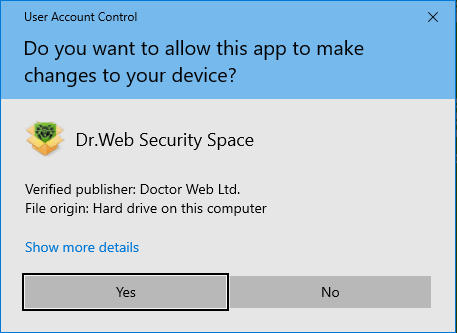
Dr.Web’s installation must be performed by a user who has administrative privileges on the given computer.
Dr.Web is incompatible with proactive protection products from other manufacturers.
The installation instructions for standard mode (using both the installation file and the Dr.Web CD) can be found in the documentation here.
How to upgrade from Dr.Web Anti-virus to Dr.Web Security Space free of charge
Replace your license key for free to be able to use all the features of Dr.Web Security Space.
! A Dr.Web Anti-virus license key can also be used for Dr.Web Security Space, however the components included in Dr.Web Security Space but absent in Dr.Web Anti-virus will not work with the Dr.Web Anti-virus license key.
The list of these components:
- Spider Gate
- Device access rules
- Parental Control
- Data Loss Prevention
To replace your key, sign in to your My Dr.Web Portal for home (from the program or via the site), and in the active license's area of the License section—Active, click on Upgrade to Dr.Web Security Space free of charge.
An email containing your new serial number and key file will be sent to your address. Read it.
! Free key replacement is only possible for Dr.Web Anti-virus licenses or Dr.Web Anti-virus + cryptographer licenses that are active (valid) at the moment of replacement.
! If you have a license that has not yet been activated, just register it—you'll be given a Dr.Web Security Space license immediately and you won't need to replace it.
! Once your license is replaced, your old license will be blocked in 30 days.
Install Dr.Web Security Space. To do this:
Download the Dr.Web Security Space distribution file. To do this, in your license's area of My Dr.Web Portal, click on "Download".
Place the license key file in the same folder with the Dr.Web Security Space distribution file.
Uninstall Dr.Web Anti-virus for Windows; to do this, open:
- Windows 10
Click on "Start" - "Parameters" - "Applications". - Windows 8 / 8.1
Press "Win" + "X". In the newly appeared list, select "Programs and components". - Windows Vista / Windows 7
Go to "Start" - "Control panel" - "Remove Programs". - Windows XP
Go to "Start" - "Control panel" - "Add and Remove Programs".
Find Dr.Web Anti-virus for Windows on the application list; select it, and click on "Uninstall".
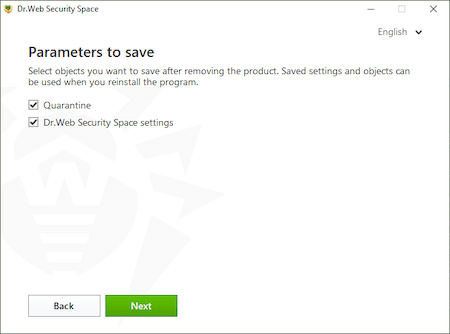
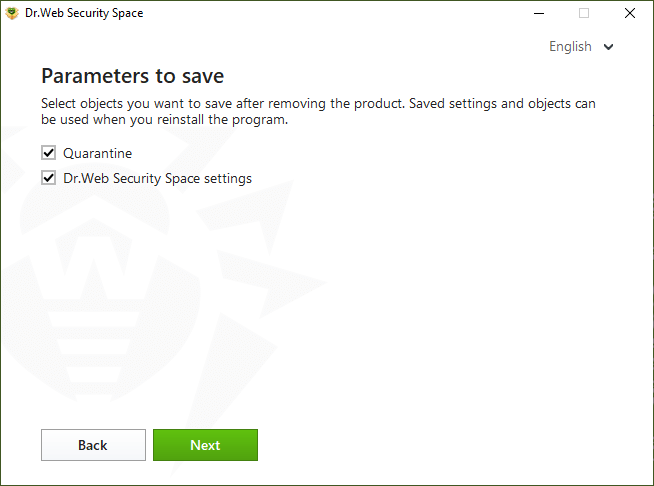
To transfer custom Dr.Web component settings to Dr.Web Security Space, do not clear the box "Dr.Web Anti-virus for Windows settings" in the "Parameters to save" window.
Click on "Next".
Enter the CAPTCHA code and choose to uninstall the application.
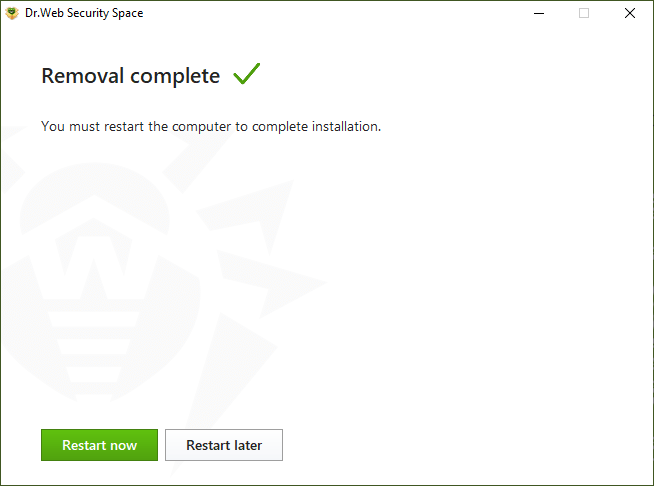
Wait for the Dr.Web Anti-virus uninstall process to complete and make sure that you restart the computer.

Install Dr.Web Security Space. To do this, open the distribution file.
Confirm the system prompt to elevate privileges to administrator ones.

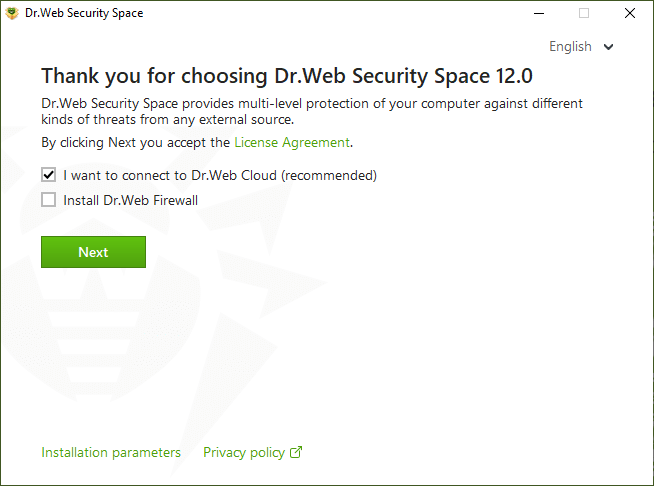
If you want to change the list of components to be installed, for example, to add the Firewall, which is not installed by default, click on "Installation parameters".
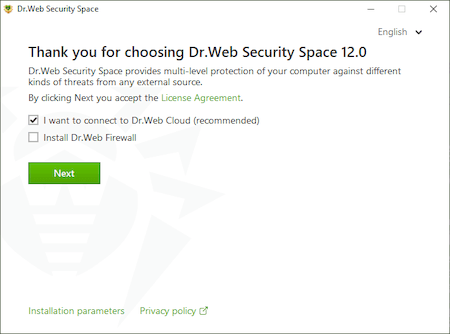
Click on "Next".
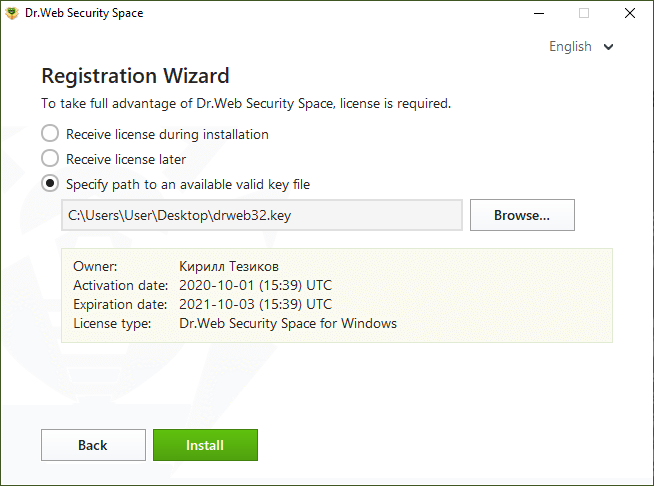
The license file will be found automatically if it is located in the same folder with the distribution file.
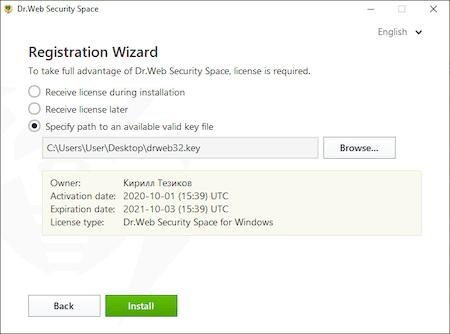
Otherwise, click on "Browse" and specify the file's location.
Click on "Install" and wait for Dr.Web to finish installing to Dr.Web Security Space.
Once installation is complete, restart the computer.
- Windows 10

I have purchased Dr.Web Anti-virus license.Which of your products shall I install?
When purchasing our anti-virus, you obtain a certificate indicating which product the license you have bought is applied to. So, you need to install the product indicated.
I want to reinstall an operating system. My Dr.Web license has not expired yet. How can I recover my Dr.Web license on the new OS?
There are two ways to do it:
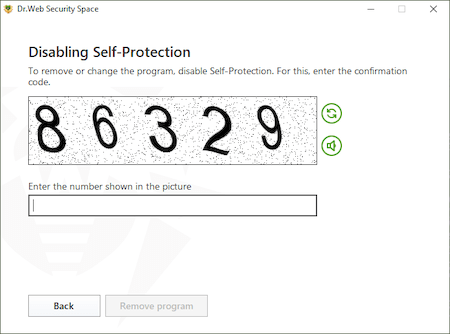
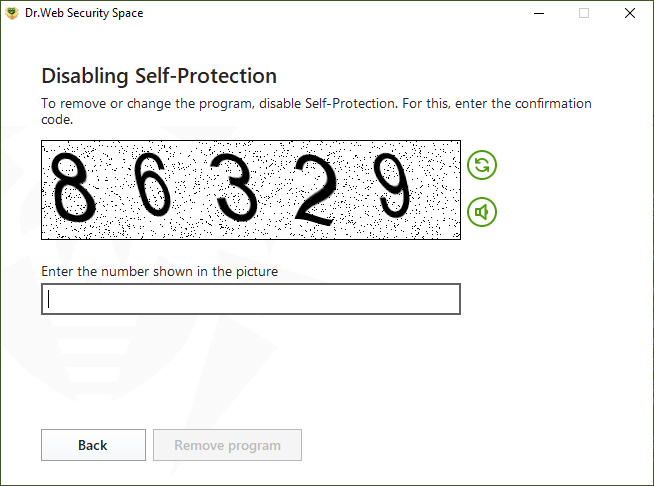
- Disable anti-virus self-protection (right-click on the Dr.Web icon in the notifications area, select Disable self-protection, enter digits from the CAPTCHA and press Disable self-protection), then copy the drweb32.key key file from C:\Program Files\DrWeb (or the anti-virus installation folder) to a removable media. After that, locate the drweb32.key file path during the anti-virus installation the new OS.
- Download the latest Dr.Web version from our website and launch the installation. During the installation, enter your serial number; the key will be downloaded and installed automatically.
My notebook CD-DVD drive is absent/broken. How can I install box version of anti-virus I have purchased?
In this case, you need to download the latest anti-virus distribution file from our website and install it.
What is the difference between default and custom installations?
In default installation, all the anti-virus package components are automatically installed into C:\Program Files\DrWeb\ folder.
In custom installation, you can specify the list of components to be installed (e.g. you may choose not to install a firewall if you don’t need it), select installation folder and configure update server.
When installing anti-virus, I see the following message: “Instmsi30.exe not found”. What am I to do?
To have this error fixed, you need to download and install an update for Windows, and then restart anti-virus installation.
Why can’t I keep another anti-virus on my PC while installing Dr.Web?
It is not allowed to install several anti-virus programs on one PC at a time — they will conflict with each other that may considerably slow down you PC or make it completely non-operational. If you have an anti-virus software already installed on your PC, but intend to install a new product from another vendor, then you need to remove the anti-virus program you have, prior to the installation.
If you wish to install another anti-virus program, you do it at your own risk, and become responsible for all the consequences because the consequences of such installation might be unpredictable including inability of your OS to boot as a result of two or more anti-viruses installed on your PC.
I installed the Dr.Web anti-virus. During the installation process, it was supposed to disable the built-in Windows Defender anti-virus. However, it remains active. Why?
After you install any vendor’s anti-virus, Windows Defender is not disabled; it switches to the passive mode. This option is regulated by Windows; no anti-virus installed in your system (including Dr.Web) can affect Windows Defender's operation. This is one of Microsoft's requirements.
Instructions on how to disable Windows Defender can be found here. If you face problems while disabling Windows Defender manually, please contact our technical support service.
Nothing found