Lists of frequently asked questions
Firewall
How can I avoid downloading a huge amount of data to my Android device via the mobile Internet?
To avoid downloading a huge amount of data via the mobile Internet, temporarily disable it for an application. To do this:
- run Dr.Web;
- open the Firewall component;
- click on the “Applications” tab;
- select the application you need;
- in the “Access to data transfer” section, click on "Mobile Internet" so that it becomes inactive.
When you need to download a major update, for example, via free or home Wi-Fi, you can use this same method to allow the application to use mobile traffic to connect to the Internet.
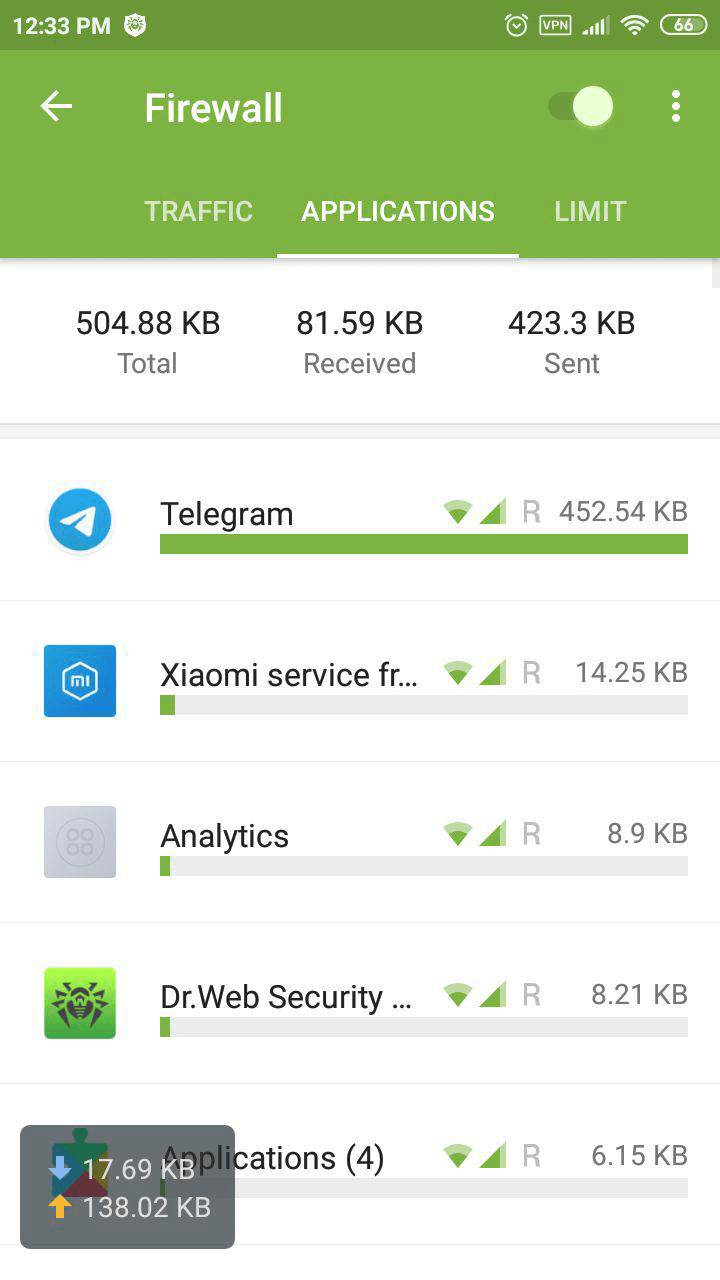
How can I view the applications whose network access parameters were specified in the Firewall?
To view applications whose network access parameters were specified in the Firewall:
- run Dr.Web;
- open the Firewall component;
- click on the “Applications” tab;
- take note of the applications marked with the red gear icon.
If present, this icon indicates that the application settings in the Firewall were changed or that an active rule was set for it.

How can I get the floating window to be displayed in Dr.Web for Android?
The floating window containing traffic-usage information is disabled by default because it takes up screen space, which may not always be convenient when working with a mobile device. When no acute need to control traffic exists, the window can be disabled, but when the amount of traffic and where it is coming from is important to know, it is better to have this data on view.
To enable the display of the floating window:
- run Dr.Web;
- open the Firewall component;
- click on the “Limit” tab;
- select "Current traffic information";
- place the floating window on the screen so that it does not bother you while you are working with your mobile device.

Immediately after this option is selected, the floating traffic-information window will appear; in the future, it will appear on top of other windows.
How can I obtain full information on application network activity while the Dr.Web Firewall is in operation?
For user convenience, network traffic-usage information is displayed in two ways.
To obtain full information on application network activity while the Firewall is in operation:
- run Dr.Web;
- open the Firewall component;
- click on the "Applications" tab.
To view data pertaining to an application you are interested in, select the application from the list—the settings window, containing complete information, will open.
The user can also control this information via the floating window—we've described how to enable it here.
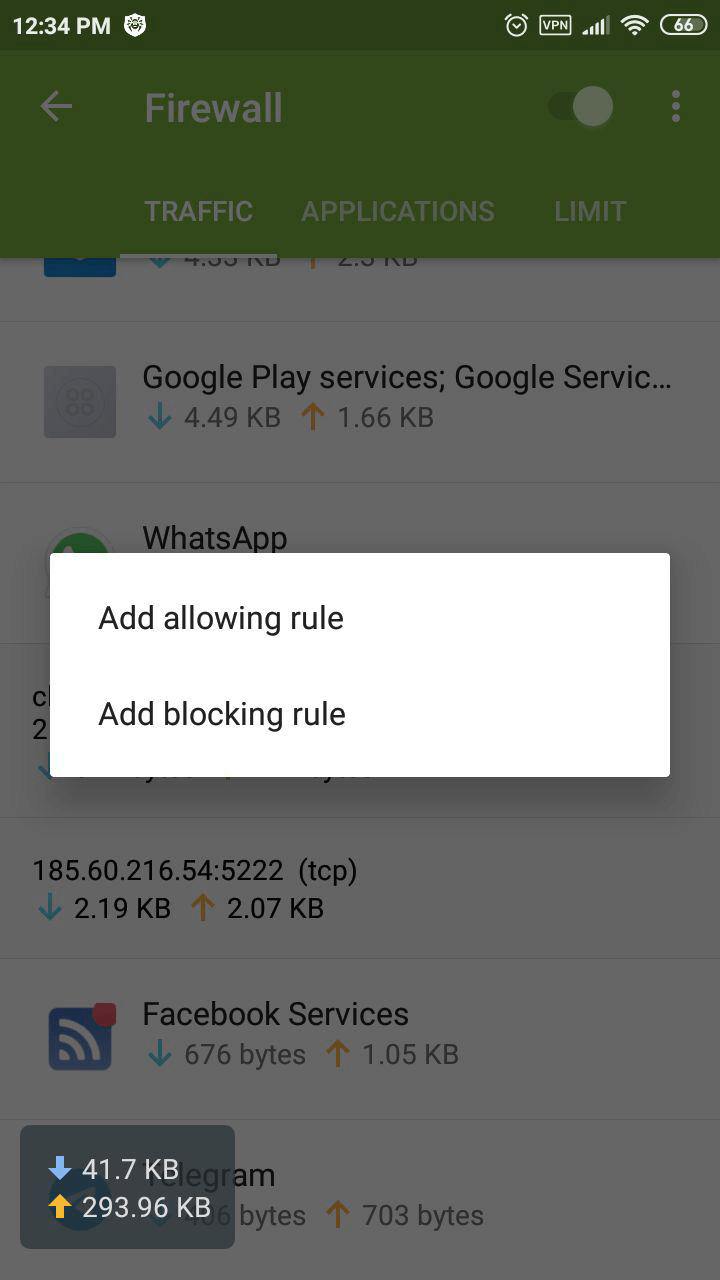
How can I use Dr.Web Firewall to prevent my Android device from accessing a specific website?
If you need to prevent an application from accessing a website, you can do this on the Dr.Web Firewall’s "Traffic" tab:
- run Dr.Web;
- open the Firewall component;
- click on the "Traffic" tab;
- select the application you want to prevent from accessing the website;
- from the drop-down list containing connections used by applications, select the connection that needs to be blocked;
- you will see a pop-up menu that lets you add an “allow” or “block” rule. Select "Add blocking rule".
The firewall will now automatically block access to this resource.
If you want to restore access to a previously blocked resource, you can do this by removing the corresponding blocking rule.
You can also explicitly specify an address that you don’t want any programs connecting to. To do this:
- run Dr.Web;
- open the Firewall component;
- click on the "Applications" tab;
- select the program you want to keep from accessing the website;
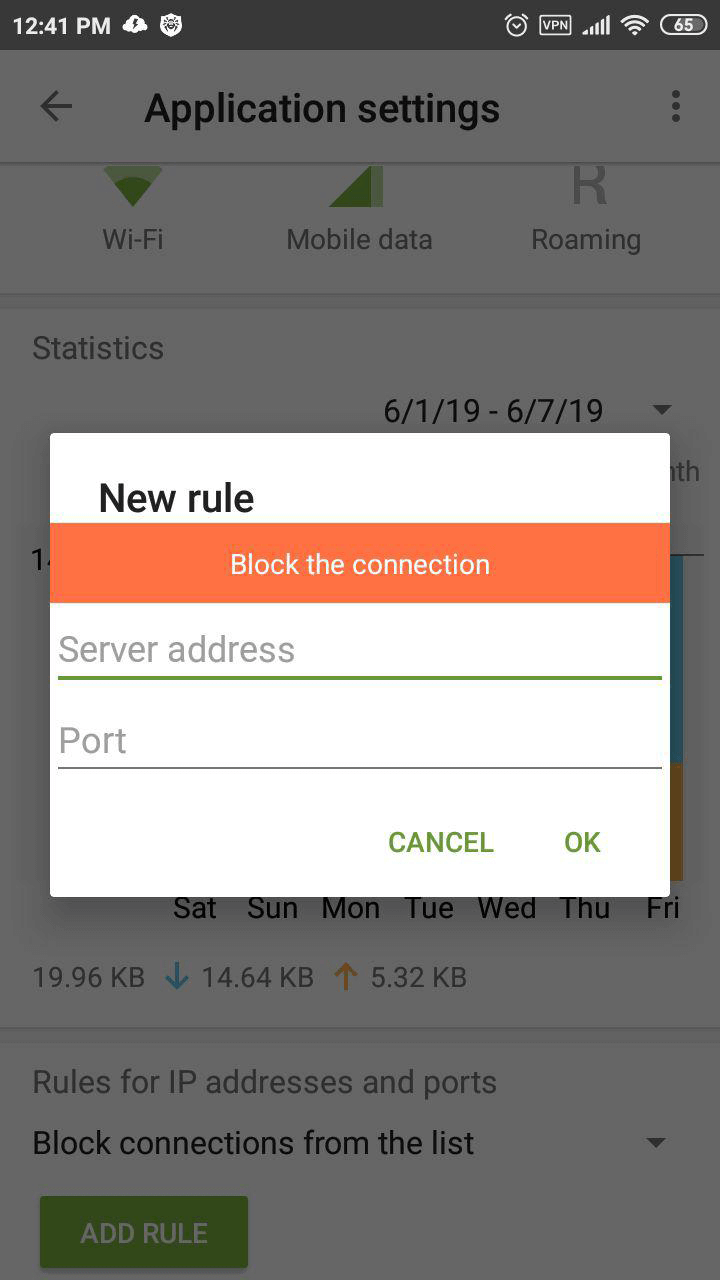
- in the newly appeared window, in the "Rules for IP addresses and ports" section, select "Block connections from list";
- click on "Add rule", and in the "New rule" window, specify the server address and the connection port you need to block access to;
- click OK to finish creating the rule.
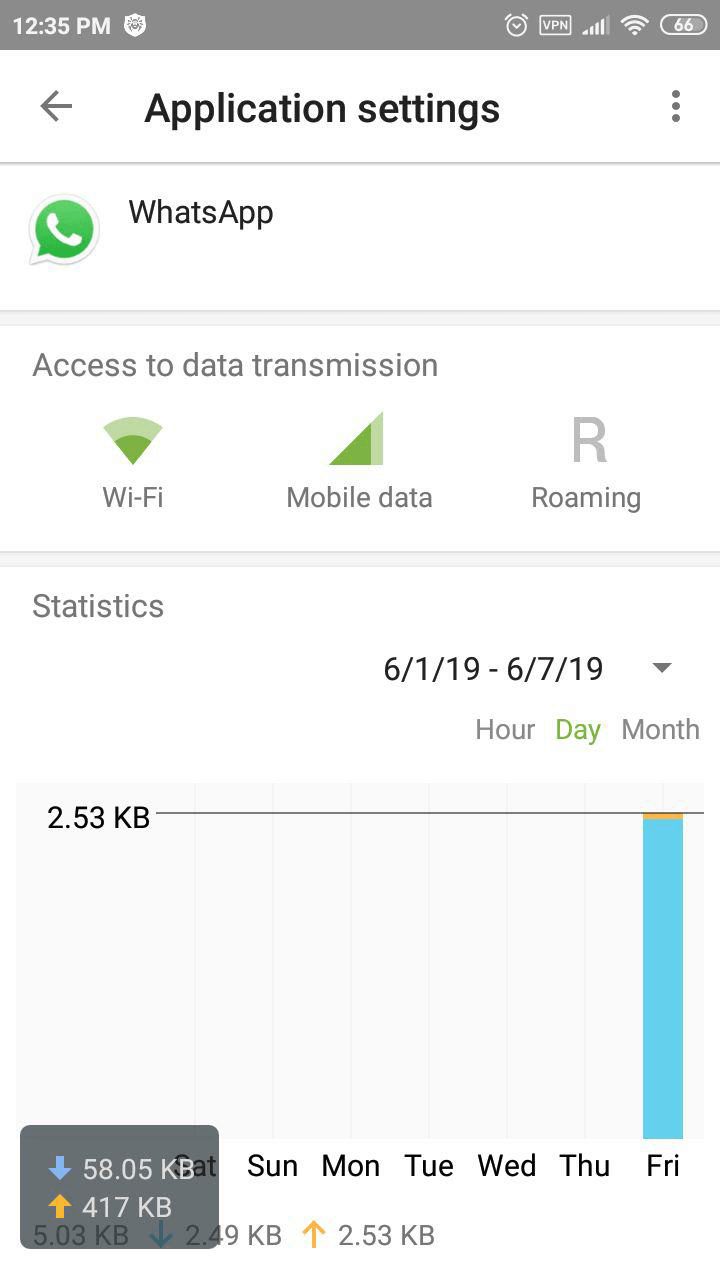
How can I use Dr.Web to limit the amount of traffic consumed on my Android device?
The firewall can restrict the use of mobile traffic and, if necessary, block an application's access to the Internet via a selected connection type: Wi-Fi, mobile Internet, and in roaming.
To configure the connection types that applications can use to connect to the Internet:
- run Dr.Web;
- open the Firewall component;
- click on the "Applications" tab;
- select the application you need;
- in the "Access to data transmission" section, specify the connection types that the application can use to connect to the Internet.
To limit the use of mobile traffic:
- run Dr.Web;
- open the Firewall component;
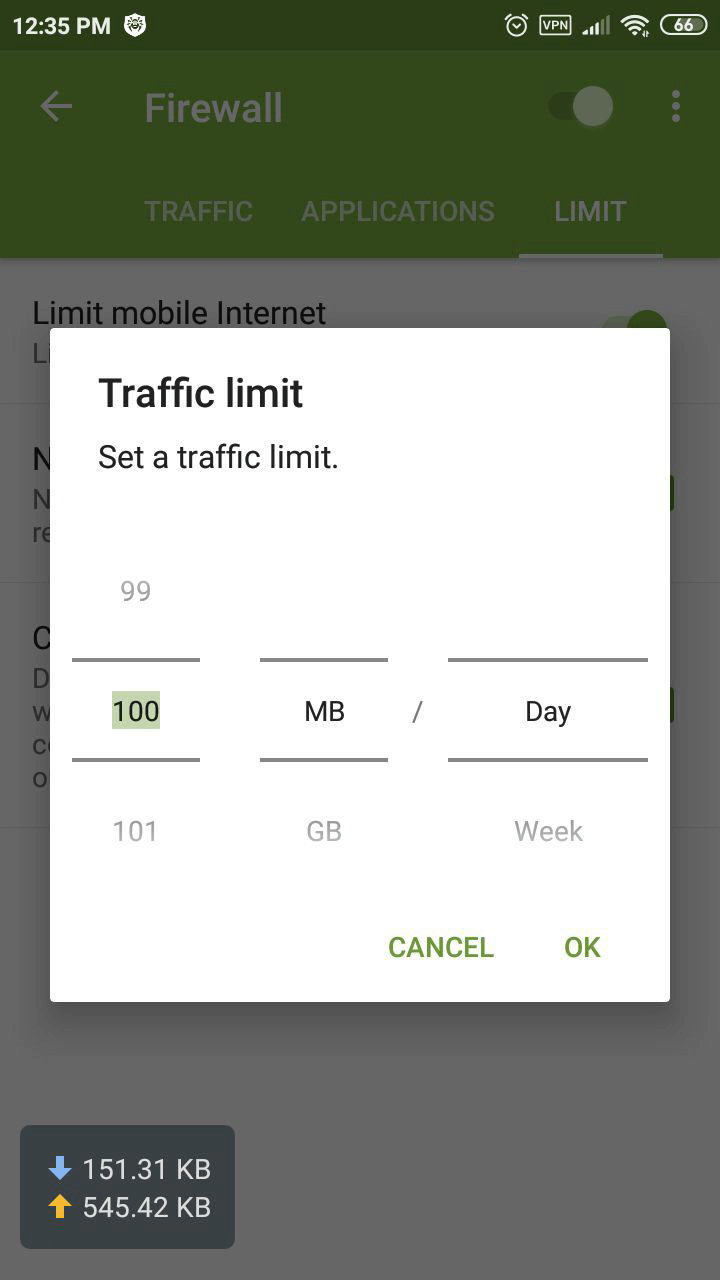
- click on the "Limit" tab;
- select "Limit mobile Internet";
- in the newly appeared window, indicate how much mobile traffic (in megabytes or gigabytes) you can use for a specific period (day, week, or month), and click “OK”.
- you will see a window where you can specify the amount of traffic you’ve already used prior to the current moment—if you’ve already used some traffic from the current period (for example, you installed Dr.Web in the middle of the month). Specify the amount that you have used, and click “OK”.
With this option, you’ll find it very convenient to receive notifications informing you that you are reaching your limit. To enable these notifications, select the “Notifications” checkbox in the “Limit” tab.
I’m on a limited plan; how can I limit traffic consumption?
Since limited Internet plans are usually offered for a specific amount over a specific period (for example, 100 MB per 24 hours or 5 GB per month), the traffic limitation option can be configured to prevent users from suddenly and significantly exceeding their usage limits.
To configure a limit for the mobile traffic you use
- run Dr.Web;
- open the Firewall component;
- click on the "Limit" tab;
- select "Limit mobile Internet";
- in the newly appeared window, indicate how much mobile traffic (in megabytes or gigabytes) you can use for a specific period (day, week or month), and click “OK”.
- you will see a window where you can specify the amount of traffic you’ve already used prior to the current moment—if you’ve already used some traffic from the current period (for example, Dr.Web was installed in the middle of the month). Specify the amount that you have used, and click “OK”.
With this option, you’ll find it very convenient to receive notifications informing you that you are reaching your limit. To enable these notifications, select the “Notifications” checkbox in the “Limit” tab.
How can I track an application’s current network activity on my Android device?
Two of the tools incorporated into the Firewall can be used to view current network activity.
The first one is the floating window, which, in minimised format, displays the total amount of traffic used and, in expanded format, displays the list of applications currently using an Internet connection.
If the floating window is disabled, do the following to get the latest network activity information:
- run Dr.Web;
- open the Firewall component;
- click on the Firewall's "Traffic" tab.
Here, the user can find information about the applications and services currently using an Internet connection and the amount of traffic they are using.
How can I limit network activity for an application on my Android device?
If, for some reason, you have to completely block an application’s access to the Internet, the best solution will be to prevent the application from being able to transfer data.
To limit any kind of network activity for an application, do the following:
- run Dr.Web;
- open the Firewall;
- click on the "Applications" tab,
- select the program whose Internet access you want to limit;
- in the newly appeared window, in the "Access to data transmission" section, disable the use of Wi-Fi, mobile Internet, and roaming for each application in the list.
How can I create a rule for an application?
To create a rule that restricts or allows an application to engage in any kind of network activity, do the following:
- run Dr.Web;
- open the Firewall component;
- click on the "Applications" tab,
- select the program for which you want to create the rule;
- in the newly appeared window, go to the "Rules for IP addresses and ports";
- create an “allow” or “block” rule, as described below.
To create a blocking rule:
- select "Block connections from the list" from the drop-down list;
- click on "Add rule";
- in the newly appeared window, enter the IP address (in the ххх.ххх.ххх.ххх format) and the number of the port (e.g., 225) to which you need to block access;
- click "OK".
If necessary, you can repeat this operation for all the addresses you want to block access to. All other connections will be enabled by default. This operation mode can conveniently be called "Using the blacklist".
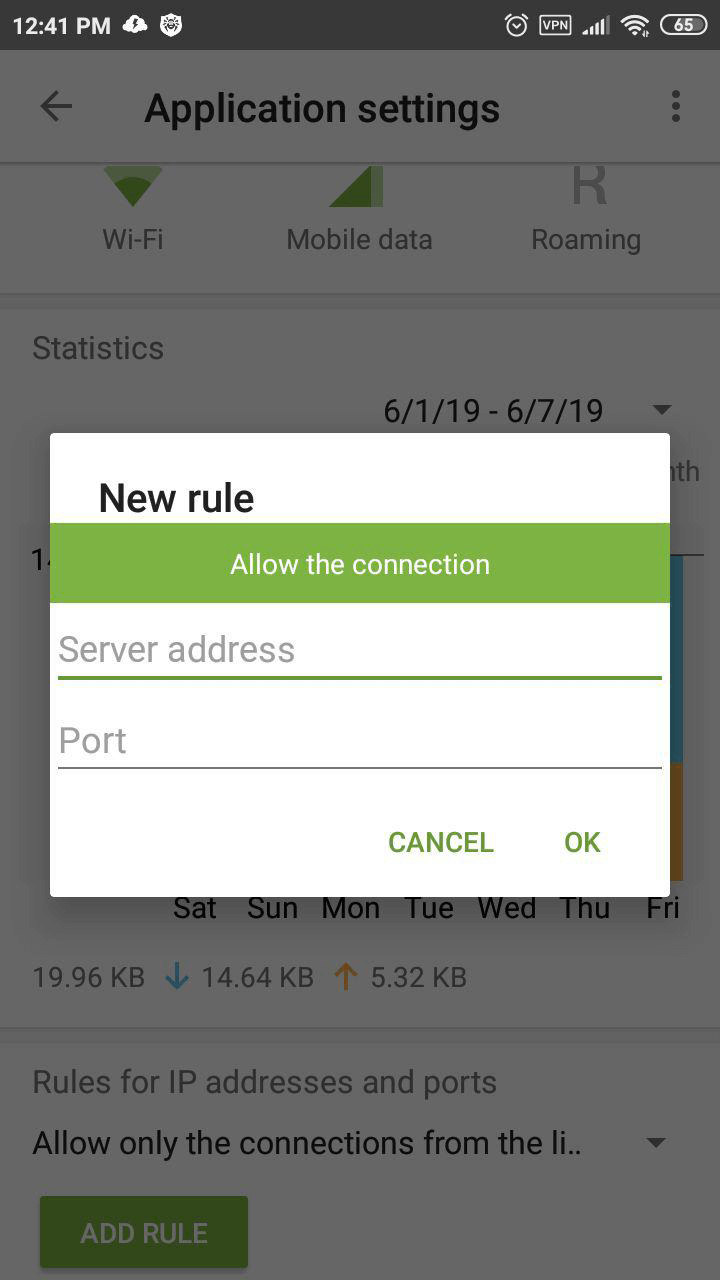

To create an allowing rule:
- select "Allow only the connections from the list " from the drop-down list;
- click on "Add rule";
- in the newly appeared window, enter the IP address (in the ххх.ххх.ххх.ххх format) and the number of the port (e.g., 225) to which you need to allow access;
- click "OK".
If necessary, you can repeat this operation for all the addresses you want to have access to. Please note that all other connections will be disabled by default. This operation mode can conveniently be called "Using the whitelist".
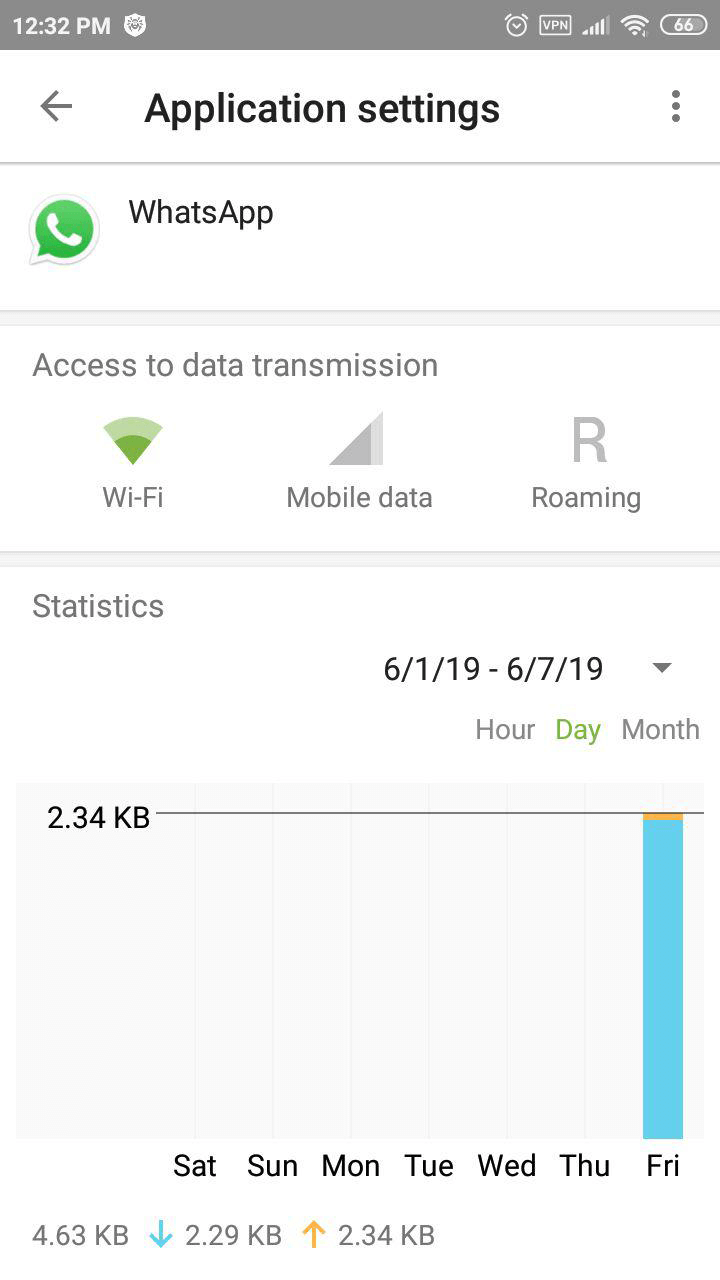
What kind of statistics does the Firewall collect for each application?
For each application that uses Internet access, the Firewall collects statistics related to incoming and outgoing traffic.
To view statistics:
- run Dr.Web;
- open the Firewall component;
- click on the "Applications" tab;
- select an application you are interested in, and in the newly opened window, go to the "Statistics" section.
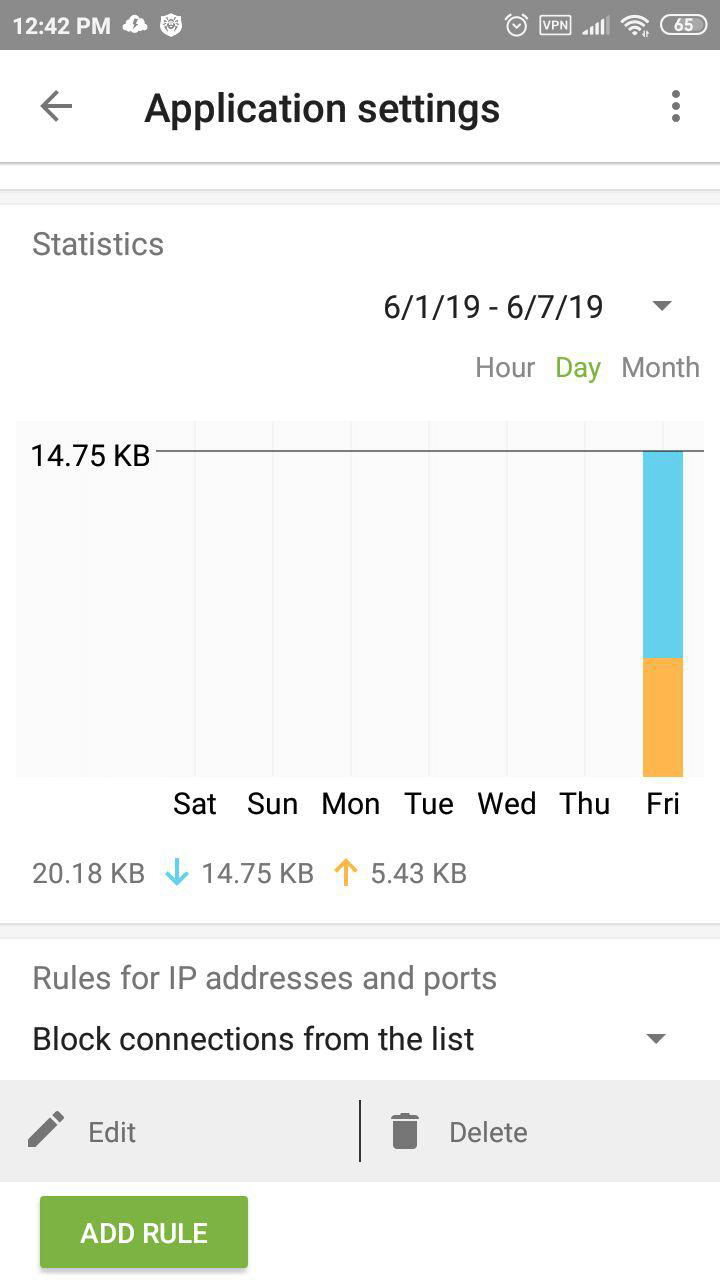
Here, users can find complete traffic information (incoming and outgoing) for the application and a network-usage diagram. Users can see how much data the application received during a defined period.
How can I delete an application rule?
If you need to delete an existing rule:
- run Dr.Web;
- open the Firewall component;
- click on the "Applications" tab;
- select the application for which you want to change the rule;
- in the list of rules visible in the newly appeared window of the "Rules for IP addresses and ports" section, tap the line that you want to delete, and drag it in any direction. The line will switch to the choice "Edit" or "Delete";
- click on "Delete" to remove the rule or on "Edit" to replace it with a new one.
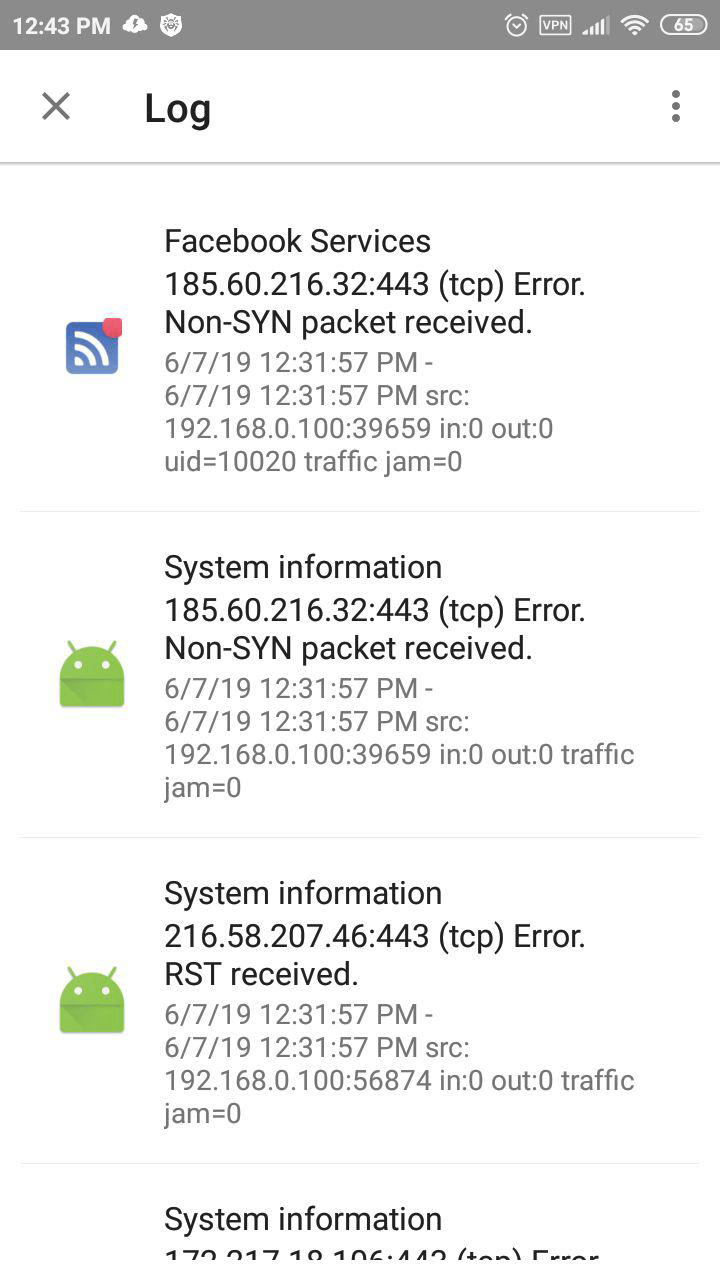
What information is displayed in the Firewall Log?
All Firewall actions are logged and recorded in the Firewall Log. The report contains the following information about applications and actions involving them:
- Application name.
- IP address, port, and protocol via which the data was exchanged.
- Date and time of connection (for TCP) or time taken to receive data packets with the corresponding amount of traffic (for UDP). For example: 21/11/2017 22:19:39 — 21/11/2017 22:19:42.
- Local address and local port. For example: src: 192.168.0.102:55512.
- Incoming and outgoing traffic (bytes) or the number of blocked packets. For example: in:124 out:79 or blocked packets:1.
- The identifier of the application on the device associated with this traffic (User ID). For example: uid=10011.
- Number of network congestion incidents (for TCP only). For example: traffic jam=0. Traffic congestion is a special situation when a client program fails to offload a TCP buffer, and that can be the cause of data transfer slowdowns over the network.
To open the Firewall Log, run Dr.Web, open the firewall, and then click on the icon in the form of the vertical ellipsis. Select "Log".

Note that data related to application network activity is stored in a separate Application log that is created separately for each application.
After this, the Firewall starts operating. By default, all network activity is allowed except the use of the Internet in roaming. To manage traffic at your own discretion, you will need to configure the Firewall.
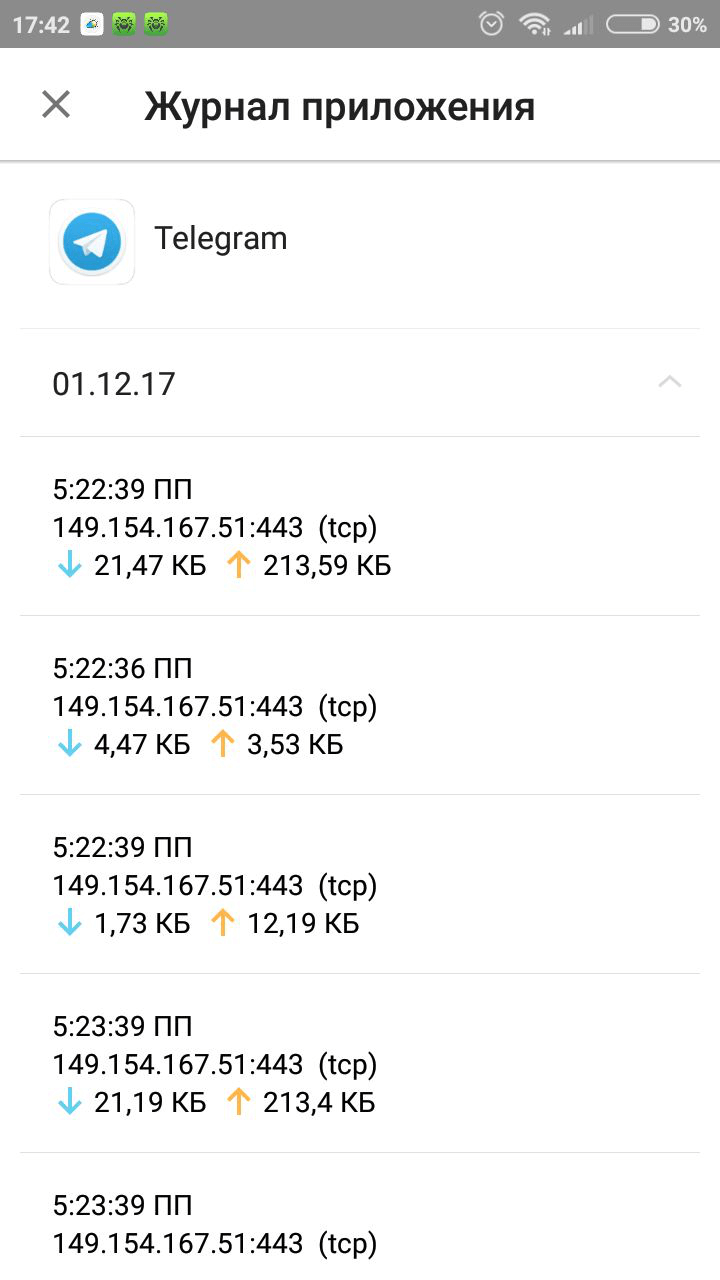
What does the Application Log contain?
Since monitoring and recording all network application activity is one of the main tasks of the Firewall, the Application Log stores all the information about application-specific network activity:
- Time an event occurred
- Resource name
- Resource IP address
- Protocol via which the connection was established
- Connection status
- Amount of incoming traffic
- Amount of outgoing traffic
To access the Application log, do the following:
- run Dr.Web;
- open the Firewall;
- click on the "Applications" tab;
- select the application you need, and in the newly appeared window, click on the icon that looks like a vertical ellipsis. Select "Application Log".
Nothing found