Lists of frequently asked questions
Dr.Web for macOS
Dr.Web has become unstable (it is freezing/slowing down)
This can be caused by the increased activity of system processes requiring large amounts of RAM. We recommend that you close any applications that you are not using to free some memory. You can view information about running processes and manage them using the standard macOS System Watcher utility.
If the problem persists, try to reinstall the app.
If the problem persists after reinstallation, contact our technical support. To help our specialists assist you quickly, please provide as much information about the problem as possible.
How can I add a site to SpIDer Gate for macOS’s exclusions list?
To allow access to a specific site:
- In the main window click on
 .
. - In the Settings window, select the Exclusions section.
- Go to the Websites tab.
- If the settings are unavailable, disable the protection. To do this, click on
 at the bottom of the window and enter your username and password;
 - Click on
 at the bottom of the table and enter the site address.
- To remove an object from the list of exclusions, select it in the list and click on
 or drag it outside the application window.
 - To clear the list of exceptions, select all items in the list (COMMAND-A) and click on .
For more information about the settings of the SpIDer Gate component, refer to the Documentation.
How can I change the application language?
Users of macOS 10.15 and later can change the application language.
To change the language:
- Go to the Apple menu
 .
. - Click on System settings.
- Click on Language & Region.
- Click on Applications.
- Select Dr.Web for macOS and select the language of the application.
How can I extend the validity of a trial license
You cannot renew a 30-day trial license. You will need to purchase a commercial license.
How can I get a trial license?
On the page zhttps://download.drweb.com/security_space, click on Free download.
Start the Dr.Web for macOS installation process. Click on the Activate a 30-day trial period link at the license-activation stage.
How do I install Dr.Web for macOS?
Download the installation file using the Download Wizard or click on the "Free Download" link on the trial request page.
- Click on the installation file.
- Read the License Agreement and accept its terms. The installation will begin.
- Move Dr.Web for macOS to the Applications folder.
- Go to the Applications folder and launch Dr.Web for macOS.
- Enter the administrator password, and then click on "Install Helper".
How do I remove Dr.Web for macOS?
- Find Dr.Web in the Finder. It is usually located in the Applications folder, which can be found on the sidebar of any Finder window. To find the application, you can also use Spotlight (the service icon looks like this:
 ). Then double-click on this application in the Spotlight window while holding down the Command button (⌘).
 - Drag the application to the Trash or select it and choose File > Move to Trash.
- When prompted for a username and password, enter the administrator login and password on the Mac.
- To remove the application, choose Finder > Move to Trash.
How do I update Dr.Web for macOS manually?
To start the manual updating process, in the main Dr.Web window, select Update is required/No update is required:

If you encounter problems updating your application, contact our technical support. To help our specialists assist you quickly, please provide as much information about the problem as possible.
How is Dr.Web for macOS updated?
Automatically, manually on demand, or according to a specified update frequency. By default, Dr.Web updates the virus databases every 30 minutes. For more information about the Module Updating settings, refer to the product Documentation.
How is another manufacturer’s anti-virus removed in macOS?
To remove that application in macOS:
- Find the application you want to remove in the Finder. It is usually located in the Applications folder. To find the application, you can also use Spotlight (the service icon looks like this: ). Then double-click on this application in the Spotlight window while holding down the Command button (⌘).
- Drag the application to the Trash or select it and choose File > Move to Trash.
- When prompted for a username and password, enter the administrator login and password on the Mac.
- To remove the application, choose Finder > Move to Trash.
If removal using standard OS tools fails, contact that anti-virus’s technical support. Doctor Web's technical support service does not provide assistance with the removal of third-party software.
License
The trial period has not expired, but the license has become invalid
- The trial license is linked to the operating system checksum. You may have updated your operating system or other software, or you may have replaced your computer components, and the checksum changed.
- The trial license is linked to the device's MAC address. You may have changed the MAC address and the license became invalid.
Contact Doctor Web's technical support or activate a new trial version using a different email address.
Unable to activate the license
- Make sure your Mac is connected to the Internet.
- If you use a proxy server, try to disable it and launch the update again. To start the update manually, select Update is required in the main Dr.Web window
 .
. - If the router is operating in “On-demand connection” mode, make sure that the connection is continuously active (maximum idle time is 0 minutes).
If you experience problems using Dr.Web that are not covered above, please contact Doctor Web's technical support. To help our specialists assist you quickly, please provide as much information about the problem as possible.
Scanning problems
File system scanning is not working (the Scanner and/or SpIDer Guard failed to launch)
Perhaps, the license has expired. To find out the license's validity period and purchase a new one, go to the License section of the main Dr.Web window .
The virus databases are taking a significantly longer time to load or the scanning process is slow
- Dr.Web downloads virus databases at the start of the scanning process and before each attempt to cure an object. So, this may take some time.
- Unstable operation can also be caused by the increased activity of system processes requiring large amounts of RAM. We recommend that you close any applications that you are not using to free some memory. You can view information about running processes and manage them using the standard macOS System Watcher utility.
Some files are skipped during scanning (they are not being scanned)
- Files (or the folders that contain them) may be excluded from scanning.
- Some files can be skipped during scanning because they are corrupted or password-protected, and also when administrator privileges are required to access them. If the list of excluded objects contains archives, try to unpack them before launching the scan.
The scanner is frozen
If the Scanner freezes, close it and launch it again. If the problem persists, try to reinstall the app.
Reading error
This error can occur if Dr.Web for macOS is not provided with full access to the drive.
To grant Dr.Web full access to the drive:
- Go to the Apple menu .
- Click on System settings.
- If the settings are unavailable, disable the protection. To do this, click at the bottom of the window and enter your username and password.
- Go to the Privacy section.
- Click on Disk access.
- Add the Dr.Web modules to the allowed list.
- Click on Restart.
Sound notifications are configured but do not work
Check the volume level in the System Settings section and in the speakers.
SpIDer Gate issues
SpIDer Gate is not blocking sites that fall into certain categories
- Make sure the SpIDer Gate tab's check box is selected next to the appropriate site category.
- If the connection to the site was established before SpIDer Gate was launched, disable and enable SpIDer Gate and restart the browser.
- Check whether the site uses a secure connection (in the case of a secure connection, a padlock is usually displayed in the browser address bar). If a secure connection is being used, in the Network tab, enable the Scan encrypted traffic option and restart the browser.
- SpIDer Gate is not blocking sites that use an FTP/SPDY or HTTP/2.0 connection.
A certificate error message appears when the site is opened
- An error may occur because some browsers and email clients do not access the system certificate store when receiving and transmitting encrypted traffic. In this case, install a Doctor Web certificate, which can be obtained by clicking on the Export button in the Network tab.
- If the browser or email client was started immediately after installation, it may not have received a system security certificate. In this case, you need to restart the browser or email client.
- The original server certificate may be unreliable. To verify this, disable SpIDer Gate and restart your browser or email client. If the error persists, it means that the certificate is unreliable. In this case, visiting this site is not recommended.
SpIDer Gate has blocked a needed site
The site may belong to a category of sites to which access is blocked. To access the site, add it to the exclusions list.
SpIDer Gate, SpIDer Guard, and Firewall cannot be enabled
MacOS 10.13 and later blocks the downloading of system extensions (kernel modules). At the same time, the message about a system extension being blocked appears on the screen. For SpIDer Gate and SpIDer Guard to operate correctly, allow the download of system software from Doctor Web in the Protection and Security panel of the System Settings section.
- Go to the Apple menu .
- Click on System settings.
- Open the Protection and security section.
- If the settings are unavailable, disable the protection. To do this, click on at the bottom of the window and enter your username and password.
- Click on the Allow button next to the message from Doctor Web about the system software being blocked.
The VPN tunnel doesn't work in the AdGuard app
If you’ve experienced problems with the AdGuard VPN tunnel, follow these steps:
- Open AdGuard.
- Click on Network.
- Make sure that the Filter application traffic automatically check box is selected.
- Click on Applications.
- Add Dr.Web for macOS to the list of filtered applications.

If you cannot find Dr.Web for macOS when adding it to the list of filtered applications, restart your Mac and try again.
The firewall has blocked Internet access
Create an allow rule in the Firewall settings for the application that cannot access the Internet.
The license was activated, but Dr.Web isn’t working
- Perhaps, the license has expired. To find out the license's validity period and purchase a new one, go to the License section of the main Dr.Web window .
- You may have updated your operating system and your installed Dr.Web version does not support the new macOS version. Remove the current version of Dr.Web and install the program again.
The settings are blocked
The settings of some components are protected. If the settings are unavailable, disable the protection. To do this, click on at the bottom of the window and enter your username and password.
Updating
Updates are not downloading
- Make sure your Mac is connected to the Internet.
- If you use a proxy server, try to disable it and launch the update again. To start the update manually, select Update is required in the main Dr.Web window
- If the router is operating in “On-demand connection” mode, make sure that the connection is continuously active (maximum idle time is 0 minutes).
- Perhaps, the license has expired. To find out the license's validity period and purchase a new one, go to the License section of the main Dr.Web window .
What does Dr.Web anti-virus for macOS protect against?
Dr.Web for macOS reliably protects Macs from all types of threats—viruses, rootkits, trojans, spyware and adware, hacker utilities and various malicious objects—using the latest technologies for detecting and neutralising viruses.
Dr.Web components are constantly updated, and the virus databases and databases of web resources categories are regularly expanded to include new threat signatures. Updates provide an up-to-date level of device protection. Heuristic analysis methods are used to neutralise unknown threats.
The main features of Dr.Web anti-virus:
- regular scanning of all files on Macs;
- on-demand scans;
- scanning of data that is transmitted over the unprotected HTTP protocol;
- control over connections that applications make to the network and the blocking of suspicious connections;
- protection against unauthorised access.
What versions of MacOS are supported by Dr.Web for macOS?
The current list of supported versions can be found in the Documentation for Dr.Web Home Security Suite / Dr.Web Security Space (for macOS).
How does malware penetrate macОS?
Malware programs for macOS exist, but compared with Windows, their number is relatively small. For more information about macOS threats, follow this link.
Are there viruses for macOS?
Yes. The first virus for an Apple computer was created in 1982. The first virus for macOS (Mac.Leap) appeared in 2006. In early 2009, the Trojan Mac.Iservice infected machines that comprised the iBot zombie network. In 2012, half a million of computers were connected to the botnet created by the Trojan BackDoor.Flashback. It was Doctor Web who first discovered this zombie network.
I see the message "Permission to check the entire file system is required. How do I get permission?
Once the anti-virus is installed, a notification will appear, saying "Your permission is required to scan the file system":
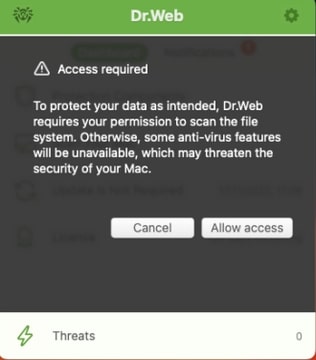
The notification will appear after each device restart, and hourly thereafter, if ignored.
To grant permission for the scan, you should:
- Click on the Allow access button.
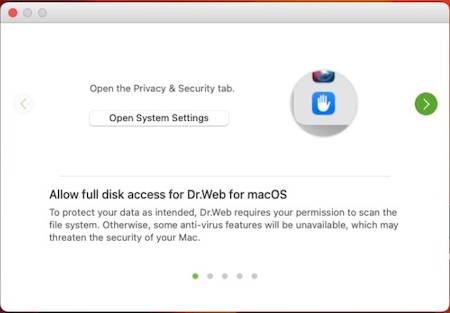
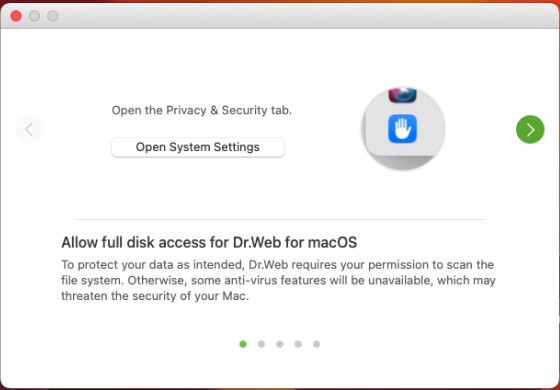
- In the Drive Access Permission Wizard, select “Open System Settings”:
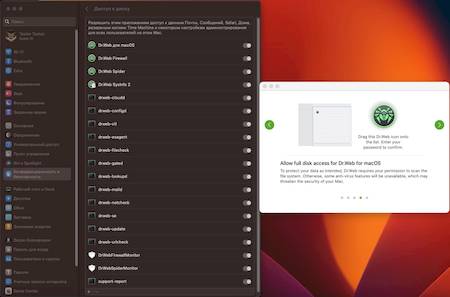
- Drag the Dr.Web icon from the Drive Access Permission Wizard to the settings window:

In case the notifications were ignored, the Allow access button is added to the "General" settings section:
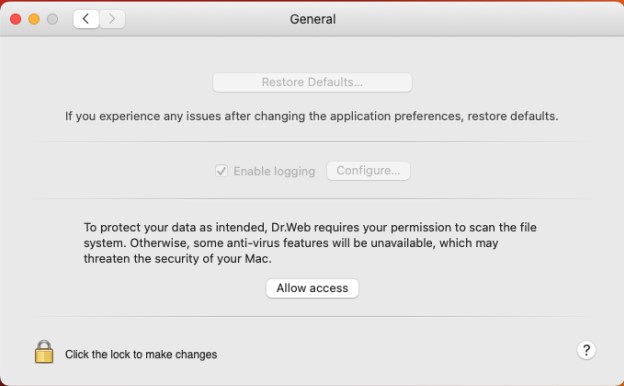
After clicking on this button, proceed as described above.
A special case when there is a drive access permission issue — the SpIDer Guard component is not activated on macOS Ventura. In this case:
- Remove the installed version of Dr.Web anti-virus.
- Install the latest version (for example, from the official website: https://download.drweb.com/?lng=en).
- Grant the necessary permissions according to the above instructions.
How does malware penetrate macOS?
An attacker does not necessary need to hack into your computer to install malicious software. In most cases, unwanted programs get onto Macs due to careless of users when they visit legitimate sites, such as news portals. They can be compromised, so that infection gets onto computers of visitors regardless of their OS—in most cases, the target platform is detected and selected automatically.
Two simple conditions must be met for a system to get infected with BackDoor.Flashback.39: Java Virtual Machine must be installed in the system, and a user must load a compromised webpage in the browser.
Trojan.SMSSend family programs can be easily downloaded from various websites under the guise of a useful application. Today, adware for macOS is also rather common. For instance, Trojan.Yontoo.1 gets onto a Mac, if the user agrees to download and install a browser plug-in from certain sites, or downloads it under the guise of a media player, a program to improve video playback quality, a "download accelerator", etc.
There are also e-mail and removable data storage devices—the traditional media that spread malware with no regard to the operating system.
What is iBot?
It is a botnet of infected Macs which took shape with emergence of the Trojan Mac.Iservice in January 2009. To date, it has several thousand computers and has managed to manifest itself in a number of DDoS-attacks.
How can I test the product before I buy it?
For evaluation purposes, you can use the trial version. Download the distribution from Doctor Web's site at download.drweb.com/demoreq. The period of a demo license is 30 days.
You can also use the free scanner Dr.Web Light for macOS. The scanner incorporates state-of-the-art technologies to detect and eliminate viruses. You can use it to check your system, whenever you need to. However, Dr.Web for macOS is a more feature-packed product as compared with Dr.Web Light for macOS. It includes Dr.Web SpIDer Guard file monitor to scan files in real time.
What versions of OS are supported by Dr.Web for macOS?
According to the documentation, OS X 10.7 and above are supported.
What viruses and malware does Dr.Web for macOS protect against?
Dr.Web for for macOS protects against viruses whose definitions are present in the Dr.Web virus database. They can be written to infect macOS as well as other platforms.
The non-signature detection technology Origins Tracing and heuristic analyser help neutralise threats yet unknown.
How can I get a demo key?
Download the program's distribution at download.drweb.com/mac. Install Dr.Web for macOS. In the License Manager, select Demo license.
How can I increase validity of a demo key file?
There is no way to prolong a demo key—you need to purchase a commercial license.
How do I install Dr.Web for macOS?
Administrator privileges are required to install Dr.Web. After mounting the drive you will see the following window:

Select Dr.Web anti-virus for macOS. Read the Installation Wizard's welcome and click Continue. To continue the installation, read the License Agreement and accept its terms. After that select the disk onto which Dr.Web for macOS will be installed. Enter the administrator password. Then Dr.Web for macOS will be installed automatically. When finished, click Finish. You don’t need to restart your system after installation.
How do I register my serial number of Dr.Web for macOS?
If you purchased a license for Dr.Web for OS X and the program is already installed on your Mac
- In the main menu of Dr.Web for macOS, select License Manager. In the subsequent window select Get New License. Follow the registration steps and enter the serial number in the appropriate fields of the registration form. Your key file will be downloaded and placed in the required directory automatically.
If you purchased a license for Dr.Web for macOS and the program is not installed on your Mac
- Download the installation package at download.drweb.com/mac. During installation, in the License Manager, select Get New License.
- Enter the serial number in the appropriate fields in the registration form. Your key file will be downloaded and placed in the required directory automatically.
You can also register your serial number at Doctor Web's server at products.drweb.com/register.
How do I update Dr.Web for macOS?
You can choose to update the anti-virus automatically and manually on demand or according to the schedule.
How can I update Dr.Web for macOS manually?
Select Update in the program's main window.
How can I protect settings of Dr.Web for macOS against unauthorised modification?
By default, only anti-virus file monitor settings are protected. To change them, click on the lock icon in the bottom left corner of the SpIDer Guard window, enter the administrator password and make the necessary adjustments.
Can I cure quarantined files?
Yes, you can. Once a subsequent update is downloaded, you can try to cure a quarantined file.
How do I uninstall Dr.Web for macOS?
- Find Dr.Web in the Finder. It is usually located in the Applications folder, which can be found on the sidebar of any Finder window. To find the application, you can also use Spotlight (the service icon looks like this:
 ). Then double-click on this application in the Spotlight window while holding down the Command button (⌘).
 - Drag the application to the Trash or select it and choose File > Move to Trash.
- When prompted for a user name and password, enter the administrator login and password on the Mac.
- To remove the application, choose Finder > Empty Trash.
How to add a site to SpIDer Gate's exclusions list for macOS
Click on the spider icon on the menu bar. In the newly appeared Dr.Web window, click on the gear icon.

The "Settings" menu will open. Click on "Exclusions".

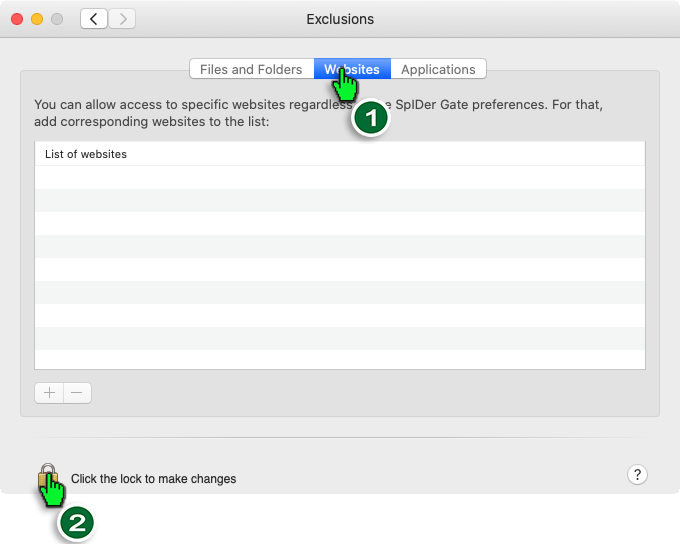
Open the "Websites" tab. Click on the padlock icon to make changes to the Exclusions settings.
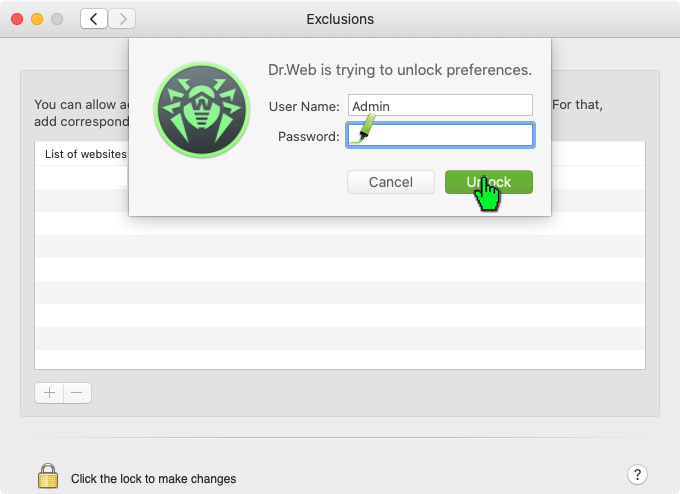
Enter the administrator login and password. Click on "Unlock".
Enter into the list the URLs to which you want to allow access. After entering each URL, you need to click on "Enter".
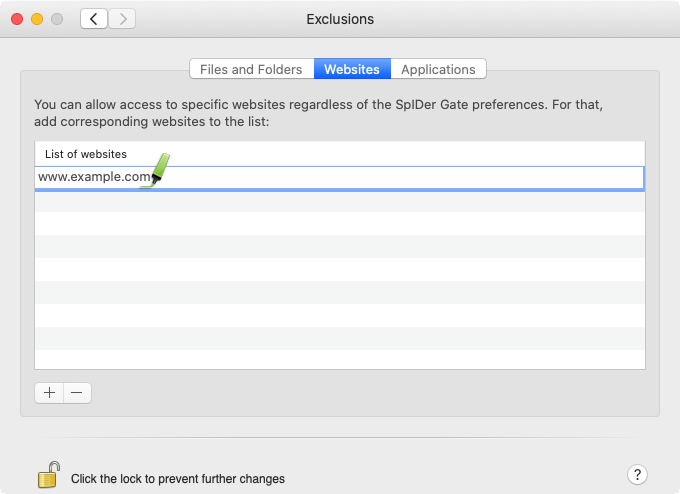
Dr.Web Security Space for Windows supports the use of masks when URLs are specified, but in this case, that capability is absent. Therefore, you should enter site addresses and not segments of their names to the exception list.
How to generate a report on anti-virus technical issues
- Download the utility https://cdn-download.drweb.com/pub/drweb/tools/drweb-sysinfo-macos.zip (the utility is intended for macOS 10.15) and save it to your desktop.
- Unpack the application file and run Dr.Web SysInfo.
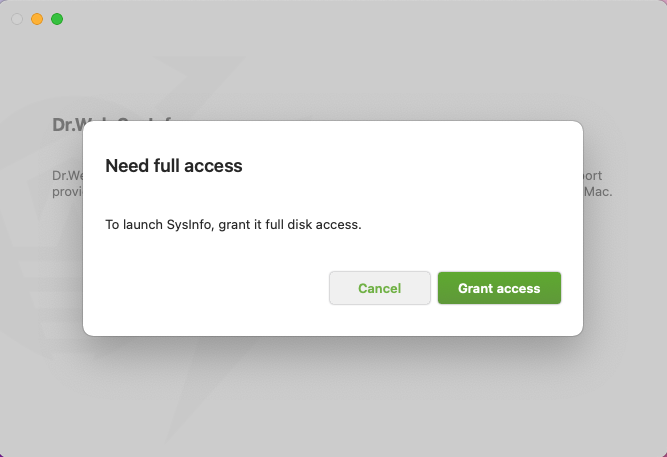
- You will also need to grant the utility full disk-access permissions. When the corresponding alert is displayed, press Grant access. In the Security & Privacy window, click on the padlock icon to make changes to the settings and then tick the box next to Dr.Web SysInfo. In the subsequent prompt select Quit & Restart.
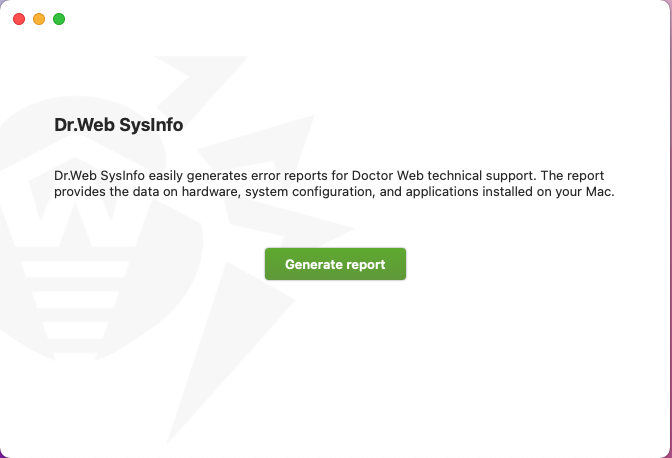
- Switch back to the Dr.Web SysInfo window and click Generate report.
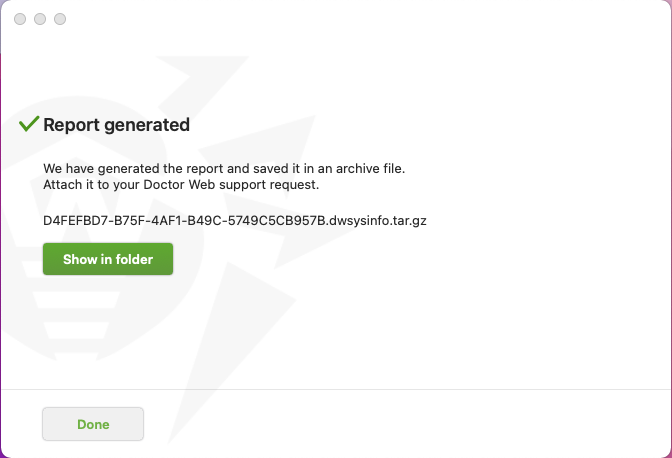
- Once you see the message informing you that an archive was created successfully, click on the Show in folder button. The folder containing the report will open. The report file's name will be generated according to this template: id.dwsysinfo.tar.gz.
- Upload the file to your respective support ticket (Browse → Choose file).
What’s included in the Dr.Web system information utility's report?
Operating system information:
- Detailed system information;
- The complete list of running processes;
- Information about applications with elevated privileges;
- The list of applications having full disk-access permissions;
- All available system logs;
- Daemon and system process start-up logs;
- System.log;
- Updating and software installation logs;
- System boot/restart time;
- System component settings.
Information about the installed Dr.Web anti-virus:
- Dr.Web software component configuration;
- The Dr.Web anti-virus's logs;
- Information about the running SysInfo utility.
Nothing found