Lists of frequently asked questions
Settings
How can I configure Dr.Web so that I can access the protected system remotely?
Dr.Web for Windows 11.5:
- Click on the Dr.Web icon in the notification area (in the lower-right corner of the screen).
- Click on the padlock icon (Administrative mode) to allow the application to launch.
- Click on the gear icon (Settings), and then click on General → Self-protection.
- Toggle off the Block user activity emulation option.

Dr.Web for Windows 12:
- Click on the Dr.Web icon in the notification area (in the lower-right corner of the screen).
- Select Security Center, and click on the padlock icon (Administrative mode) to allow the settings to be changed.
- Click on the gear icon (Settings) in the top-right corner of the installer window, and then click on Self-protection.
- Toggle off the Block user activity emulation option.

You can also toggle off this option during the anti-virus installation process in the Installation parameters section — in the Advanced options tab.

How can I boot in Windows safe mode?
To enter the safe mode when your PC is booting, press F8 at the moment the computer vendor picture disappears, before Windows logo is displayed. If you can see the Windows logo then you failed to press the button in time. In this case, you need to wait for the Windows system login window to appear, shut down and reboot your PC.
If you managed to press F8 key in time, you will see the Windows boot menu on the screen.
Use arrow keys to select a boot mode you need, and press Enter.
How can I check and change the system date?
To check the date, roll the mouse cursor over the clock icon in the notification area. The system date will be displayed in the pop-up hint. To change the date, do the following: right-click on the clock icon in the notifications area and select Date/time settings in the open menu. In the next window, set the current date and press Ok.
How can I create a Windows XP system registry archive copy?
Press Start–>All programs–>Standard–>Service–>Data archving. The archiving window appears. Press Next, check the Archive files and parameters in the next window and press Next. In the next window, select Allow choosing objects to be archived and press Next. Now, open My computer in the left-hand part of the window, check System State box and press Next. Specify archive file save path and name. Verify the data displayed and press Ready. When the operation is completed, you may close the archiver window.
How can I enable the Scheduler?
Locate the C:\WINDOWS\inf\mstask.inf file right-click it and select Install item. During installation, you might need an OS installation disk. Your PC may need to reboot.
How can I export a registry tree?
press Start–>Run and enter the the following command in the open line
reg export "tree" file namewhere the “tree” is the registry tree you need to export (tree should be embraced with quotes);
file name is the file where the result will be saved.
For example, you need to export the
HKEY_LOCAL_MACHINE\SYSTEM\CurrentControlSet\Control tree into the C:\result.reg fileThe command will be as follows
reg export "HKEY_LOCAL_MACHINE\SYSTEM\CurrentControlSet\Control" c:\result.reg
How can I know my Windows version?
Press Start–>Run and enter the winver command in the open line.
How can I reset Internet connection settings?
To reset Internet connection settings, press Start–>Run and enter the following command in the open line:
netsh winsock reset
And press Ok.
Note: to restore your previous settings, export the HKEY_LOCAL_MACHINE\SYSTEM\CurrentControlSet\Services\WinSock2 registry tree prior to reset.
I cannor launch an *.exe application. What am I to do?
If the system recovery is enabled on your PC then roll back the system to a checkpoint when this problem did not exist.
If this measure was useless or the system recovery is disabled then try to use a utility located at plstfix.exe.
The disk will not open after viruses have been cured. What am I to do?
Try to use a utility located at plstfix.exe
What is a ticket?
A ticket is a virtual document keeping technical support calls and dialogs between an engineer an user.
What is md5 and how can I get it?
It is a file checksum required to confirm data integrity and authenticity. To get the checksum, use the Hash program or visit forum.drweb.com/hash. When linking, select the file you need with the Browse button and press Compute. When the analysis is over, you will be provided with all the file information, including md5.
Why cannot I install two anti-viruses on one PC?
It is not allowed to install several anti-virus programs on one PC at a time — they will conflict with each other that may considerably slow down you PC or make it completely non-operational. If you have an anti-virus software already installed on your PC, but intend to install a new product from another vendor, then you need to remove the anti-virus program you have, prior to the installation.
If you wish to install another anti-virus program, you do it at your own risk, and become responsible for all the consequences because the consequences of such installation might be unpredictable including inability of your OS to boot as a result of two or more anti-viruses installed on your PC.
I forgot the password for my anti-virus—how can I recover it?
These instructions are intended for users of Dr.Web Security Suite and current versions of Dr.Web Anti-virus for Windows.
Dr.Web technologies are designed to prevent user data, including passwords, from being obtained by hackers. The password is not stored in plain text, so it cannot be recovered.
In addition, Doctor Web does not collect the personal data of Dr.Web users, and, therefore, passwords cannot be recovered by contacting our technical support service.
You have to reinstall the product you are using so that you can gain access to the anti-virus’s settings. Once you do this, all the settings you previously configured, including your password, will be lost.
- Save the Dr.Web key file (this file has the .key extension and contains information about your license). The file can be found in the directory C:\Program Files\DrWeb. For example, put it on your desktop.
- To reinstall Dr.Web, you will need its distribution. Download it in the Download Wizard. Enter your serial number or your key file—the file with the extension .key that contains information about your license (you can find it in the directory C:\Program Files\DrWeb)—and your registered email address, and then click on the Download button. In the newly appeared window, the download option for Windows and Android is already selected, so you can just click on the Send button. In the next dialogue box, select the download version:
- 11.5 if you are already using Windows XP;
- 12 if you are using Windows Vista and later versions.
Dr.Web does not support versions below Windows XP.
Download the Dr.Web distribution.
Remove the anti-virus.
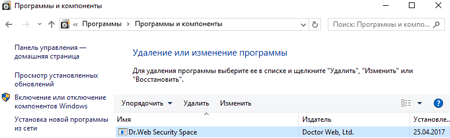
Go to the Control Panel, and select Start → Search → Control Panel. After this, depending on the type of Control Panel you have — Programs and Features or Remove program.
In the list of programs, select Dr.Web Anti-virus or Dr.Web Security Space. Click on Remove, and follow the Removal Wizard's instructions.
In the Parameters to save window, clear the checkbox next to Settings.

After you remove the solution, restart the computer, and reinstall Dr.Web. Your key file will be downloaded automatically.
If the key file is not downloaded automatically during the installation, enter it manually. To do this, in the anti-virus's menu, select Licenses. In the License Manager window, click on the Buy or activate new license button. Then click on the text or specify the key file, and select the previously saved key file — the desktop file that begins with SL and has the .key extension.
If a proxy server is used to access the network—do I somehow need to configure the update procedure for Dr.Web Security Space?
Yes, you need to specify the proxy server you are using in the Dr.Web Security Space settings.
- Click on the Dr.Web icon
 in the notification area (in the lower-right corner of your screen).
 - Select "Dr.Web Security Center" and then the padlock icon
 (Administrative mode) in the lower-left corner of the window; to ensure the settings can be accessed, allow the launch of the application.
 - If you set a password to access the settings — enter it.
- The icon in the lower-left corner of the window will change to
 .
. - Click on the gear icon
 (Settings) in the top-right corner of the window, and click on Network.
 - After clicking, toggle the switch Use proxy server to the On position. If the proxy server settings were not previously set up, the Proxy server parameters 6. window will automatically open. Otherwise, click on Change.
- Specify the connection parameters
Can I change the Dr.Web Security Space settings (such as the proxy server parameters) without having administrator privileges?
No, for security reasons. If no restrictions are placed on accessing the settings, cybercriminals could change the anti-virus’s settings to block its operation.
How do I find the Security Center?
Click on the Dr.Web icon ![]() in the notification area (in the lower-right corner of your screen). If the icon is not displayed in the tray, click on the “up arrow” button
in the notification area (in the lower-right corner of your screen). If the icon is not displayed in the tray, click on the “up arrow” button

and in the newly opened panel, click on the Dr.Web icon ![]() .
.

! The appearance of the “up arrow” may vary depending on the OS version and its settings. For example, it may look like  or
or  .
.
Click on “Security Center”

If the button ![]() is not displayed (it can be hidden by your network administrator), contact your system administrator or use the “Start” button to launch the Security Center.
is not displayed (it can be hidden by your network administrator), contact your system administrator or use the “Start” button to launch the Security Center.
Click on the “Start” button (its appearance may vary depending on your OS version, but it is usually displayed in the lower-left corner of the screen)

Click on "Dr.Web", and in the newly appeared list, click on "Security Center"
The “Security Center” window will open. The list of contents may vary depending on your product version.

The list of available options may vary depending on your product version and the settings configured by your network administrator.
By default, the changing of settings is disabled. To change them, click on the padlock icon (Administrative mode) in the lower-left corner of the window. If you set a password to access the settings — enter it.
The icon in the lower-left corner of the window will change to .
Nothing found