Preguntas más frecuentes sobre los temas
Componentes de la protección y su configuración
Configuración
El antivirus bloquea el acceso a la red, sin antivirus hay acceso
Uno de los problemas posibles (pero no únicos) son la configuración incorrecta del componente el Firewall Dr.Web. Vd. puede cambiarla sin ayuda o restablecer la configuración hasta los valores predeterminados. Para restablecer la configuración:
-
Entre en el Centro de seguridad Para realizarlo:
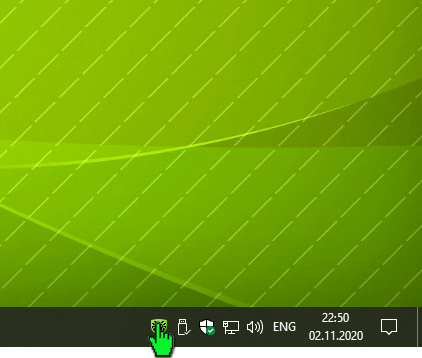
Haga clic sobre el icono Dr.Web
 en el área de notificación (en la parte derecha inferior de la pantalla). Si no hay este icono de la bandeja, haga clic sobre «flecha arriba»
y en el panel que se abre haga clic sobre el icono Dr.Web
.
¡Atención! El diseño del botón «flecha arriba» puede ser distinto en función de la versión del sistema operativo y su configuración. Por ejemplo, puede ser así
 o así
o así  .
.Haga clic sobre el Centro de seguridad

Se abrirá la ventana del Centro de seguridad. La lista de los puntos puede ser distinta en función de la versión del producto usada.

-
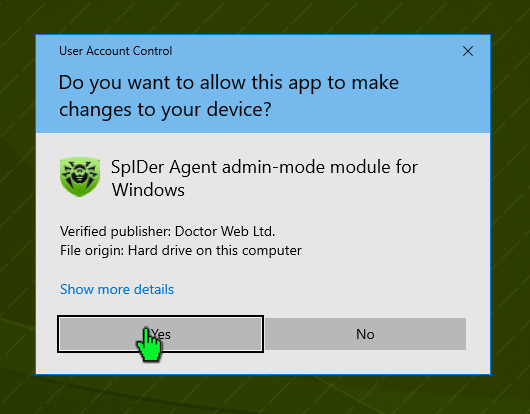
Permita cambiar la configuración (entre en el modo administrativo):
De forma predeterminada, la posibilidad de cambiar la configuración está bloqueada. Para desbloquear, haga clic sobre el icono de candado
 (Modo administrativo) en la parte izquierda inferior de la pantalla. Si tiene establecida la contraseña para acceder a la modificación de la configuración, indíquela.
El icono en la parte izquierda inferior de la ventana se cambiará por
 .
. -
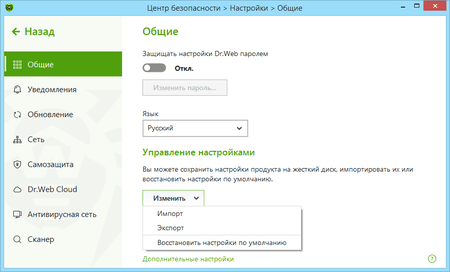
Haga clic sobre el icono de piñón en la parte derecha superior de la ventana. En la sección General haga clic sobre el botón Cambiar debajo de Administrar configuración. En la lista de acciones que se abre, seleccione Restablecer la configuración predeterminada.

Si en caso de restablecer la configuración se cambia el idioma de la interfaz del antivirus, en la misma sección de la configuración General haga clic sobre la lista Language y seleccione el idioma de la interfaz.

-
Cierre la ventana de la configuración.
Por causa de restablecer la configuración, si los programas intentan conectarse a Internet, pueden aparecer solicitudes de creación de las reglas de acceso (crear regla, prohibir una vez) del componente Firewall Dr.Web. Debe crear una regla que permite para las aplicaciones requeridas, al hacer clic sobre Crear regla, y luego al seleccionar la acción Permitir y al hacer clic sobre Aceptar.


He olvidado la contraseña del antivirus, ¿cómo puedo recuperarla?
Esta instrucción sirve para los usuarios Dr.Web Security Suite иy el Antivirus Dr.Web de versiones actuales para la plataforma Windows.
Las tecnologías usadas en los productos Dr.Web se desarrollan para que los malintencionados no puedan obtener los datos de usuario, así mismo, la contraseña. La contraseña no se guarda en ningún sitio directamente, por eso no es posible recuperarla.
La empresa Doctor Web tampoco recaba los datos personales de usuarios y por lo tanto no puede recuperar su contraseña a través de la solicitud al servicio de soporte.
Para que Vd. pueda acceder a la configuración del antivirus, debe reinstalar el producto usado. Así mismo toda su configuración, incluida la contraseña, se perderá.
- Guarde el archivo de claves Dr.Web (archivo con extensión key con la información sobre su licencia). Está en el directorio C:\Program Files\DrWeb. Por ejemplo, colóquelo en el Escritorio.
- Para reinstalar Dr.Web, necesitara su distribución. Descárguelo en el drweb-av.es. Indique su número de serie o archivo de claves — el archivo con extensión key con la información sobre su licencia (está en el directorio C:\Program Files\DrWeb) y el correo-e de registro, haga clic sobre el botón Descargar. En la ventana que se abre, ya estará seleccionada la opción de descarga para Windows y Android, por lo tanto, Vd. puede simplemente hacer clic sobre Enviar. En el paso siguiente, seleccione la versión para la descarga:
- 11.5, en caso de usar el sistema operativo Windows XP;
- 12, en caso de usar el sistema operativo Windows Vista y superior.
Dr.Web no soporta versiones inferiores a Windows XP.
Descargue la distribución Dr.Web.
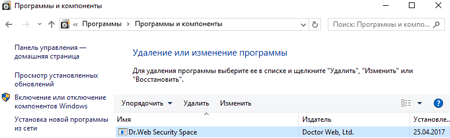
Desinstale el antivirus.
Entre en el Panel de control, al seleccionar de forma consecutiva Inicio → Buscar → Panel de control y luego en función del tipo del Panel de control — y luego en función del tipo del Panel de control — o Quitar programa.
Seleccione en el listado de programas el Antivirus Dr.Web o Dr.Web Security Space, haga clic sobre Quitar y siga las instrucciones del asistente para quitar programas.
Al quitar, en la ventana Opciones guardadas desactive la casilla Configuración.

Una vez quitada la solución usada, reinicie el equipo y vuelva a instale Dr.Web. Su archivo de claves se cargará de forma automática.
Si el archivo de claves no se carga de forma automática durante la instalación, indíquelo manualmente. Para realizarlo, seleccione Licencias en el menú del antivirus. En la ventana que se abre del Administrador de licencias haga clic sobre Comprar o activar la nueva licencia, luego haga clic sobre o indique el archivo de claves, seleccione el archivo de claves anteriormente guardado — el archivo cuyo nombre empieza por SL con extensión .key desde el Escritorio.
How can I boot in Windows safe mode?
To enter the safe mode when your PC is booting, press F8 at the moment the computer vendor picture disappears, before Windows logo is displayed. If you can see the Windows logo then you failed to press the button in time. In this case, you need to wait for the Windows system login window to appear, shut down and reboot your PC.
If you managed to press F8 key in time, you will see the Windows boot menu on the screen.
Use arrow keys to select a boot mode you need, and press Enter.
How can I check and change the system date?
To check the date, roll the mouse cursor over the clock icon in the notification area. The system date will be displayed in the pop-up hint. To change the date, do the following: right-click on the clock icon in the notifications area and select Date/time settings in the open menu. In the next window, set the current date and press Ok.
How can I create a Windows XP system registry archive copy?
Press Start–>All programs–>Standard–>Service–>Data archving. The archiving window appears. Press Next, check the Archive files and parameters in the next window and press Next. In the next window, select Allow choosing objects to be archived and press Next. Now, open My computer in the left-hand part of the window, check System State box and press Next. Specify archive file save path and name. Verify the data displayed and press Ready. When the operation is completed, you may close the archiver window.
How can I enable the Scheduler?
Locate the C:\WINDOWS\inf\mstask.inf file right-click it and select Install item. During installation, you might need an OS installation disk. Your PC may need to reboot.
How can I export a registry tree?
press Start–>Run and enter the the following command in the open line
reg export "tree" file namewhere the “tree” is the registry tree you need to export (tree should be embraced with quotes);
file name is the file where the result will be saved.
For example, you need to export the
HKEY_LOCAL_MACHINE\SYSTEM\CurrentControlSet\Control tree into the C:\result.reg fileThe command will be as follows
reg export "HKEY_LOCAL_MACHINE\SYSTEM\CurrentControlSet\Control" c:\result.reg
How can I know my Windows version?
Press Start–>Run and enter the winver command in the open line.
How can I reset Internet connection settings?
To reset Internet connection settings, press Start–>Run and enter the following command in the open line:
netsh winsock reset
And press Ok.
Note: to restore your previous settings, export the HKEY_LOCAL_MACHINE\SYSTEM\CurrentControlSet\Services\WinSock2 registry tree prior to reset.
I cannor launch an *.exe application. What am I to do?
If the system recovery is enabled on your PC then roll back the system to a checkpoint when this problem did not exist.
If this measure was useless or the system recovery is disabled then try to use a utility located at plstfix.exe.
The disk will not open after viruses have been cured. What am I to do?
Try to use a utility located at plstfix.exe
What is a ticket?
A ticket is a virtual document keeping technical support calls and dialogs between an engineer an user.
What is md5 and how can I get it?
It is a file checksum required to confirm data integrity and authenticity. To get the checksum, use the Hash program or visit forum.drweb.com/hash. When linking, select the file you need with the Browse button and press Compute. When the analysis is over, you will be provided with all the file information, including md5.
Why cannot I install two anti-viruses on one PC?
It is not allowed to install several anti-virus programs on one PC at a time — they will conflict with each other that may considerably slow down you PC or make it completely non-operational. If you have an anti-virus software already installed on your PC, but intend to install a new product from another vendor, then you need to remove the anti-virus program you have, prior to the installation.
If you wish to install another anti-virus program, you do it at your own risk, and become responsible for all the consequences because the consequences of such installation might be unpredictable including inability of your OS to boot as a result of two or more anti-viruses installed on your PC.
¿Cómo restablecer la configuración del antivirus?
Uno de los problemas posibles (pero no únicos) son la configuración incorrecta del componente el Firewall Dr.Web. Vd. puede cambiarla sin ayuda o restablecer la configuración hasta los valores predeterminados. Para restablecer la configuración:
-
Entre en el Centro de seguridad Para realizarlo:
Haga clic sobre el icono Dr.Web
en el área de notificación (en la parte derecha inferior de la pantalla). Si no hay este icono de la bandeja, haga clic sobre «flecha arriba»y en el panel que se abre haga clic sobre el icono Dr.Web
.¡Atención! El diseño del botón «flecha arriba» puede ser distinto en función de la versión del sistema operativo y su configuración. Por ejemplo, puede ser así
o así .Haga clic sobre el Centro de seguridad
Se abrirá la ventana del Centro de seguridad. La lista de los puntos puede ser distinta en función de la versión del producto usada.
-
Permita cambiar la configuración (entre en el modo administrativo):
De forma predeterminada, la posibilidad de cambiar la configuración está bloqueada. Para desbloquear, haga clic sobre el icono de candado
(Modo administrativo) en la parte izquierda inferior de la pantalla. Si tiene establecida la contraseña para acceder a la modificación de la configuración, indíquela.El icono en la parte izquierda inferior de la ventana se cambiará por
. -
Haga clic sobre el icono de piñón en la parte derecha superior de la ventana. En la sección General haga clic sobre el botón Cambiar debajo de Administrar configuración. En la lista de acciones que se abre, seleccione Restablecer la configuración predeterminada.
Si en caso de restablecer la configuración se cambia el idioma de la interfaz del antivirus, en la misma sección de la configuración General haga clic sobre la lista Language y seleccione el idioma de la interfaz.
-
Cierre la ventana de la configuración.
Por causa de restablecer la configuración, si los programas intentan conectarse a Internet, pueden aparecer solicitudes de creación de las reglas de acceso (crear regla, prohibir una vez) del componente Firewall Dr.Web. Debe crear una regla que permite para las aplicaciones requeridas, al hacer clic sobre Crear regla, y luego al seleccionar la acción Permitir y al hacer clic sobre Aceptar.
Si para acceder a la red se usa un servidor proxy, ¿es necesario de alguna forma configurar el procedimiento de actualización de Dr.Web Security Space?
Sí, en la configuración de Dr.Web Security Space Vd. debe indicar el servidor proxy usado.
- Haga clic sobre el icono Dr.Web en el área de notificación (en la parte derecha inferior de la pantalla).
- Seleccione Centro de seguridad, luego el icono de candado (Modo de administración) en la parte izquierda inferior de la ventana que se abre para asegurar el acceso a la configuración permita el inicio de la aplicación.
- Si tiene establecida la contraseña para acceder a la modificación de la configuración, indíquela.
- El icono en la parte izquierda inferior de la ventana se cambiará por .
- Haga clic sobre piñón
 (Configuración) en la parte derecha superior de la ventana, luego seleccione Red.
 - Al hacer clic, cambie el conmutador Usar el servidor proxy a la posición Act. Si anteriormente las opciones del servidor proxy no han sido configuradas, automáticamente se abrirá la ventana Opciones del servidor proxy. En caso contrario, haga clic sobre Cambiar.
- Indique las opciones de la conexión.
¿Se puede cambiar las opciones de la configuración Dr.Web Security Space (en particular, las opciones del servidor proxy) sin permisos de administrador?
No, por causa de seguridad. Si no hubiera restricciones de acceso a la configuración, un malintencionado podría cambiar la configuración del antivirus y bloquearlo.
¿Cómo entrar en el Centro de seguridad?
Haga clic sobre el icono Dr.Web ![]() en el área de notificación (en la parte derecha inferior de la pantalla). Si no hay este icono de la bandeja, haga clic sobre «flecha arriba»
en el área de notificación (en la parte derecha inferior de la pantalla). Si no hay este icono de la bandeja, haga clic sobre «flecha arriba»
y en el panel que se abre haga clic sobre el icono Dr.Web ![]() .
.
! El diseño del botón «flecha arriba» puede ser distinto en función de la versión del sistema operativo y su configuración. Por ejemplo, puede ser así o así .
Haga clic sobre el Centro de seguridad
Si no hay botón ![]() (puede haber sido oculto por el administrador de Su red), contacte con Su administrador de sistemas o use el botón Inicio para iniciar el Centro de seguridad.
(puede haber sido oculto por el administrador de Su red), contacte con Su administrador de sistemas o use el botón Inicio para iniciar el Centro de seguridad.
Haga clic sobre Inicio (su diseño puede ser distinto en función del sistema operativo usado, pero suele estar en la parte izquierda inferior de la pantalla)

Haga clic sobre el punto Dr.Web y en la lista que se abre, sobre Centro de seguridad.
Se abrirá la ventana del Centro de seguridad. La lista de los puntos puede ser distinta en función de la versión del producto usada.

La lista de elementos disponibles puede ser distinta en función de la versión del producto usada y la configuración realizada or el administrador de la red.
De forma predeterminada, la posibilidad de cambiar la configuración está bloqueada. Para desbloquear, haga clic sobre el icono de candado (Modo administrativo) en la parte izquierda inferior de la pantalla. Si tiene establecida la contraseña para acceder a la modificación de la configuración, indíquela.
El icono en la parte izquierda inferior de la ventana se cambiará por .
Componentes del programa
Dr.Web Security Space para Windows contiene muchos componentes. ¿Cuál de ellos me protege contra virus y qué módulos son solo de servicio?
El Antivirus Dr.Web — es un conjunto entero de programas (módulos) cada uno de los cuales se encarga de su “sector de defensa” de Su equipo. La eliminación (ausencia) o la desactivación por lo menos de un componente de protección reducen bastante la seguridad de la protección antivirus en total, por lo tanto, siempre recomendamos no desactivar ningún módulo sin necesidad extrema.
Los programas de servicio en el Antivirus integral es la Utilidad de actualización automática y el Programador.
¿Dr.Web solo elimina los programas troyanos? ¿No los cura?
Para contestar a esta pregunta hay que entender en qué radica la diferencia entre el objeto infectado por el virus y el malware.
Normalmente el virus añade (añade su código) al archivo infectado y de esta forma el archivo infectado consiste en la parte “sana” y la infectada añadida a la misma. Juntos son un archivo infectado por virus. La mayor parte de estos archivos pueden ser desinfectados por el antivirus Dr.Web (y así pasa). Así mismo, no se trata de la “desinfección del virus”, sino de “desinfección del archivo” infectado por el virus.
El malware (de inglés malicious software) es un software completo, por lo tanto, para el mismo no está prevista la desinfección, solo la eliminación. En algunos casos se puede mencionar la posibilidad de desinfectar el sistema (pero no el malware) que consiste, así mismo, en la eliminación de la amenaza localizada, así como en la recuperación de los objetos dañados.
Sospecho que un virus ha penetrado en mi equipo. ¿Cómo puedo iniciar el escáner?
Hay varios modos de iniciar el escáner.
- En el Escritorio, localice un icono con araña en el fondo verde — el Escáner Dr.Web. Inicie el escáner con doble clic sobre el icono.
- Abra el menú Dr.Web (clic derecho sobre el icono de antivirus en la parte derecha inferior de la pantalla) y seleccione Centro de seguridad. Luego seleccione Archivos y red, luego Escáner. Seleccione el modo de escaneo requerido: rápido, completo o personalizado.
- Para escanear un objeto en concreto (archivo o carpeta) haga clic sobre el mismo con el botón derecho del ratón. En el menú contextual que se abre seleccione Escanear con Dr.Web con el icono de araña negra en el fondo gris. El escáner se iniciará enseguida y el archivo será escaneado.
En la configuración del escáner hay acción para los archivos sospechosos e incurables— «Mover a la cuarentena». ¿Estos archivos se mueven a algún sitio en mi ordenador? ¿Es decir, el mismo permanece infectado?
La acción «Mover» para los objetos sospechosos e incurables significa transferir el archivo a la carpeta especial de cuarentena. Junto con la transferencia, el archivo pierde su extensión. Estas acciones significan el “desarme” real del antivirus, que deja de poder funcionar, y, por lo tanto, se hace seguro. Posteriormente Vd. puede abrir el Administrador de la cuarentena (Centro de seguridad → Herramientas → Administrador de la cuarentena) y eliminar los archivos si no los necesita.
¿Se puede desactivar el guardián de correo antivirus SpIDer Mail, porque el escáner también escanea los archivos de correo?
El escáner Dr.Web realmente puede detectar los virus en los buzones de algunos formatos, pero el guardián de correo SpIDer Mail tiene algunas ventajas:
- No todos los formatos populares de buzones se soportan por el Escáner Dr.Web, y en caso de usar el guardián de correo SpIDer Mail los mensajes infectados ni siquiera llegan a buzones;
- El escáner Dr.Web escanea los buzones, pero solo por solicitud de usuario o por programación, y no en el momento de recibir el correo, así mismo, esta acción requiere muchos recursos y lleva bastante tiempo.
De hecho, al configurar todos los componentes Dr.Web de forma predeterminada el guardián SpIDer Mail es el primero en detectar e impedir que los virus y los objetos sospechosos que se difunden por correo-e penetren en el equipo. Su funcionamiento es bastante económico desde el punto de vista de gasto de recursos de computación; los demás componentes pueden no ser usados para escanear los archivos de correo.
Uso un programa de correo muy poco común. En este caso, ¿me protege uno de los componentes del antivirus — SpIDerMail?
El guardián de correo SpIDer Mail escaneará tanto el correo entrante como el saliente en Su equipo sin importar el cliente de correo usado.
Protección preventiva
¿Qué significa el mensaje Ejecución del código no autorizado bloqueado?
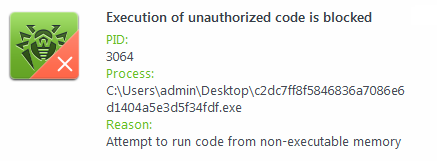
El Antivirus Dr.Web puede no solamente detectar el malware ya conocido, sino también bloquear el funcionamiento de los medios más nuevos usados por los malintencionados. Así, por ejemplo, la Protección preventiva Dr.Web supervisa las solicitudes de todo el software activo a varios recursos del equipo y, según las reglas especiales, detecta las acciones no habituales para software legítimo. En este caso, el mensaje significa un intento de implementación de algún código en un proceso activo, lo cual los programas legales hacen con poca frecuencia.
De esta forma, el Antivirus Dr.Web bloqueó el uso por los malintencionados de una vulnerabilidad no corregida en el equipo.
Para prevenir los casos similares, deben instalarse todas las actualizaciones de seguridad lanzadas por la empresa Microsoft hasta el momento, en el sistema donde se observa el positivo. Luego hay que reiniciar el equipo.
También hace falta asegurarse de que los componentes Dr.Web han sido actualizados y las bases de virus son de fecha actual.
Para detectar una amenaza en la configuración de la Protección preventiva Dr.Web para la Integridad de las aplicaciones activas establezca el modo Preguntar, y también active el modo interactivo de protección contra exploits.
Consulte con el servicio de soporte técnico. A la solicitud adjunte un informe del sistema donde está instalado el antivirus. Para realizarlo, haga clic son el botón derecho del antivirus sobre el icono Dr.Web en la bandeja, abra Centro de seguridad -> Soporte  , haga clic sobre «Ir al asistente de informes» y luego «Crear informe». Espere que el informe se genere. Se generará un archivo con extensión.zip — adjúntelo a la solicitud.
El asistente de informes Dr.Web (aplicación dwsysinfo) — es una utilidad especial Dr.Web para recopilar la información sobre el sistema. Al iniciar, la utilidad genera un archivo zip con registros de eventos, documentos XML, un archivo HOSTS y otra información. Se puede consultar la lista completa de los datos disponibles en el informe en el enlace.
Web antivirus SpIDer Gate
A connection failure occurs when I try to download a program. If I turn off SpIDer Gate, downloading continues without interruptions. What shall I do?
Try running SpIDer Gate with the -dbg: 2 parameter. To do this, click Start-> Run, type in the string provided below:
"C:\Program Files\DrWeb\spidergate.exe" –dbg:2
Click Ok.
If the problem persists, please contact the technical support service.
Can the firewall do Spider Gate's work?
No, SpIDer Gate is an HTTP-monitor. It performs the following tasks:
- Scan incoming and outgoing HTTP-traffic
- Intercept all HTTP-connections
- Filter Data
- Block loading infected pages automatically in any browser
- Scan archived files
- Protect from phishing and other dangerous online resources.
At the same time the firewall protects your PC or network from unauthorized access.
Thus, SpIDer Gate and the firewall must operate simultaneously on your computer to protect your system against viruses and network attacks.
Does SpIDer Gate depend on my browser?
No. SpIDer Gate operates independently of the programs that use the Internet (including browsers).
Does operation of SpIDer Gate slow down web surfing?
Dr.Web anti-virus engine is so fast that SpIDer Gate won’t delay loading of web-pages or slow-down file transfers.
How can I configure SpIDer Gate's verbose log?
For version 5.0:
- Increase log file size up to 5 Megabytes. Right-click on the Dr.Web icon in the notifications area, select SpIDer Gate–>Settings, in the next window proceed to the Log tab and modify the File size limit field value.
- Right-click on the Dr.Web icon in the notifications area and select SpIDer Gate ->Disable.
- Press Start–>Run, copy one of the strings below to the Run field and launch SpIDer Gate:
- "C:\Program Files\DrWeb\spidergate.exe" -dbg — enable verbose logging,
- "C:\Program Files\DrWeb\spidergate.exe" -dbg -dbg — debug logging.
Version 6.0
Right-click on the Dr.Web icon in the notifications area and select SpIDer Gate–>Settings from the list (if this item is unavailable, you should first switch to the Administrator mode). In the next window, open the Log section and use the slider to set the Extended mode. Press Ok to confirm the changes made.

Further, if required, you can reproduce the problem that must be analysed using the extended report. Please keep in mind that the Debug log is not always required because redundant information might complicate troubleshooting.
How can I disable the SpIDer Gate HTTP monitor?
It is not recommended to disable the SpIDer Gate HTTP monitor because nowadays a lot of malware is distributed via infected websites. There are many script viruses and exploits that can cause harm to the system before they are saved to your hard drive and, consequently, detected by the SpIDer Guard® file monitor.
If disabling HTTP monitor is still necessary, right-click on the Dr.Web icon and in the next menu, select SpIDer Gate –> Disable. When anti-virus self-protection screen appears, type digits from the picture into the string and click Disable SpIDer Gate.
How do I disable the HTTP-monitor SpIDer Gate?
Right-click on the Dr.Web icon in the system tray and select SpIDer Gate-> Disable in the context menu.
Caution! It is not recommended to disable the HTTP-monitor SpIDer Gate because nowadays a lot of malware is distributed via infected web sites. There are many script viruses and exploits that can harm the system before they are saved to your hard drive and, consequently, detected by the file monitor SpIDer Guard.
How do I update the HTTP-monitor SpIDer Gate?
Since SpIDer Gate utilizes the Dr.Web engine and databases, it is updated automatically along with other anti-virus modules.
How is SpIDer Gate updated?
As other modules of the program Dr.Web, SpIDer Gate features the same anti-virus engine and uses the same virus databases and therefore is updated along with other modules.
The SpIDer Gate icon is red. What shall I do?
The red icon indicates that SpIDer Gate is disabled. To activate it, right click on the Dr.Web icon in the notification area. In the menu, hover over the SpIDer Gate item and in the drop-down list select Enable.
If the icon remains red, you have two options:
- Application error – in this case you need to contact the Technical support service.
- Your license does not cover SpIDer Gate. In this case, it is recommended to remove the component: Go to Start-> Settings-> Control Panel-> Add and Remove Programs, find the Dr.Web anti-virus on the list, click Modify and follow the wizard's instructions to disable this component.
This script should be used to answer users’ questions.
One of SpIDer Gate’s tasks is to inform users that visiting some websites is dangerous or undesirable, for reasons that include the presence of “pirated” content. Dr.Web informs users about such websites because they are accompanied by malicious programs. Websites are included in the so-called Dr.Web “anti-piracy” database only on the basis of allegations made by content copyright holders. Each allegation is verified by Doctor Web’s lawyers before the decision is made to include the corresponding URL in the database. When users receive SpIDer Gate notifications concerning the undesirability of visiting pirated websites, they are getting objective, legally considered information about intellectual property infringement. Thus, Doctor Web helps users of its products:
- avoid becoming the victims of criminals, who for their own selfish ends use others’ works and trademarks, and the fruits of others’ intellectual labours, for illegal purposes;
- avoid potential criminal indictment for downloading, using, and further distributing pirated content;
- protect PCs against infections occurring as a result of downloading unlicensed content that is accompanied by malicious programs.
Users make their own decisions as to whether it is worth visiting the websites they have been notified about. The SpIDer Gate component can be enabled or disabled at their discretion.
What is the impact of SpIDer Gate on the web-surfing speed?
The unique Dr.Web anti-virus engine allows SpIDer Gate to scan traffic so quickly that you will never notice any delay when viewing web pages and downloading files from the Internet.
When I try to go to some sites, SpIDer Gate blocks them and displays the message "URL is known as a source of infection." How can I disable this feature?
If you believe that SpIDer Gate has mistakenly blocked a respected site, please let us know through the form on our website.
If you need to access a suspicious site, right click on the Dr.Web icon in the system tray and in the context menu select SpIDer Gate-> Settings. Clear the Block known source check box and press Ok.
Caution! Disabling this option is not recommended, because pages from all sites, including potentially dangerous ones will be loaded without a corresponding warning.
Where can I find SpIDer Gate's log?
SpIDer Gate's log file name is spidergate.log. The file is located in the C:\Documents and Settings\Your_user_name\DoctorWeb folder.
Which browsers support SpIDer Gate?
SpIDer Gate is compatible with all web-browsers.
Dr.Web anti-virus engine is so fast that SpIDer Gate won’t delay loading of web-pages or slow-down file transfers.
Why do I need the Speed balance option?
The Speed balance option allows you to adjust the amount of CPU time utilized to scan Internet traffic. The higher the scanning priority, the more CPU resources it will use, but it will help maintain high speed connectivity. Low priority results in low CPU load and slower network communication speed. Changing the default value usually is not required.
¿Dr.Web filtra el tráfico en caso de uso de VPN?
Una conexión segura (así mismo, con VPN) sirve para la protección contra intercepción de la información transferida. No es posible hacer que los servicios de inteligencia y los delincuentes no vean sus acciones, pero los medios de protección sí. Cualquier función usada para que los medios de protección tengan acceso al filtrado de la información transferida, enseguida habría sido disponible tanto para los malintencionados como para los servicios de inteligencia. Es por eso que si Vd. se protege de los servicios de inteligencia y de intercepción de su tráfico, automáticamente significa que este tráfico no puede ser escaneado por los medios de protección antivirus y los delincuentes pueden enviarle spam y programas nocivos.
Pero el usuario sigue protegido con Dr.Web — todo lo iniciado en el equipo será escaneado por el antivirus, solo después de haber penetrado en su equipo, y no antes.
¿Por qué Dr.Web Security Space casi devora el tráfico? El tráfico del componente del antivirus dwnetfilter supera todo el tráfico restante de Internet
En realidad el componente no consume tráfico. Lo escanea y el tráfico pasa a través del componente. El volumen del tráfico procesado depende del número de aplicaciones que se conectaban a la red, y del volumen de datos recibidos/enviados por la red.
Técnicamente todo pasa de forma siguiente:
Para asegurar el escaneo del tráfico el antivirus instala en el sistema protegido sus filtros del tráfico de Internet, como si sirviera de proxy. Y este filtro debe ser el primero, para que un programa malicioso no procese el tráfico primero. Por ejemplo, para ocultar su transferencia de datos. Los sistemas de supervisión de terceros también establecen los filtros de cálculo similares, pero procesan el tráfico ya después del filtro del antivirus, porque estos filtros siempre funcionan de forma consecutiva. Por lo tanto, el proceso dwnetfilter será visualizado como consumidor principal del tráfico.
dwnetfilter de forma autónoma no se conecta a Internet, solo intercepta las conexiones de otros.
Para evitar un efecto falso de consumo del tráfico por el componente dwnetfilter, el mismo debe ser excluido de la supervisión de Su programa de control del tráfico, si hay esta posibilidad. No tiene sentido supervisar el tráfico de aplicaciones por separado y su tráfico total a través del proxy (dwnetfilter)./p>
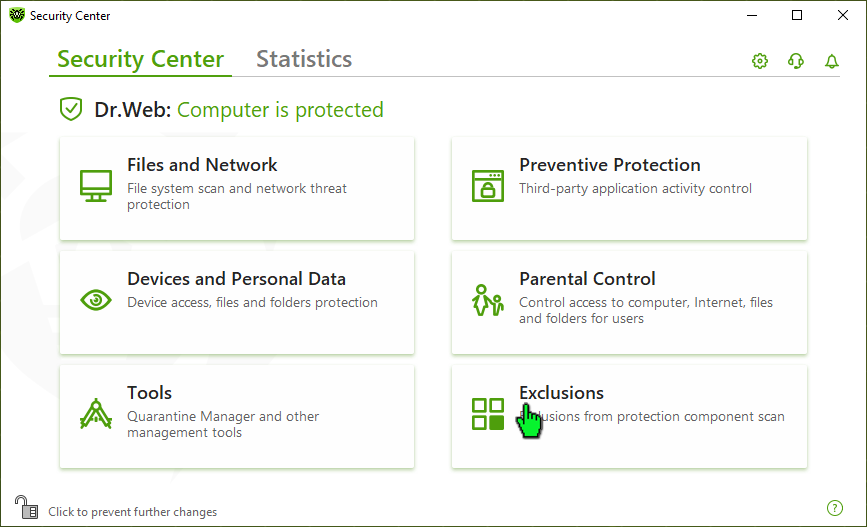
Cómo añadir un sitio web a excepciones Spider Gate para Windows
Haga clic sobre el icono Dr.Web en el área de notificación.
Abra el Centro de seguridad Dr.Web.

Para modificar la configuración Dr.Web se necesitan permisos de administrador Windows. Haga clic sobre el candado para proporcionarlos.

Responde de forma afirmativa a la pregunta sobre la mejora de permisos.
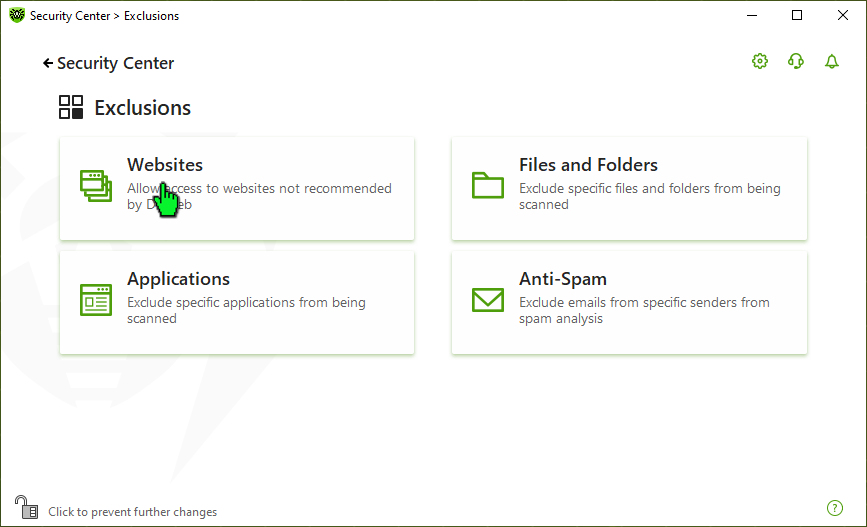
Haga clic sobre “Excepciones”.
Haga clic sobre «Sitios web».
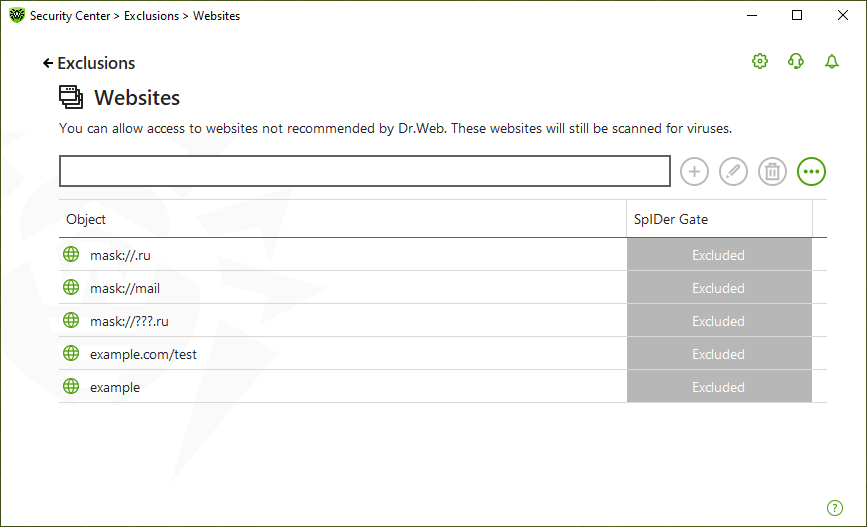
Añada las direcciones de sitios web el acceso a los cuales debe permitir. Una vez introducida la dirección del sitio web, haga clic sobre «+».
Para añadir un sitio web determinado a la lista, introduzca su dirección (por ejemplo, www.example.com). El acceso a todos los recursos ubicados en este sitio web será permitido.
Para permitir acceso a los sitios web en cuya dirección hay texto determinado, introduzca este texto en el campo. Ejemplo: en caso de introducir el texto example, el acceso a las direcciones example.com, example.test.com, test.com/example, test.example222.ru etc. será permitido;
Para permitir acceso al dominio determinado, indique el nombre del dominio con carácter «.». En este caso el acceso a todos los recursos de este dominio será permitido. En caso de usar el carácter «/» para indicar el dominio, la parte de la sublínea que está a la izquierda del carácter «/» se considerará nombre de dominio, y las partes a la derecha del carácter— una parte de la dirección permitida en este dominio. Ejemplo: en caso de introducir el texto example.com/test, se permitirán las direcciones como example.com/test11, template.example.com/test22 etc.;
Para añadir los sitios web determinados a excepciones, introduzca la máscara que los determina en el campo de introducción. Las máscaras se añaden en formato: mask://...
La máscara establece la parte común del nombre del objeto, así mismo:
- el carácter «*» sustituye cualquier secuencia de caracteres, posiblemente, vacía;
- el carácter «?» sustituye cualquier carácter, así mismo, vacío, pero solo uno.
Ejemplos:
mask://*.ru/ — se abrirán todos los sitios web en la zona.ru;
mask://mail — se abrirán todos los sitios web que contienen la palabra «mail»;
mask://???.ru/ — se abrirán todos los sitios web de la zona.ru, cuyos nombres consisten en tres caracteres o menos.
La línea introducida, al añadir a la lista, puede ser transformada de forma universal. Por ejemplo, la dirección http://www.example.com será transformada en la entrada www.example.com.
Control parental
A site I want to visit is blocked by the parental control module. How do I exclude this site from the blocking list?
Add the site's address onto the white list, or if you are sure that the site is blocked by mistake, report the false positive to Doctor Web.
At what address can I report false positives of the Dr.Web Parental control?
Send links to web-site mistakenly rated by the module as undesirable to Doctor Web's laboratory via the web-form on our website.
How can I disable the parental control module?
Right-click on the Dr.Web icon in the notification area and select Parental Control → Settings. Enter the password and select Allow access to all sites. In the Local Access tab, select Allow and Unlimited in the corresponding sections. Click Apply to save the changes.
Caution! Disabling Parental control will allow access to all resources on the Internet, LAN and the PC.
How can I recover a lost password to access the Parental control?
There is no way to recover a Parental control access password. The only solution is to import a new password into the registry from a special file.
- Use the download link to obtain the file
- Disable the anti-virus's self-protection
- Double-click on the downloaded file and agree to modify the registry
- Enable self-protection
- Now your password is "drweb" (without the quotes), do not forget to change it in the Parental control settings.
How do I disable access blocking?
Right-click on the Dr.Web icon in the notification area and select Parental Control → Settings. If this is the first launch of the Parental control module, you will need to set a password for it. Then in the subsequent window select what you want to block and then click Apply.
I am prompted to enter a password to access the parental control. What for?
If the password for parental control is not specified, each time you open parental control settings, you will be prompted to set a password. It is Recommended that you set a password right away to prevent unauthorized access to these settings. If no password is required, click Cancel.
I can not turn on the Parental control, it requires a key file. What do I do?
If upon activating the Parental control you receive the message "Unable to find a key file", it means that your license does not cover the Parental control. In this case, it is recommended to remove the component: Go to Start–> Settings–> Control Panel–> Add and Remove Programs, find the Dr.Web anti-virus on the list, click Modify and follow the wizard's instructions to disable this component.
What is the "Local access" option for?
Use the local access settings to restrict access to resources on your computer - files and folders. In addition, it is possible to prohibit the use of removable storage media and access to the LAN. By restricting access to such resources you can avoid damaging or removing sensitive data by a third party and prevent unauthorized access to confidential information.
What is the parental control for?
The Parental control module allows you to restrict users' access to certain sites on the Internet, local files and folders, local network resources. An administrator can manually configure a list of banned sites or take advantage of the constantly updated thematic lists provided by Doctor Web.
When I hover the cursor over the Dr.Web icon in the notification area, the tooltip says that local access protection and URL filtering are disabled. What does this mean and is it dangerous?
Local access protection and the URL filter are parental control features disabled by default. You need to activate them manually by setting the parental control operation mode and access password in its settings.
Which sites can be blocked with the Parental control module?
The Parental control module can restrict acces to any specific sites or web-pages, as well as to all known sites containing information on certain subjects (such as sites about drugs or weapons, sites of paid on-line games, etc.). A list of specific websites to be blocked is set up by the user; both individual addresses and keywords found in URLs can be specified in this block list. Blocking websites by subject is carried out automatically using the lists, updated regularly by Doctor Web.
Will my child be able to disable the Parental control module without my consent?
If you set a password for accessing the Parental Control, only the computer's administrator will be able to do so after entering the password. If no password is set, then any user with administrative privileges will be able to change the settings.
¿Cómo restringir acceso a los sitios web no deseado usando el Control Parental de Dr.Web para Windows?
- Haga clic sobre el icono de araña en la bandeja del sistema.
- Haga clic sobre un icono con candado cerrado — el sistema solicitará permisos de acceso avanzados.
- Responda de forma afirmativa y, en caso necesario, introduzca la contraseña de la cuenta de administrador. El icono de candado cerrado se cambiará por el icono abierto.
- Haga clic sobre el botón piñón.
- En la ventana de configuración Dr.Web vaya a la pestaña «Control Parental».
- En la parte derecha de la ventana, seleccione la cuenta de usuario para configurar restricciones.
- Haga clic sobre «Cambiar» en la sección «Internet».
- En la lista desplegable, seleccione «Bloquear por categorías».
- Marque las categorías de los sitios web no deseados el acceso a los cuales desea restringir.
Las listas de sitios web para cada categoría se completan por los expertos de la empresa Doctor Web. Para más información, consulte el artículo del periódico «Moskovskie novosti».
Conozca más
¿Cómo en Dr.Web para Windows ofrecerle al niño el acceso a algunos sitios web que forman parte de alguna categoría de bloquea o completar la lista de sitios web bloqueados?
- Vaya a la pestaña Control parental.
- En la parte derecha de la ventana, seleccione la cuenta de usuario para configurar restricciones.
- Haga clic sobre Cambiar en la sección Internet.
- Seleccione el modo Bloquear por categorías
- Haga clic sobre Lista blanca y negra.
- Para excluir un sitio web del bloqueo, añada su dirección a la lista blanca.
- Para añadir un sitio web a la lista de sitio web no deseados, añada su dirección a la lista negra.
- Si desea que el usuario solo tenga acceso a los sitios web determinados, añada las direcciones de estos sitios web a la lista blanca y seleccione el modo Bloquear todo excepto los sitios web de la lista blanca.
Los buscadores populares (Google, Yandex) tienen función de búsqueda segura que permite excluir de la búsqueda los enlaces a sitios web de contenido peligroso y no deseado. Para que el navegador automáticamente active la función de búsqueda segura, active la función similar del Control parental.
Conozca más
¿Cómo restringir acceso a algunos archivos y carpetas con el Control Parental de Dr.Web para Windows?
- Abra la carpeta Archivos y carpetas y haga clic sobre el conmutador.
- Añada las rutas a archivos y carpetas al listado, y luego seleccione el modo de acceso necesario.
«Solo lectura» significa que el niño podrá leer los archivos y carpetas, pero no podrá modificar ni cambiarlos;
«Bloqueado» no permitirá que el niño acceda a archivos y carpetas.
¿Cómo proteger la configuración del Control parental de Dr.Web para Windows contra la modificación por terceros?
- Haga clic sobre «Inicio» — «Opciones».
- Abra la sección «Cuentas de usuarios».
- Vaya a la subsección «Familia y oras personas».
- Asegúrese de que las cuentas de usuarios para las cuales Vd. configuró restricciones en el Control parental no tienen permisos de administrador.
- En caso necesario, cambie los permisos de usuarios de «Administrador» a «Usuario ordinario».
- También asegúrese de que su cuenta de administrador tiene establecida una contraseña no vacía. Si la contraseña está vacía, haga clic sobre Ctrl + Alt + Delete y luego sobre «Cambiar contraseña». Introduzca la nueva contraseña en los campos «Nueva contraseña» y «Confirmar contraseña» y haga clic sobre «Enviar».
Cómo restringir el tiempo de acceso del niño a Internet o al equipo en el Control Parental Dr.Web para Windows.
- Abra la pestaña «Tiempo».
- Usando la programación horaria, configure el horario de acceso a Internet y al equipo.
- En vez de configurar la programación horaria, puede seleccionar el modo «Restricción de tiempo por intervalos».
Escáner
How can I enable a scheduled scan?
In order to launch full scan, please use the Task scheduler.
Windows XP:Open the Windows task scheduler (Start->Control panel->Assigned tasks). Find the Dr.Web Daily Scan task pre-installed during installation and open it to edit. In the Task tab, check Enabled. In the Schedule tab, specify scan frequency and time you need. Press Ok to apply the settings. Enter user name and password upon the operating system request.
Windows Vista/7:In order to edit a task pre-installed during the anti-virus installation, right-click on the Dr.Web icon in the notifications area and select Tools->Scheduler. In the next window, select the Drweb Daily Scan task, which is disabled by default. You should enable it (by right-clicking the task and selecting Enable option). In the Triggers tab, edit launch time and frequency.
I have installed anti-virus on my PC and run the program. Though I did nothing about it, it started to perform itself — some numbers appeared and the progress bar began sliding to the right in the bottom part of the program window. What is it doing?
Quick scan of the critical system objects with the anti-virus scanner is launched automatically as the program starts. It is required to find out if any viruses exist in the system. After the scan is complete, two right windows indicate numbers. The left one shows the number of viruses found on your PC, while the right one — the number of RAM objects and files scanned with the anti-virus scanner.
In the scanner settings, there is an action to process infected and incurable files — Move. Are such files moved to a location on my PC?
The Move action in respect to infected and incurable objects means the following: an object is moved to a special directory specified in the Move to field (by default, it is the infected.!!! subdirectory of the Dr.Web installation directory) and accessible even after the scan is over. Furthermore, after having been moved, the file loses its extension. Such actions mean that the virus is actually “disarmed”, rendered incapable and, therefore, absolutely safe.
What is the scanner designed for? Is SpIDer Guard anti-virus monitor, which always monitors all the calls to files, not enough?
Dr.Web scanner for Windows either scans files at the user’s command or on the schedule specified in the Scheduler. Not all the files are checked, but only those specified in the scanner settings instead. By default, files are checked by format — i.e., files in archives, packed and e-mail files, and RAM and all the autorun objects as well. You may choose to scan disks, folders, scan by file types, by preset mask, or scan all the files. To view current scanner settings, go to the program main window menu bar and select Settings–>Modify settings.
Dr.Web anti-spam
How can spam be filtered into definite mail folder?
To move automatically all messages marked as spam by Dr.Web Anti-spam into definite mail folder in your mail client, do the following.
- In SpIDer Mail menu on the Windows Task Panel choose “Settings” – the SpIDer Mail “Settings” window will appear. Press the “Advanced…” button. The “SpIDer Mail® Spam Settings” window will open. Check the “Add prefix to the subjects of the spam messages” box. Input any word or combination of symbols in the field below it. This will be the prefix Dr.Web Anti-spam will add to subjects of messages marked as spam.
- In the mail client you use, make a new folder for spam. Make the rule for this folder so that all the spam messages with the prefix you specified in the “Add prefix to the subjects of the spam messages” filed are placed there automatically.
How to activate Dr.Web spam filter?
Incoming mail filtering is processed by SpIDer Mail, one of Dr.Web modules. The following steps describe how to activate the spam filter:
- In SpIDer Mail menu on the Windows Task Panel choose “Settings” – the SpIDer Mail “Settings” window will appear.
- In the “Scan” pane of the SpIDer Mail “Settings” window enable the “Check for the spam” checkbox and press OK to save the changes made; then close SpIDer Mail “Settings” window.
After you’ve activated your spam filter, SpIDer Mail with Vade Retro anti-spam engine integrated into it starts filtering all your incoming mail on POP3 and IMAP4 protocols.
How to avoid filtering Cyrillic e-mails as spam?
At first all spam messages were of Latin origin and spam-filters’ developers, represented for the most part by Western companies, were aimed at filtering these ones only. Later on spammers switched into Cyrillic, too. But since the bulk of spam is still in Latin, there are some difficulties to filter Cyrillic spam.
To save your Cyrillic correspondence from being filtered as spam without a prior analysis, check the “Allow Cyrillic texts” box. Otherwise such e-mails are likely to be marked as spam. “Allow Chinese, Japanese, Korean text” option works the same way.
How to configure spam filtering to a specific folder in my e-mail client?
To have all the messages marked with Dr.Web spam filter automatically moved to a specific folder — let's call it Spam, for example, — follow the below steps:
- Right-click on the Dr.Web icon in the notifications area and select SpIDer Mail–>Settings. Go to the Anti-spam tab, and check the box next to Add a prefix to the Subject field of e-mails containing spam. In the field below, enter any word or letter combination you like — that's what will be a prefix Dr.Web spam filter will add to the subjects of messages specified to be a spam.
- In your e-mail client, create a folder for spam filtering and configure rule for it so that messages having a prefix you have entered to the Add a prefix to the Subject field of e-mails containing spam be placed into it automatically.
Below are detailed steps on how to set up rules for various e-mail clients. It is assumed that the Anti-spam is configured to mark an incoming spam with the [SPAM] prefix. If you chose an alternative prefix, use it in accordance with this manual...
Microsoft Outlook Express 6
- Create a new folder into which spam will be moved:
- right-click on the account name, and in the context menu select "New Folder...";
- enter the Spam folder name, and click "OK".
- Set a filter rule for messages marked as spam:
- in the menu, select "Tools" - "Rules for messages" - "Mail ...";
- in the first list, check the "Search for messages containing specific words in the "Subject" field;
- in the second list, check the "Move to a specified folder";
- in the "Rule description", click on the "containing specific words";
- enter the [SPAM] key word, and press "Add", then "OK";
- in the "Rule description", click on the "specified";
- select the "Spam" folder created in step 1, and press "OK";
- in the "Rule name", type "Spam filtering", and press "OK" twice.
Microsoft Office Outlook 2003:
- Create a new folder into which spam will be moved:
- right-click on the account name, and in the context menu select "New Folder...";
- enter the Spam folder name, and click "OK".
- Set a filter rule for messages marked as spam:
- in the menu, select "Service" - "Rules and alerts...";
- Go to the "E-mail rules" tab;
- click on "New...";
- select "Create a new rule";
- in Step 1, select the "Check messages upon receipt", then click "Next";
- in Step 1, select "containing
in the "Subject" field; - in Step 2, click on "
"; - in the upper field, enter [SPAM], and press "Add", then "OK" and "Next";
- in Step 1, select "move them to the
folder"; - in Step 2, click on "
"; - select the "Spam" folder created in step 1, and press "OK", then "Next" twice;
- in Step 1, specify the "Spam Filtering" rule name, and click "Finish", then "OK".
Microsoft Office Outlook 2007:
- Create a new folder into which spam will be moved:
- right-click on the account name, and in the context menu select "New Folder...";
- enter the "Spam" folder name, then in the "Folder content" list, select "elements such as Mail"; in the "Place folder into..." tree, choose a location where the "Spam" folder will be stored.
- Set a filter rule for messages marked as spam:
- in the menu, select "Service" - "Rules and alerts...";
- Go to the "E-mail rules" tab;
- click on "New...";
- select "Move all messages containing specific words in the subject field to folder", and click "Next";
- in Step 1, select "containing
in the "Subject" field"; - in Step 2, click on "
"; - in the upper field, enter [SPAM], and press "Add", then "OK" and "Next";
- in Step 1, select "move them to the
folder"; - in Step 2, click on "
"; - select the "Spam" folder created in step 1, and press "OK", then "Next" twice;
- in Step 1, specify the "Spam Filtering" rule name, and click "Finish", then "OK".
Windows Mail 6 (Windows Vista):
- Create a new folder into which spam will be moved:
- right-click on the account name, and in the context menu select "New Folder...";
- enter the "Spam" folder name; in the "Select the folder in which a new folder will be created" tree, select a location where the "Spam" folder wil be stored.
- Set a filter rule for messages marked as spam:
- in the menu, select "Service" - "Message rules " - "Mail...";
- click on "New...";
- in the "1. Select conditions for this rule" list , flag the "Search for messages containing specific words in the "Subject" field";
- in the "2. Select actions for this rule" list, flag the "Move to the specified folder";
- in the "3. Rule Description" field, click on "containing specific words";
- in the "Enter the keywords" dialog box, type [SPAM] in the "Enter keywords or sentence and click" Add"" field, press "Add", then "OK";
- in the "3. Rule Description" field, click on "specified";
- in the next "Move" window, select the "Spam" folder created in step 1, and press "OK";
- in the "4. Rule name" field, type "Spam Filtering" and click "OK" twice.
Ritlabs The Bat! 4
- Create a new folder into which spam will be moved:
- right-click on the account name, and in the context menu select "New" - "New Folder...";
- enter the Spam folder name, and click "OK".
- Set a filter rule for messages marked by anti-spam as spam:
- right-click on the account name, and in the context menu select "Inbox Assistant settings...";
- right-click on the "Incoming mail", and in the context menu, select "New rule";
- in the "Name" field, enter "Spam filter";
- click on "Sender" and choose the "Subject" line from the drop-down list;
- enter [SPAM] into the field after the word "containing"
- under the "Actions" list, click "Add";
- in the drop-down list, select the "Move message to folder";
- in the folder tree, select the "Spam" folder created in step 1, and click "OK" twice.
Mozilla Thunderbird 2.0
- Create a new folder into which spam will be moved:
- right-click on the account name, and in the context menu select "New Folder...";
- enter the Spam folder name, and click "OK".
- Set a filter rule for messages marked by anti-spam as spam:
- select the account name in the tree of accounts and folders;
- in the menu, select "Tools" - "Message Filters...";
- press "Create...";
- in the "Filter name" field, enter "Spam filter";
- in the list below, sequentially select "Subject", then "contains" from the drop-down lists; in the right-hand field, enter [SPAM];
- from the drop-down lists in the list far below, sequentially select "Move message to...", and in the next box, select the "Spam" folder created in step 1, then press "OK";
- close the "Message filters" window.
How to manage Whitelists\Blacklists?
Whitelists and Blacklists contain mail addresses you either trust or not.
- If the sender’s e-mail address is added to the Whitelist, these messages are not filtered. However, if the sender and the receiver share the same domain name e-mail addresses and this domain name is enlisted in the Whitelist with the “*” symbol, it is filtered for spam.
- All messages enlisted in Blacklist are marked as spam without additional analysis.
Both lists settings should be fill in one after another, parted by “;”. The “*” sign can be used as a part of e-mail address. For example, *@domain.org passes for all addresses with “domain.org” domain name.
Where to forward e-mails falsely marked as spam/non-spam?
In case some messages are falsely filtered, they should be forwarded as attachments to special addresses for analysis and correction of spam-filtering techniques.
- Messages, falsely marked as spam , should be forwarded as attachments to nonspam@drweb.com
- Messages, falsely marked as non-spam , should be forwarded as attachments to spam@drweb.com.
Which messages are filtered by Dr.Web anti-spam as unwanted?
- To make it short, let’s apply “spam” name to all unsolicited e-mails. The bulk of it comprises advertisements offering different goods and services.
- The most dangerous among spam messages are phishing, pharming and scamming ones. Nigerian scams, lottery and casino scams, fraudulent messages from banks and credit organizations are characteristic of them.
- Next come black political and economic PR scams and the so-called “letters of happiness”.
- There is also a technical spam, or bounce messages, generated by mail servers in reply to undelivered message, whether you did send one or not. Such e-mails might emerge as a result of mail server poor work or virus activity, of some e-mail worm, for instance.
Dr.Web Firewall
Do I need to disable Windows Firewall when installing Dr.Web Firewall?
If you install a Dr.Web package that includes the firewall, you will be prompted to deactivate the Windows firewall. The Windows firewall must be disabled, doing otherwise will result in numerous conflicts that can cause errors or an OS crash.
Neither it is recommended to enable the Windows firewall while the Dr.Web firewall is working.
How can I create an application (program) rule in Dr.Web version 8 and earlier?
Right-click on the Dr.Web icon in the notification area. In the menu, hover over the Firewall item and in the drop-down list, select Settings. Click the Application tab.
To create an application rule, click Create. In the opened window, specify the path to the executable file for the program for which you are creating the rule, and select
- the rule type for launching network applications:
- Allow — to allow the application to launch processes.
- Block — to block the application from launching processes.
- Not configured — to customize the selected firewall operating mode for this application.
- and the rule type for accessing network resources:
- Allow all — the application will be permitted to access the network.
- Block all — the application will be blocked from accessing the network.
- Custom — access will be determined by the parameters specified.
- Not configured — to customize the selected firewall operating mode for this application.
You do not need to configure rules manually if the firewall is operating in the training mode — it is easier to configure access for each application right from the firewall notification window when it attempts to connect to the network for the first time.
How do I disable the automatic launch of the firewall at Windows startup?
You can't disable automatic startup for the firewall with standard tools available in the system.. However, you can disable temporarily various anti-virus modules including the firewall at any moment. Right click on the Dr.Web icon in the system tray and select Firewall-> Disable in the context menu.
Note: If the Disable item is not available in the menu, switch to the Administrative mode.
I'm getting messages about new network rules created again and again. How can I disable the notifications?
Dr.Web Firewall in the real time mode creates rules for applications running in the system but are not on its list. Therefore, you must create rules for such applications when they attempt to connect to the network for the first time. A connection request is issued for specific ports and protocols utilized by the application. You can allow all the requested connections, a connection only for a specific protocol and port, or block the connection. Once the rule is created, the firewall handles requests according to the rule and no longer gives out messages regarding application's network activity to the user.
The predefined database contains rules for the most popular programs, as well as all Windows system services and applications. The database is updated on a regular basis.
For more information see the video tutorial on configuring the Dr.Web firewall.
What firewall operational modes are available?
Dr.Web Firewall has four operating modes:
- Allow unknown connections — all unknown connections are allowed. Protection is not active.
- Training mode (create rules for known applications automatically) — learning mode. Rules for known applications are created automatically. The user will be prompted to choose what action to take with all unknown connections.
- Interactive mode — learning mode. When the operating system or an application attempts to connect to a network, the firewall will prompt the user to choose an action.
- Block unknown connections — all unknown connections will be blocked without prompting the user.
¿Qué es un Firewall?
Un Firewall (de inglés Firewall — un contrafuegos, o un Firewall) — es un programa que controla el intercambio de datos entre su equipo y el resto de la red. La tarea básica del Firewall es la supervisión de la actividad de red generada por las aplicaciones y la prevención de los ataques de hackers o de programas nocivos de enviar alguna información desde su equipo a la red o, al contrario, de recibirla de forma no autorizada desde la fuente eliminada.
¿Qué es un modo interactivo del Firewall?
En este modo Vd. tiene la posibilidad de enseñar al Firewall la respuesta a los intentos de actividad en la red de algún programa.
Al detectar consultas de recursos de red, el Firewall Dr.Web comprueba si para estos programas están establecidas las reglas de filtrado. Si no hay reglas, se visualiza una solicitud correspondiente donde el usuario puede seleccionar una acción de un solo uso para el Firewall o crear una regla para procesar posteriormente la actividad de red similar de la aplicación.
El Firewall bloqueó acceso a Internet. ¿Qué hago?
Si el Firewall bloquea el trabajo con la red, se requiere hacer lo siguiente.
-
Para restablecer la configuración, haga clic sobre el icono de Dr.Web en la bandeja, abra el Centro de seguridad en el menú del antivirus, haga clic sobre el icono
 en la parte izquierda inferior de la ventana y luego —
  en la parte superior derecha. En la ventana que se abre, en la sección Administrar configuración seleccione Modificar → Restablecer la configuración predeterminada y haga clic sobre Aceptar.
¡Atención! Al realizar esta acción, se restablecerán las opciones de usuarios de todos los componentes Dr.Web, y habrá que volver a configurarlas.
Luego, al intentar entrar en Internet, pueden aparecer solicitudes del Firewall (crear la regla, prohibir una vez, permitir una vez). Cree las reglas que permiten para las aplicaciones requeridas, al hacer clic sobre Crear regla → Permitir → Aceptar.
Para más información sobre la formación del Firewall, consulte la documentación
-
Contacte con el servicio de soporte técnico, al adjuntar un informe creado por la utilidad DwSysInfo.
Para crear el informe:
- Descargue y guarde en el equipo la utilidad: https://download.geo.drweb.com/pub/drweb/tools/dwsysinfo.exe
- Inicie el archivo guardado dwsysinfo.exe.
- Haga clic sobre Generar informe.
- Espere que el informe se cree.
¿Cómo prohibir que un programa se conecte a Internet?
Para prohibir a un programa determinado el uso de la red, se requiere crear una nueva regla. Haga clic sobre el icono Dr.Web en la barra de tareas, seleccione Centro de seguridad → Archivos y red y haga clic sobre el icono ![]() .
.

Al aparecer una ventana de control de cuentas de usuarios, pulse el botón Sí y, en caso necesario, introduzca la contraseña del administrador.
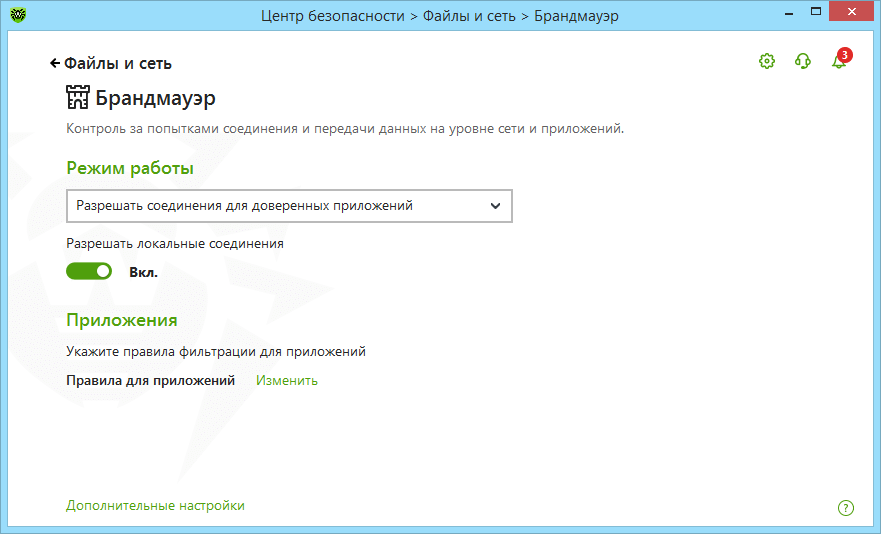
Seleccione la sección Firewall ya activa y haga clic sobre Modificar en Reglas para aplicaciones.
En la ventana que se abre, haga clic sobre el icono ![]() para añadir la nueva regla.
para añadir la nueva regla.
En la ventana siguiente, indique la ruta al archivo ejecutable de la aplicación, en la lista desplegable Iniciar aplicaciones de red seleccione Bloquear, y en la lista Acceso a los recursos de red — Bloquear todo.
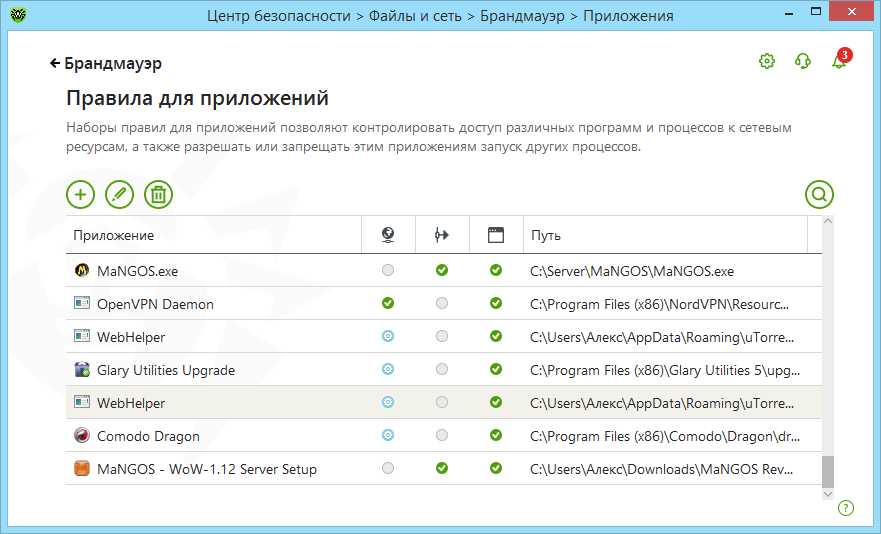
Haga clic sobre Aceptar para que los cambios surtan efecto.
Apareció una ventana de notificación del Firewall. ¿Qué hago?
La aparición de la ventana de notificación significa que para la aplicación a la cual reaccionó el Firewall no hay regla de procesamiento establecida. Puede usar alguna de las opciones siguientes.
- Permitir una vez — la actividad de red de la aplicación será permitida para el periodo de la sesión actual. Una vez reiniciado el equipo o al volver a abrir el programa la solicitud del Firewall volverá a aparecer.
- Prohibir una vez — prohibir la actividad de red del programa. Solo para la sesión actual.
- Crear la regla — cuando Vd. Configure la regla para la aplicación, el Firewall funcionará de forma automática según esta regla. Al seleccionar este punto, Vd. verá una ventana donde se le ofrecerá seleccionar una acción:
- Permitir a la aplicación las conexiones de red al puerto *número del puerto*
- Prohibir a la aplicación las conexiones de red al puerto *número del puerto*
- Permitir a la aplicación todas las conexiones de red
- Prohibir a la aplicación todas las conexiones de red
- Crear su propia regla — Vd. puede crear una nueva regla para que el Firewall trabaje con el programa actual.
Nota. Siempre intente crear reglas para automatizar el funcionamiento del Firewall.
¿Cómo crear una regla para una aplicación (un programa)?
Para prohibir a un programa determinado el uso de la red, se requiere crear una nueva regla. Haga clic sobre el icono Dr.Web en la barra de tareas, seleccione Centro de seguridad → Archivos y red y haga clic sobre el icono ![]() .
.
Al aparecer una ventana de control de cuentas de usuarios, pulse el botón Sí y, en caso necesario, introduzca la contraseña del administrador.
Seleccione la sección Firewall ya activa y haga clic sobre Modificar en Reglas para aplicaciones.
En la ventana que se abre, haga clic sobre el icono ![]() para añadir la nueva regla.
para añadir la nueva regla.
En la ventana siguiente, indique la ruta al archivo ejecutable de la aplicación, en la lista desplegable Iniciar aplicaciones de red seleccione la acción requerida:
- Permitir — al intentar iniciar la aplicación de red, el Firewall permitirá esta acción.
- Bloquear — al intentar iniciar la aplicación de red, el Firewall prohibirá esta acción.
- No establecido — al intentar iniciar la aplicación de red, el Firewall visualizará una solicitud.
Luego seleccione la acción requerida en la lista Acceso a los recursos de red:
- Permitir todo — se permitirá cualquier actividad de red del programa.
- Bloquear todo — se bloqueará cualquier actividad de red del programa.
- De usuario — Vd. puede establecer manualmente todas las opciones de trabajo con la red.
- No establecido — cada vez que el programa intente conectarse a la red, se visualizará una solicitud.

Haga clic sobre Aceptar para que los cambios surtan efecto.
Si el Firewall funciona en modo interactivo, no es necesario configurar las reglas manualmente, es más fácil configurar acceso para cada aplicación en el momento de su primera actividad de red, directamente desde la ventana de notificación del Firewall.
¿Cómo desactivar el Firewall?
Haga clic sobre el icono Dr.Web en la barra de tareas, seleccione Centro de seguridad → Archivos y red y haga clic sobre el icono ![]() . Al aparecer una ventana de control de cuentas de usuarios, pulse el botón Sí y, en caso necesario, introduzca la contraseña del administrador.
. Al aparecer una ventana de control de cuentas de usuarios, pulse el botón Sí y, en caso necesario, introduzca la contraseña del administrador.
Luego mueva el conmutador del componente Firewall ya activo y su marco será rojo.

¿Cómo restablecer la configuración del Firewall?
Para restablecer la configuración, haga clic sobre el icono de Dr.Web en la bandeja, abra el Centro de seguridad en el menú del antivirus, haga clic sobre el icono ![]() en la parte izquierda inferior de la ventana y luego —
en la parte izquierda inferior de la ventana y luego — ![]() en la parte superior derecha. En la ventana que se abre, en la sección Administrar configuración seleccione Modificar → Restablecer la configuración predeterminada y haga clic sobre Aceptar.
en la parte superior derecha. En la ventana que se abre, en la sección Administrar configuración seleccione Modificar → Restablecer la configuración predeterminada y haga clic sobre Aceptar.

¡Atención! Al realizar esta acción, se restablecerán las opciones de usuarios de todos los componentes Dr.Web, y habrá que volver a configurarlas.
¿En qué modos puede funcionar el Firewall?
El Firewall tiene tres modos de funcionamiento:
- Permitir conexiones desconocidas — todas las conexiones desconocidas están permitidas. La protección no funciona.
- Permitir conexiones para aplicaciones de confianza — las reglas para aplicaciones conocidas (que tienen firma digital válida) se aplican de forma automática. Para todas las conexiones desconocidas, se le visualizará al usuario una solicitud para seleccionar una acción.
- Modo interactivo — modo de formación. Si el sistema operativo o la aplicación intenta realizar alguna actividad de red, el Firewall le visualizará al usuario una solicitud para seleccionar una acción.
- Bloquear conexiones desconocidas — todas las conexiones desconocidas se bloquearán sin visualizar la solicitud al usuario.
Se puede establecer el modo de funcionamiento en la configuración del Firewall. Si una regla ya está establecida para la aplicación, el Firewall funcionará según la misma.
¿Qué es un proceso parental?
Un proceso parental es un proceso o una aplicación que puede iniciar otras aplicaciones. Se puede configurar las reglas para procesos paternales en la ventana de creación o edición de la regla para la aplicación a través de la lista desplegable Iniciar aplicaciones de red.
¿Cómo configurar las reglas para las conexiones de red?
Haga clic sobre el icono Dr.Web en la barra de tareas, seleccione Centro de seguridad → Archivos y red y haga clic sobre el icono ![]() . Al aparecer una ventana de control de cuentas de usuarios, pulse el botón Sí y, en caso necesario, introduzca la contraseña del administrador.
. Al aparecer una ventana de control de cuentas de usuarios, pulse el botón Sí y, en caso necesario, introduzca la contraseña del administrador.
Seleccione la sección Firewall ya activa y haga clic sobre Configuración avanzada. En la sección Opciones de funcionamiento para redes conocidas haga clic sobre Modificar. En la ventana que se abre para cada conexión de red se puede indicar un conjunto de las reglas preestablecidas:
- Allow all — todos los paquetes se permiten.
- Block all — todos los paquetes se bloquean.
- Default rule — reglas que describen las configuraciones de red más frecuentes y los ataques frecuentes (se usan de forma predeterminada para todas las interfaces).
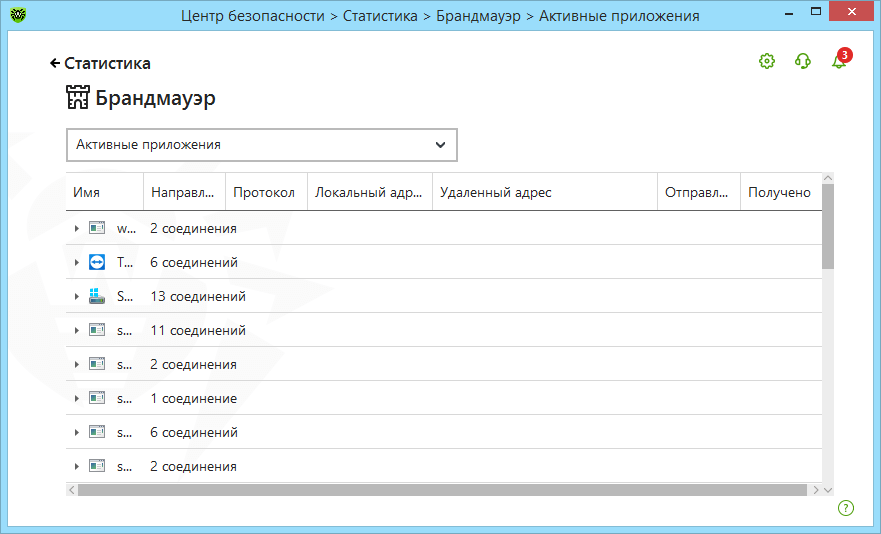
¿Cómo consultar un informe del Firewall?
Haga clic sobre el icono Dr.Web en la barra de tareas y seleccione Centro de seguridad → Estadísticas → Firewall.
¿Qué es un filtro de paquetes?
Es un elemento que permite administrar el movimiento del tráfico por protocolos indicados, al permitir o prohibir la transferencia de paquetes que cumplen con los requisitos establecidos. Un filtro de paquetes es un medio básico de seguridad del equipo que funciona independientemente de las aplicaciones.
¿Puedo instalar el Firewall Dr.Web sin instalar el antivirus?
El Firewall Dr.Web es un componente del conjunto de software Dr.Web y no se puede instalar el Firewall sin instalar el antivirus.
¿Qué significa la frase «Firma digital — desconocido» si la aplicación intenta conectarse a Internet? ¿Qué es una firma digital y en qué influye?
Una firma digital es un código que confirma que el programa fue recibido del origen concreto y no fue modificado. Al mismo tiempo, la aplicación firmada no siempre es segura, por lo tanto, el usuario debe tener cuidado al instalar cualquier software, hasta firmado.
Una aplicación desconocida constantemente intenta conectarse a Internet. ¿Qué puede ser y qué hacer en este caso?
Es probable que sea un programa nocivo. Se recomienda realizar un escaneo completo del sistema por el escáner antivirus Dr. Web.
¿Hay que configurar el filtro de paquetes para un equipo de hogar?
En casa, si solo un equipo debe estar protegido contra los ataques de red, no es necesario configurar el filtro de paquetes. Lo que pasa es que una parte significante de las reglas está en la base del Firewall, y estas reglas se activan en caso necesario. Si no hay regla para alguna situación, el Firewall visualizará una solicitud de acción.
SpIDer Guard
Can I temporarily disable SpIDer Guard with no need to reboot my PC?
Yes, you can. In order to disable SpIDer Guard, right-click on the Dr.Web icon in the notifications area and select SpIDer Guard–>Disable.
How can I add an exclusion for the SpIDer Guard scan?
In order to exclude a program or file from the SpIDer Guard scan, right-click on the Dr.Web icon in the notifications area and select SpIDer Guard–>Settings. In the next window, proceed to the Exclusions tab, press the Browse button to select the folder where the program to be excluded from the scan is installed, and press Add.
Should it become necessary to exclude a folder or file while the Dr.Web for Windows Scanner is running — select Settings–>Modify settings in the scanner menu. You may add a folder in the Scan–>Excluded paths list tab, and a certain file in the Excluded files list, then you need to press Add.
What are the SpIDer Guard functions?
Anti-virus guard is loaded into RAM and checks files being created or modified on the hard disk and all the files being opened on network disks and removable media “on the fly”.
Besides, SpIDer Guard constantly traces running processes activities specific to viruses and blocks those processes upon their detection.
Upon detection of infected objects, SpIDer Guard interacts with them according to the specified settings.
What does “Optimal mode” mean?
In the Optimal mode the guard scans only files being launched, created and modified on hard disks, removable media and network disks.
What does “Paranoid mode” mean?
Paranoid mode is an enhanced protection mode. When this mode is activated, the guard starts scanning all the files being opened, created or modified on hard disks, removable media and network disks.
What is Prohibit Host system file modification option used for?
Enabling this option allows to block attempts to modify HOSTS system file used by operating system to make an Internet access easier. Modifications of this file may be resulted in virus or any other malicious program activities, and this may cause loss of access to some websites or network resources as a whole.
What is the function of the Block removable media autorun option?
Enabling this option allows to block automatic launch of autorun.exe-like files from removable media and hard disk drives. This option is used to neutralize autorun-viruses, which are automatically activated when a device is connected to the PC with autorun option enabled.
Where is SpIDer Guard log located?
SpIDer Guard log file is called spiderg3.log and located in the anti-virus installation folder (by default, it is C:\Program Files\DrWeb).
¿Qué acciones permite realizar Dr.Web con objetos maliciosos?
Al detectar un malware por el antivirus Dr.Web, una de las siguientes acciones puede ser aplicada al mismo:
Desinfectar — se puede intentar recuperar el archivo infectado hasta el estado inicial.
En la mayoría de los casos, el punto «Desinfectar» no estará activo. Esta acción es posible solo para los objetos infectados por un virus conocido posible de desinfectar, excepto los programas troyanos y los archivos infectados dentro de los objetos completos (archivos archivados, archivos del correo electrónico o contenedores de archivos).Eliminar — eliminar para siempre un objeto malicioso (un archivo, un script, un adjunto de correo etc.).
Mover a cuarentena — si por alguna razón desea guardar el archivo (por ejemplo, para enviarlo al laboratorio de virus de Doctor Web), puede moverlo a la carpeta protegida de la cuarentena desde donde ya no podrá dañar el PC.
Ignorar — no realizar ninguna acción. Se puede seleccionar este punto solo si Vd. está totalmente seguro de que es un falso positivo.
Restricciones para desinfectar amenazas:
Imposible desinfectar los objetos sospechosos (es decir, supuestamente infectados o los que contienen un código malicioso);
No es posible mover o eliminar los objetos que no son archivos (por ejemplo, los sectores de carga);
Cualquier acción para los archivos separados en los archivos archivados, paquetes de instalación o en los mensajes es imposible — la acción en estos casos se aplica solo al objeto entero.
SpIDer Mail
How can I test SpIDer Mail performance?
You can test proper operability of anti-virus programs detecting viruses by their signatures with the use of EICAR (European Institute for Computer Anti-Virus Research) file.
This program is specially designed to allow you to see how the installed anti-virus will alert you to the viruses it detected, with no need to expose your PC to danger. Eicar program is not malicious but is specially tuned so that most anti-viruses treat it as a virus. Dr.Web refers to this “virus” as EICAR Test File (Not a Virus!).
To test mail anti-virus performance, you can ask a friend of yours to send you this file, or otherwise try to send it to yourself. If SpIDer Mail detects a virus — that is OK.
Which addresses shall I use to send letters to if misrecognized as a spam / not spam?
If the spam filter misrecognizes some letters, they can be forwarded to special mail addresses for analysis and improving filter performance quality:
- Send letters misrecognized as a spam to nonspam@drweb.com.
- Send letters not recognized by mistake as a spam to spam@drweb.com.
Important! You should forward messages as attachment, not as inline.
Trabajo con mi correo a través del navegador. ¿El componente Spider Mail escanea los mensajes de correo en busca de virus y spam?
Respuesta. El escaneo de los mensajes de correo por el componente Spider Mail se realiza solo en caso de usar un cliente de correo local (por ejemplo, MS Outlook, Mozilla Thunderbird u otro). Así mismo, cuando el mismo se está cargando en Su equipo, en el momento de visualización de la lista de los nuevos mensajes en el servidor, ellos pueden aún no ser descargados físicamente por Vd. y, por lo tanto, aún no escaneados.
Si el correo se visualiza en el navegador, no se carga en un equipo local, sino “se visualiza” por el navegador según el mensaje del servidor remoto. Si no hay un mensaje completamente cargado, el mismo no puede ser escaneado. Pero cualquier adjunto guardado del mensaje a la unidad del equipo será escaneado por el componente SpIDer Guard.
No hay coincidencias