Lists of frequently asked questions
Dr.Web for Android
For purchase through Google
How can I create a technical support request on My Dr.Web Portal?
- From your mobile device: open the application menu (the button with the three dots in the top-right corner of the screen), select About, and click on My Dr.Web. Go to the Support tab — Ask a question.
- From a PC or Mac: Use the special service on Doctor Web's site. Log on to the portal and go to the Support tab — Ask a question.
Use your My Dr.Web Portal—your personal assistant and guide to services. It is particularly from here that you can contact our technical support service. The history of your requests is also available here.
I purchased my license via Google Play, but it was not activated. What should I do?
- Open the application menu (the button with the three dots in the top-right corner of the screen), select License, and then I already have a license. Next, select Recover a purchase on Google Play.

- Enter the email address that you used when purchasing the license, and your personal data.

IMPORTANT! If, during the activation process, the program reports errors, please contact our technical support service. Attach to your request the exact text or a screenshot of the error, the Google Play order number (GPA -...) and the Google account address (@ gmail.com) used to make the purchase.
How can I transfer the license I purchased through Google Play to another device?
- Remove Dr.Web from your device.
- Using Google Play, install the Dr.Web application on the other device and open it.
- Go to License and select I already have a license.
- Click on Recover a purchase via Google Play.
- Enter the email address you used when you registered your license and your personal information. The license registered for the specified email addresses will be activated automatically.
How can a user who has the free version of Dr.Web for Android get technical support from Doctor Web?
- If you need help buying a commercial version: on the support request page of Doctor Web's site, select I do not yet have a commercial Dr.Web license, and ask your question.
- If you need assistance solving a technical problem, support is not provided with the free version of this product. Try to find the answers to your questions in the FAQ or get advice from other users on the Dr.Web forum.
I use the commercial version of Dr.Web for Android (not a lifetime license). What data do I need to provide to the Doctor Web technical support service to get help?
- If you contact our technical support service from the Dr.Web for Android page at Google Play, via My Dr.Web Portal or via the support form on Doctor Web's site — specify your serial number or your Google Play order number and your Gmail address, or the Google Play order number (GPA -...) and the address of the Google account (@ gmail.com) used to make the purchase. If you do not have the order number, you probably purchased your Dr.Web license from another site. In this case, you need to submit your serial number.
IMPORTANT! You can find your serial number on My Dr.Web Portal. - If you contact our technical support via the link in your order confirmation — click on the link found in the support request form at Google Play, select the request topic, and ask your question. We will obtain all the required information from Google Play automatically.
I lost my purchase confirmation email. How can I find out what my order number is (for example, so that I can contact Doctor Web's support service?)
If you have deleted the email confirming your purchase information, you can find the order number (Transaction ID) in your Google Wallet — information on all your orders is stored there.
Where can I find my Dr.Web serial number?
Only users of the shareware version of Dr.Web for Android (comprehensive security) have serial numbers, which become available to them after they pay for their license on My Dr.Web Portal. Serial numbers are displayed in the Portal’s license information section.
How can I find out whether I'm using the commercial version or the free one?
Open the application menu (the button with the three dots in the top-right corner of the screen), and select About. If the application name contains the word Light, you are using the free version. Also, the application menu provides access to different sets of security components; the paid version has substantially more components.
What purchase confirmation will I receive after paying for a license at Google Play?
You will receive an email receipt confirming your purchase; it will be sent to your Google email address (@gmail.com). The email will contain your order number and order information, and a link for contacting Doctor Web's support service with any purchase, payment, and refund questions. If you have not received such an email, please contact Google Play's support service — Doctor Web's support service won't be able to help you until your payment has been received.
The list of your paid purchases can be found in your Google Wallet. The list of applications that have been paid for and are thus available to you can be found in the My Apps section of your Google account.
I paid for my license but the program indicates that I'm using a demo version / the license hasn't been found.
In the program window, open the application menu (the button with the three dots in the top-right corner of the screen); select License, then Enter new serial number, and enter a valid serial number. If you purchased the license via Google Play, after selecting I already have a license, select Renew the license from Google Play. To activate the license, you must have Internet access and use the same Google account you used to make the purchase.
You can find more information about all the activation methods at: https://download.geo.drweb.com/pub/drweb/android/pro/HTML/en/index.html?dw_use_license_key_file_new.htm
Within how many days of making a purchase can I apply to Doctor Web for a refund?
According to Google Play's refund policy and under the agreement made between Doctor Web and Google, you can apply for a refund no later than 48 hours after payment is made.
How can I get refunded for a license I have paid for?
- If you have a payment receipt email from Google Play, open it and click on the link in the phrase "Have a question? Contact Doctor Web seller". A Google Play support request form will be loaded. On the request page, select the option "I'd like to request a refund/return the item", and send the refund request. A Doctor Web employee will process your request, and you will get a refund.
- If you lost the purchase receipt, request a refund through the support request form on Doctor Web's site or in My Dr.Web Portal. Specify the Google Play order number (GPA -...) and the Google account address (@ gmail.com) used to make the purchase.
In both cases, you will receive a refund confirmation from Google Play.
Important! The time frame for a refund solely depends on how fast your bank processes such requests. If the money is not returned to your account within 2-3 days after you receive the confirmation from Google Play, contact your bank. Doctor Web cannot influence bank policies or expedite refunds. Our refund liabilities to our users are met once the refund confirmation is received from Google Play.
My order was cancelled, but money was still debited from my account.
Chances are the funds have been temporarily blocked by the bank that issued your credit card. Doctor Web cannot influence bank policies. The funds will be returned to your account after the period defined by the bank expires. If the money is not returned to your account within 2-3 days after you receive your confirmation from Google Play, contact your bank.
I purchased a new smartphone. How can I transfer the Dr.Web license from my old smart phone to the new device?
- If your license has expired, you cannot transfer it to another device. Please purchase a new license.
- If your license is still valid, use your new phone to log in at Google Play under the account that was used to purchase the license. In My Apps, select Dr.Web, and tap Install. A valid license will be recognised automatically.
If your license is still valid, use your new phone to log in at Google Play under the account that was used to purchase the license.
In My Apps, select Dr.Web and tap Install. A valid license will be recognized automatically.
- I lost my Dr.Web license. How can I recover the license purchased through Google Play?
- If your license has expired, you will not be able to restore it. Please buy a new license.
- If your license is still valid,-note that licenses purchased through Google Play are bound to the account under which they have been purchased.
- Make sure that this account is set as the primary account on the device.
- In the main Dr.Web window, select About.
I lost my Dr.Web license. How can I recover a license purchased through Google Play
- If your license has expired, you will not be able to restore it. Please purchase a new license.
- If your license is still valid, open the application menu (the button with the three dots in the top-right corner of the screen); select License, then — I already have a license, and select Recover a purchase on Google Play. To activate the license, you must have Internet access and use the same Google account you used to make the purchase.
How can I reinstall Dr.Web for Android?
- Remove the application and all its data.
- Install the application on a new device in the way that is most convenient for you, in accordance with these instructions: https://download.drweb.com/doc/
- Activate the license on a new device: Open the application menu (the button with the three dots in the top-right corner of the screen); select License, then I already have a license, and enter your previous license number. If you purchased the license via Google Play, after selecting I already have a license, select Renew the license from Google Play. This license is bound to the Google account that was used to make the purchase.
IMPORTANT! The same steps should be taken to transfer a license from one device to another: users need not take any action to "unbind" the license from their previous device — they only have to remove the application.
General questions
Do viruses exist for mobile devices?
Malignant applications for mobile OSs are the fastest growing malware segment. As popularity of an OS is growing among users, so does the interest in it on the part of intruders, whose main goal is to get money. The number of threats to Android increases most rapidly.
Do dangerous malignant programs exist for Android?
Yes, there are and their number is growing. Android.SmsSend Trojan horses that emerged as early as in 2010 are the most common threats to the OS. They are designed to send SMS messages at premium numbers and sign up subscribers to various services.
Mobile banking Trojans are designed to intercept SMS messages, steal mTAN-codes and pass them to criminals who perform various financial transactions with accounts of unsuspecting victims (for example, make online purchases) pose an extreme danger. Android.SpyEye.1 is a banking Trojan for Android OS.
Such malware as Android.MailSteal.1.origin, Android.Maxbet.1.origin, Android.Loozfon.origin and Android.EmailSpy.origin. steal e-mail addresses from devices' address books and send them to a remote server, so that attackers can carry out spam mailings.
Why must your employees' personal mobile devices be protected in addition to their corporate computers, especially if they work with company finances (e.g., bookkeepers)?
While out of the office, employees are not protected from hackers, applications they use may have vulnerabilities, their computers and mobile devices can be infected with viruses and Trojans that steal banking and payment system access passwords and money from bank accounts.
Employees regularly connect to the company's network via their device, and thus put confidential data and money at risk—not only their personal assets but corporate too. Incidents when malware gets onto a local network from personal devices, including handhelds, account for up to 70% of intrusions.
In addition, banks often send SMS confirmations to maintain security of transactions. There are malignant programs that can modify such confirmation messages. An anti-virus guarantees that incidents when money is stolen from accounts will never be concealed.
I never install malware! How can my handheld get infected?
You don't need to install anything — just visit a compromised web-site. And it won't necessarily be a site with objectionable content — from intruders' point of view, hacking news portals is much more useful. News sites are the most visited ones on the Internet. They usually do not cause any suspicion among users or system administrators from companies which do not block access to such sites. That's why news portals are a very attractive field of operation to intruders. By Spreading malware through such sites, they can cause damage to a huge number of users and companies.
What does Dr.Web for Android protect against?
Dr.Web for Android protects from viruses and other malicious programs that may steal or damage information stored on the mobile device. It prevents viruses from getting and running on a mobile device.
Note: Dr.Web for Android can only protect mobile devices and its virus databases are different from those used by the anti-virus maintaining security of desktops and laptops. To protect a computer, use corresponding products from Doctor Web.
Does the anti-virus affect my device’s performance?
Dr.Web anti-virus occupies about 1 MB in the device memory. Only the file monitor that keeps track of the system processes resides in the memory at all times. The monitor requires a certain amount of resources, but it has no noticeable effect on overall performance.
How can I know what Dr.Web for Android I’m using?
In the top-right corner of the main application window, click on the menu icon, and select About.
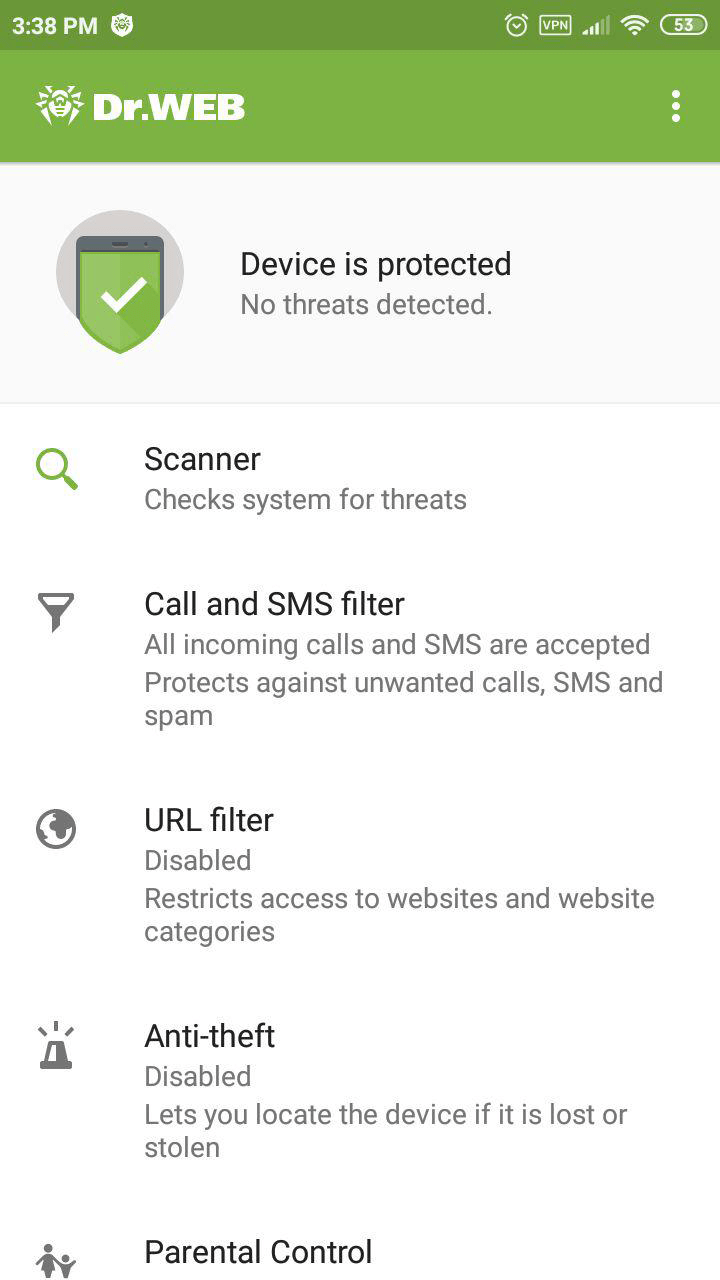
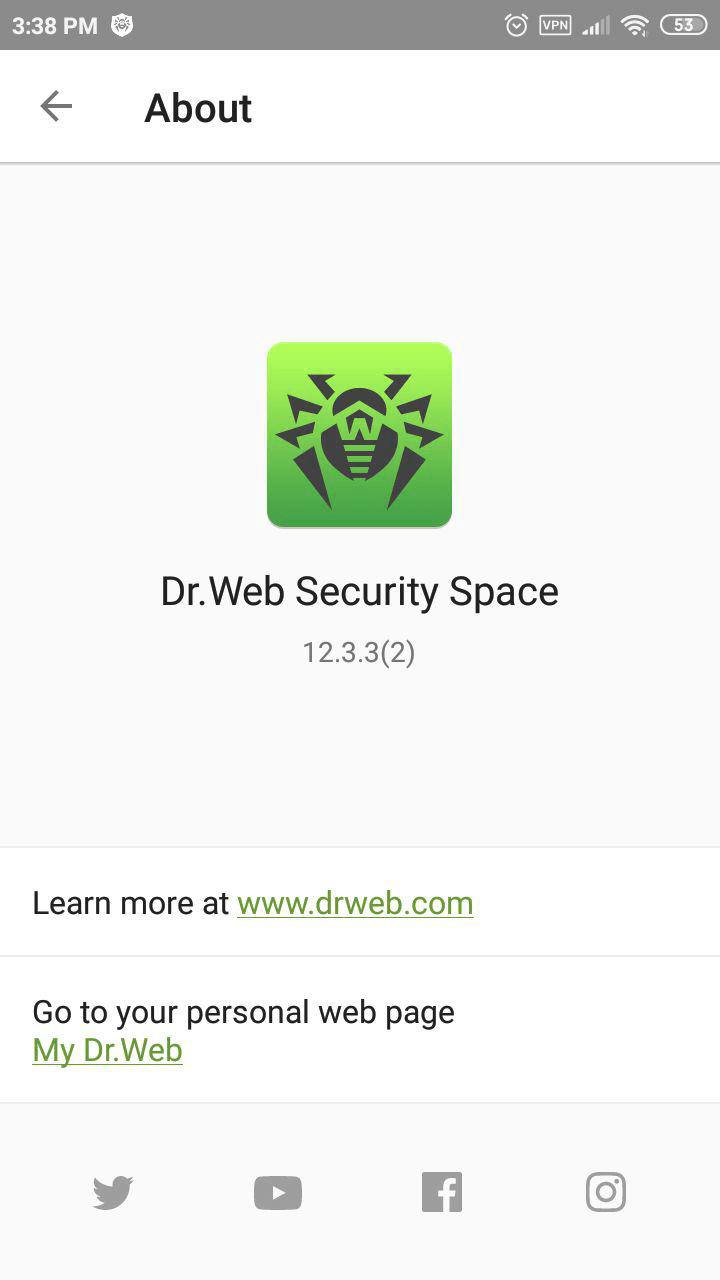
On the newly appeared page, you'll find information about the name and version of the Dr.Web solution you’re using to protect your device.
The name of your Dr.Web product can also be found in the License Manager on Doctor Web’s site.
If you inadvertently downloaded Dr.Web for Android Light instead of Dr.Web Security Space for Android, download a free 14-day trial for the full version (the trial is issued during installation) from Doctor Web’s site. You can also download the full version of Dr.Web from Google Play.
What do I do if I inadvertently downloaded Dr.Web for Android Light instead of Dr.Web Security Space for Android?
Download a free 14-day trial for the full version (the trial is issued during installation) from Doctor Web’s site.
You can also download the full version of Dr.Web from Google Play.
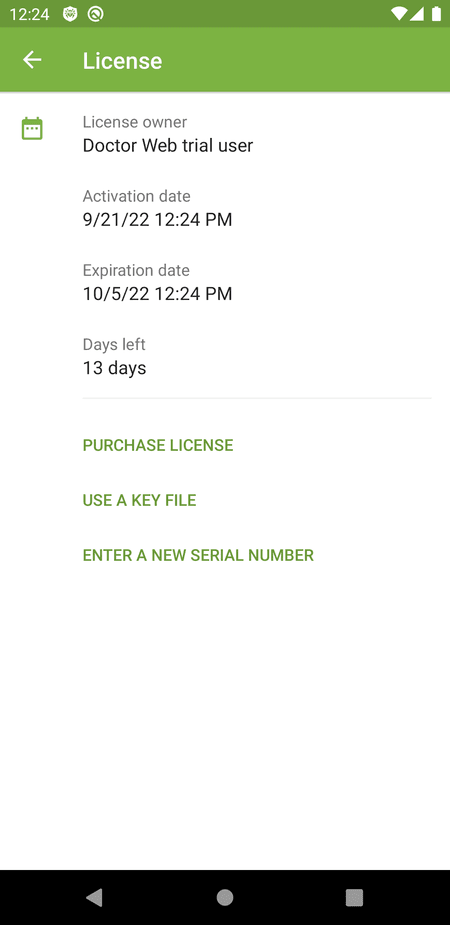
How can I check whether my Dr.Web license is valid?
In the top-right corner of the main application window, click on the menu icon, and select License.
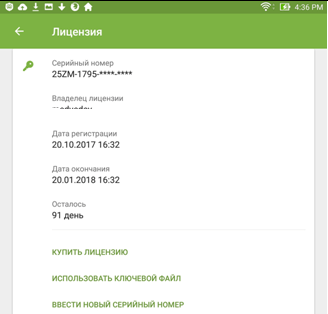
On the newly appeared page, you can find out who owns the license and when the license expires.
The validity period of your Dr.Web license can also be viewed in the License Manager on Doctor Web’s site..
My anti-virus detected threats and removed them, but they’ve reappeared. What should I?
The main signs that malicious behaviour is occurring in the system area are as follows:
- The multiple appearance of the same threats in the same areas, even after the anti-virus has removed them. Threats usually reappear after a device reset.
- Notifications in Dr.Web Security Auditor.
Due to the specific features of the Android OS, it's impossible to employ the standard features of ANY anti-virus to neutralise trojans in the system memory because, just like any other application, an anti-virus installed on a non-root device does not have administrative privileges: Dr.Web can detect malicious programs that get into the Android system directory, but it is not authorised to remove them. In addition, the quarantine option is not available for them (or for any other installed application).
To close firmware vulnerabilities and neutralise threats in /system, you can stop or disable some system applications. This will not eliminate a threat completely, but it will neutralise it until you can remove it permanently.
To stop an application: in the list of installed applications on the screen Settings → Applications, select the application that has been determined to be a threat and then on the screen containing the information about it, click on the Stop button.
This action will need to be repeated every time you restart the device.
Disable the application via the device settings: in the list of installed applications on the screen Settings→ Applications, select the application that has been determined to be a threat and then on the screen containing the information about it, click on the Disable button.
If your device is rooted (with superuser privileges that allow you to make any type of change you want, including to the firmware) and an application can be removed without disrupting device operation or cured, you will see the corresponding option in the anti-virus's interface.
With root access enabled, you can also try to remove malicious applications with the help of special third-party utilities.
In some cases, configuring root access may lead to the device manufacturer denying to provide you with warrantied maintenance.
If your device has custom firmware, you can restore the device manufacturer’s official software on your own or contact the service center. If you are using the device manufacturer’s official software, try to contact the manufacturer to get more information about this application.
If the manufacturer recommended that you update the firmware, before doing this, make a backup of all your user data and then do a reset to the factory settings.
To disable information about threats in system applications that cannot be removed without disrupting device operation, tick the System Applications box in the Settings section → General settings → Additional options.
We also recommend that you read the Anti-virus Times issue dedicated to this topic — System business. Please refer to the issue Firmly rooted to know how trojans can find their way into firmware.
How can I check whether the anti-virus is running?
Start Dr.Web for Android. In the subsequent window go to the SpIDer Guard section and check if the Monitor is enabled and protects the system message is displayed. If it is, the anti-virus protects your device. If the message is Monitor disabled, the monitor is not running. Tap the monitor indicator button.
How can I scan my device for viruses?
To scan your mobile device for viruses, launch Dr.Web for Android, and tap Scanner. In the next window, specify the scan mode.
- Quick scan. The anti-virus scans only files of installed applications. The fewer there are applications, the sooner the express scan will be completed.
- Full scan. All files on your mobile device are scanned.
- Custom scan. Scan only certain files or folders for viruses. To run a custom scan, select objects you want to scan and tap the Scan button.
Abort scan at any time by tapping Abort.
How can I view anti-virus statistics?
Launch Dr.Web for Android and select Statistics. The statistics window displays the number of processed files and information about all actions performed by the anti-virus components. It is possible to reset the statistics (Menu→Clear statistics), or save the log to a file (Menu→Save log).
A virus warning has appeared. What should I do?
Tap on the Dr.Web icon on the notification panel. In the succeeding window you will see all the available information about the threat. Tap on this message, then select the desired action: delete the file, place it into the quarantine, or ignore the warning.
Warning! It is not recommended to choose the Ignore option! If you believe that the anti-virus has made a mistake, select Quarantine and after that send the file to Doctor Web for a detailed analysis.
What do I do if Dr.Web can’t remove a malicious program?
Dr.Web cannot remove malware if the device firmware is infected. Contact the device manufacturer’s authorised service center to get your device’s firmware replaced.
What does SpIDer Guard do?
SpIDer Guard is designed to constantly protect mobile devices against viruses and other threats. It loads into the memory upon Android start-up and scans all files accessed by a user or the system in real time.
Installation/Removal/Activation
How to cancel the Dr.Web administrator role in order to uninstall an application
-
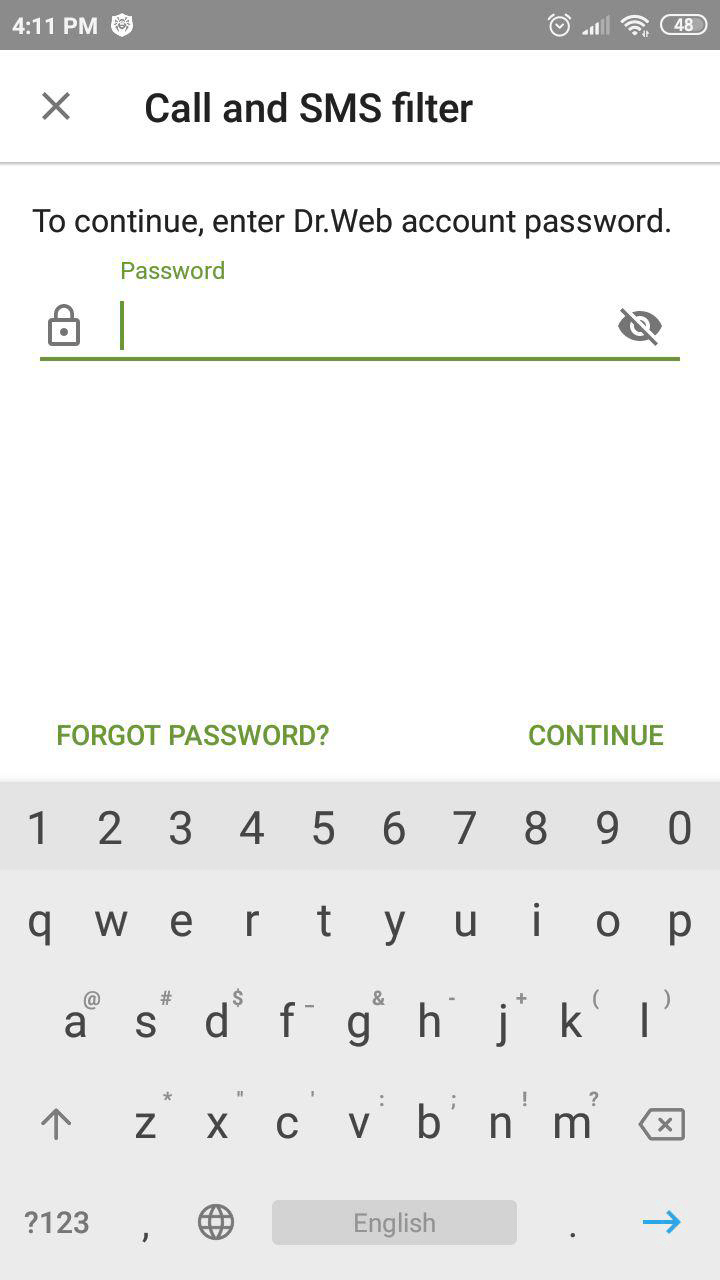
Select Settings — Security — Device Admin Apps or Device Admins — For Dr.Web Security Space, toggle the switch to the Off position (or clear the box) — enter your Dr.Web account password and click on the Deactivate device admin button.
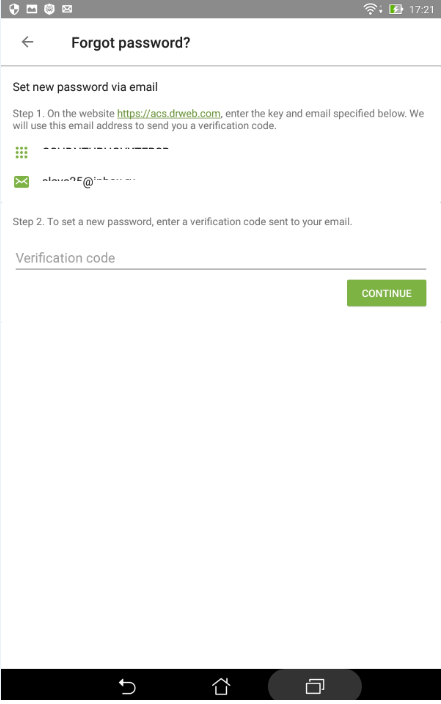
If you have forgotten your Dr.Web account password, you can reset it:
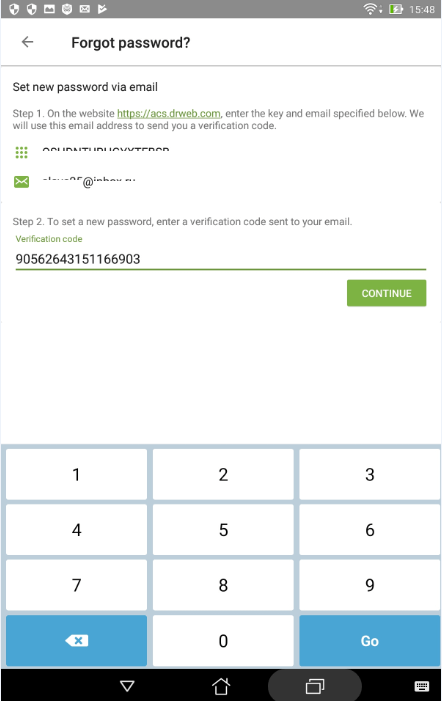
- click on the Forgot your password? button;
- click on the Via email button;
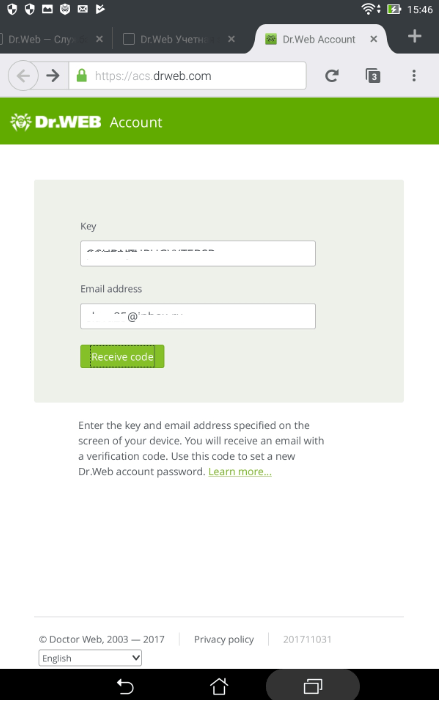
- go to https://acs.drweb.com and enter the 20-bit character code specified on the device screen, and your email address;
- you will receive an email containing a verification code consisting of a series of digits;
- in the Verification code field, enter the code you received;
- click on Continue;
- create a new password and enter it in the fields for entering a password; click on the Save button;
- use the new password to deactivate the device administrator.
-
Remove Dr.Web the way you would an ordinary application: open the Applications menu and move the Dr.Web icon to the Trash. Confirm that you want to remove the application.
How can I install the anti-virus?
There are three ways to install the anti-virus:
- Use HTC Sync. To install Dr.Web, you need to connect your device to your computer and sync them with HTC Sync. Use HTC Sync to run the Application Installation wizard, specify the path to the file drweb-600-android.apk and follow the wizard instructions.
- Manually. Copy drweb-600-android.apk (download link) to the mobile device (from a computer, with a memory card or download OTA from our web-site). To run the file you will need a file manager.
- Via Android Market. Go to the Android Market, find Dr.Web on the application list and select Install. In the subsequent window displaying information about the privileges required for the program, click OK, the application will be installed automatically.
Activating a license with a serial number
Open the Dr.Web application; click on Menu ![]() → License → Enter a new serial number. Enter your serial number and click on Activate.
→ License → Enter a new serial number. Enter your serial number and click on Activate.
No additional actions, including reinstallation, are required. This same method can be used to activate a serial number for a purchase/renewal of Dr.Web Security Space that comes with a free mobile version.
Activation error
If any error messages appear, try to activate your license using a different network connection.
If you continue to encounter problems, a detailed diagnostic is required. Submit a written request to our technical support service. Please attach the error screenshot to your request, and enter your serial number.
Activating a license with a key file for PCs
Activation via a key file only works for an application that has been downloaded directly from Doctor Web's site (this method is not suitable for an application installed via Play Market!).
-
Copy the key file to any folder in the device's memory or to its memory card.
You can extract the archive's contents and copy just the file with the *.key extension or transfer the entire ZIP archive to your device;
- Click on Menu
 , select the License section, and then select I already have a license and the Use a key file option;
 - Open the folder that the key file or ZIP archive was saved to and select it.
The key file will be installed in the system, and a message notifying you about this will appear on the screen.
Activation error
If any error messages appear, try to activate your license using a different network connection.
If you continue to encounter problems, a detailed diagnostic is required. Submit a written request to our technical support service. Please attach the error screenshot to your request, and enter your serial number.
Activating a license via Google Play
Select Menu ![]() → License → I already have a license:
→ License → I already have a license:
Then click on Recover purchase from Google Play.
Enter the email address you used when purchasing this license, and your personal data
Activation error
If any error messages appear, try to activate your license using a different network connection.
If you continue to encounter problems, a detailed diagnostic is required. Submit a written request to our technical support service. Please attach the error screenshot to your request; indicate your Google Play order number (GPA-...) and the Google account address (your_email@gmail.com) you used to make the purchase.
How can I temporarily disable the anti-virus?
Start Dr.Web for Android. The list of application components opens — the icons that are enabled will be highlighted in green and accompanied by the text enabled. Select each item you want to disable — the disable button is at the top.
With the anti-virus disabled, your mobile device becomes vulnerable. Be sure to reactivate Dr.Web as soon as you can.
How do I uninstall the anti-virus?
You can use whichever standard method is convenient for you to uninstall the application, either by going to Settings → Applications on your device or by clicking on the anti-virus icon in the context menu.
All the available ways to uninstall the application are listed in the documentation.
After installing Dr.Web, I saw a message saying that my license wasn’t found.
After its initial launch, Dr.Web establishes a network connection with the server from which it is receiving a license. Depending on the quality of the Internet connection and the performance of your device, this process may take about one minute. Just connect your device to the Internet and wait until the message saying that your license was not found disappears.
Why is an apk file downloaded instead of a zip archive?
Update your browser and try to download the file again, or rename the file, replacing the zip extension with the apk extension.
I entered an incorrect email address when registering my serial number. What should I do?
Start the registration procedure from the beginning.
I have problems installing Dr.Web — error 110 occurs. What do I do?
Follow the recommendations from this article.
What do I do if errors 608, 404, 401, or 616 occur when I activate my license?
You installed the Dr.Web Security Space version for Android that is not designed to work on a subscription basis — Dr.Web Mobile Life. Remove the product and install the appropriate version.
Renewal
To renew a license on the website
- If you need a license to protect only your mobile: select licenses here.
- If you need a license to protect your PC or Mac and your handheld: select licenses here.
How to renew a license via Google Play
Open the Dr.Web for Android application, and tap Menu (the three dots in the upper-right corner of the screen) → License → Renew license via Google Play. Open the link and pay for the license. When an attempt is made to renew a license that was not purchased on Google Play, the application will display an error message and another renewal method can then be selected.
Possible renewal issues
You don’t have your serial number, but you do have your registration email: :
You can restore your serial number using the web form at https://support.drweb.ru/restore.
You don’t have the email address you used to register your Dr.Web license, but you do have your serial number:
If you know your previous email address, you can replace it with your new one using the web form at https://products.drweb.ru/register/change_email/.
No serial number, no email access:
Please contact our technical support service at https://support.drweb.com/support. You will need to attach copies of the following documents to your request.
Updates
How to update the virus databases manually?
By default, virus database updates are downloaded automatically in the background. To update the databases manually, on the main application screen, tap “Menu” (the three dots in the upper-right corner of the screen), and select Virus databases and then Update.
How can I update the databases after downloading them from your website?
Presently you can't update the anti-virus by copying virus databases onto a mobile device. To update the databases, use the built-in update module.
Note: an Internet connection is required for updating.
Where is the update log stored?
Information about the number of virus definitions in the databases and date of the last update is contained in the anti-virus statistics.
How to allow or block the use of mobile networks (LTE, 3G, EDGE, GPRS) when updates are being downloaded
- On the main application screen, tap “Menu” (the three dots in the upper-right corner of the screen), and select Settings and then the section Virus database update;
- Select the Update over Wi-Fi checkbox, and by default, mobile networks will not be used to download updates. If no Wi-Fi networks are available, you will be prompted to use the mobile Internet.
Why does the error Files cannot be updated occur when the databases are being updated?
Your device doesn’t have enough free space or your network connection is not stable. Remove unneeded applications from your device to free up space.
Why is it taking so long to update the virus databases?
Most likely, you are using the mobile Internet and, at the moment, the quality of the network connection is low.
Settings
How can I access the Dr.Web for Android settings menu?
Start Dr.Web for Android and tap the Menu button on your mobile device. In the pop-up window select Settings.
How can I enable the English interface language?
Dr.Web for Android interface language corresponds to the current language of the operating system. Select English as the Android interface language and the anti-virus will switch to English automatically.
Note: to change the OS language tap Menu and point to Settings in the subsequent pop-up window. Go to Language & Keyboard, Select Language and choose the language you need in the succeeding window.
How can I reset the program settings to their default state?
For version 11.5:
- Click on the Doctor Web icon in the system tray (in the bottom right of the screen).
- Click on the padlock icon (Administrative mode), and allow the application to be launched.
- Click on the gear icon (Settings) and then on Change, and select Reset settings. Click on OK to confirm the reset.
- After the reset, the interface language will change to Russian, so you will need to change it back to English. To return to the English language interface, select Main→ Advanced. In the Language list, select Russian, click on English, and close the window.
For version 12:
- Click the Doctor Web icon in the system tray (in the bottom right of the screen).
- Select the Control Center, click on the padlock icon (Administrative mode), and allow the application to be launched.
- Click on the gear icon (Settings), and in the Manage settings section, click on Change and then on Restore defaults. Click on OK to confirm the reset.
Can I disable notifications that tell users they need to restart their systems after an update?
It is impossible to launch received updates without a system restart, so don't disable such notifications, and it's impossible to do this via the anti-virus interface.
If a system restart does not make such notifications go away, it may be due to certain features of your operating system. In this case, you should submit a written request to our technical support service and follow the instructions received from our support engineers.
How can I configure notification parameters in the program?
For version 11.5:
- Click on the Doctor Web icon in the system tray (in the bottom right of the screen).
- Click on the padlock icon (Administrative mode), and allow the application to be launched.
- Click on the gear icon (Settings) and then on Main → Notifications → Notification parameters. Select the type of notification you need (Threat detected, Critical, Major, Minor) as well as the notification method (email, screen).
It is strongly recommended that you do not disable notifications for these levels: Threat detected, Critical, Major.
For version 12
- Click on the Doctor Web icon in the system tray (in the bottom right of the screen).
- Select the Control Center, click on the padlock icon (Administrative mode), and allow the application to be launched.
- Click the gear icon (Settings) and then on Main → Notifications → Notification parameters. Select the type of notification you need (Threat detected, Critical, Major, Minor) as well as the notification method (email, screen).
It is strongly recommended that you do not disable notifications for these levels: Threat detected, Critical, Major.
Account
How can I create a Dr.Web account on my Android device?
Dr.Web Security Space for Android version 12 has a new feature that lets you password-protect your Dr.Web account and the configuration of Anti-theft and Parental Control. Setting a password for your Dr.Web account ensures that outsiders can’t tamper with important anti-virus and system settings.
If you’re a Dr.Web user, when you upgrade to version 12, an account will automatically be created for you provided you enabled the Anti-theft component before the upgrade.
If you’ve downloaded Dr.Web version 12 for the first time, create an account so that you can set a password for accessing Dr.Web’s settings.
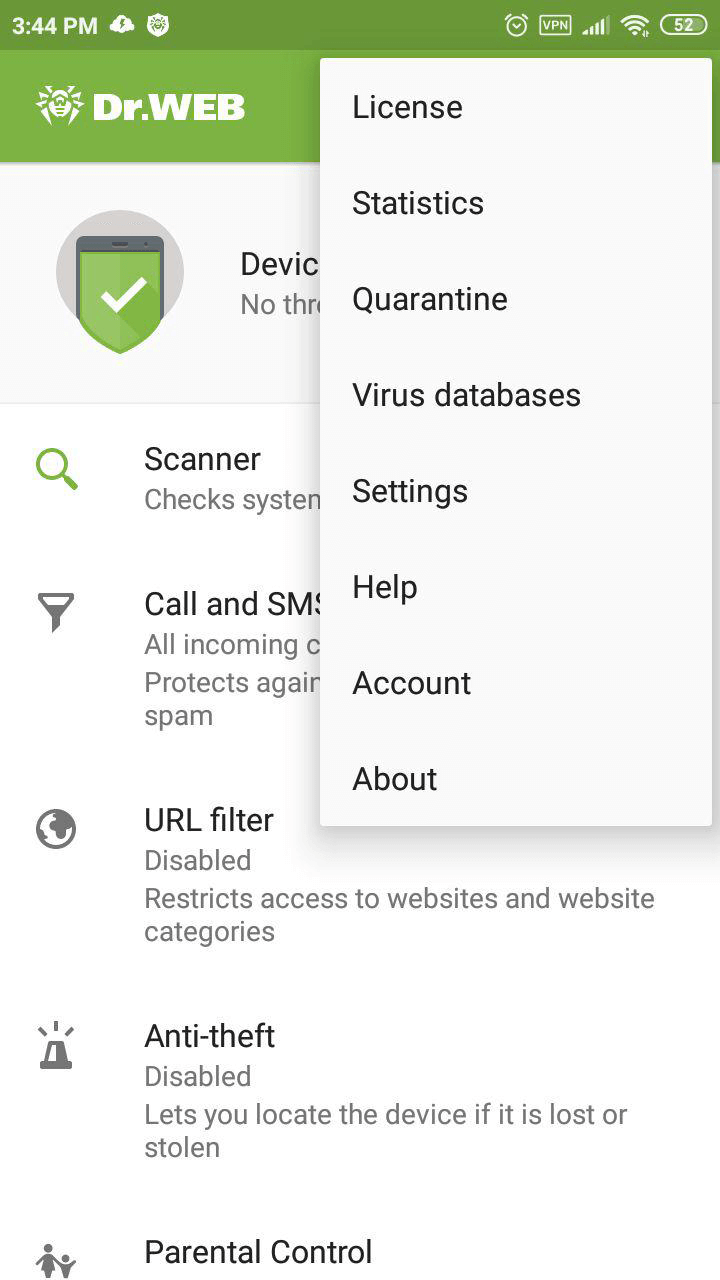
In the top-right corner of the main application window, click on the Menu ![]() icon.
icon.
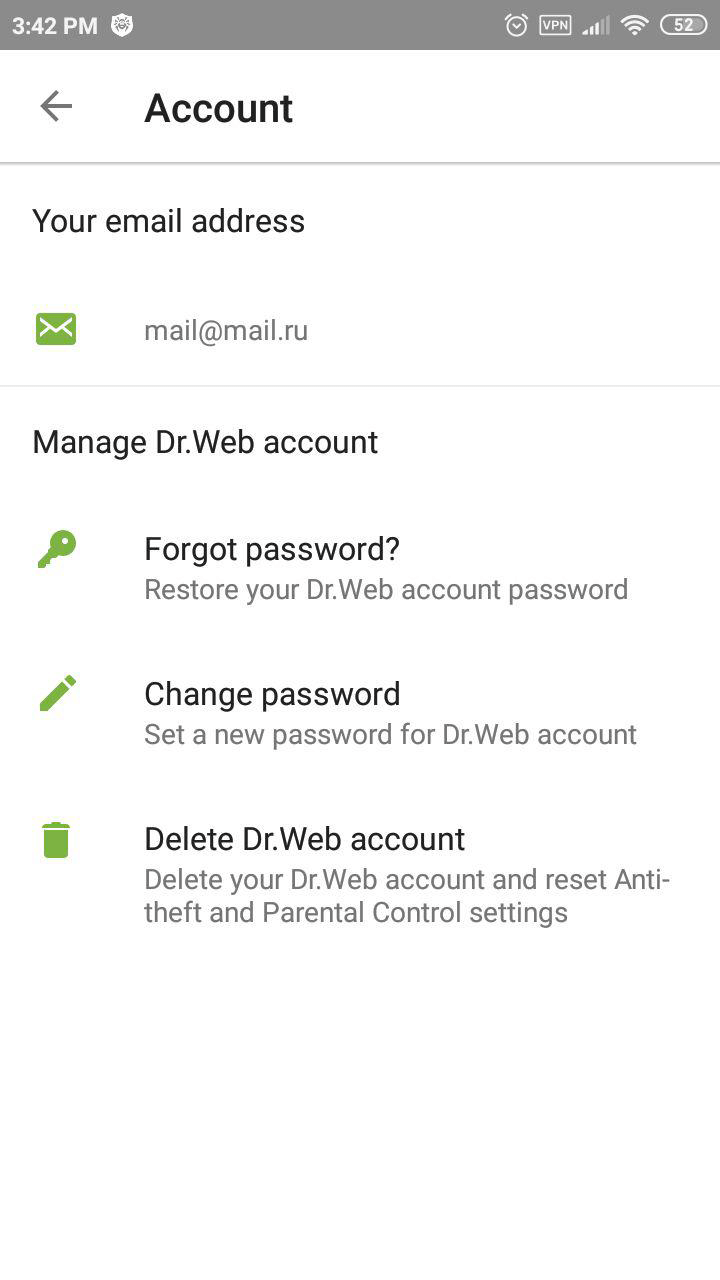
Select Account.
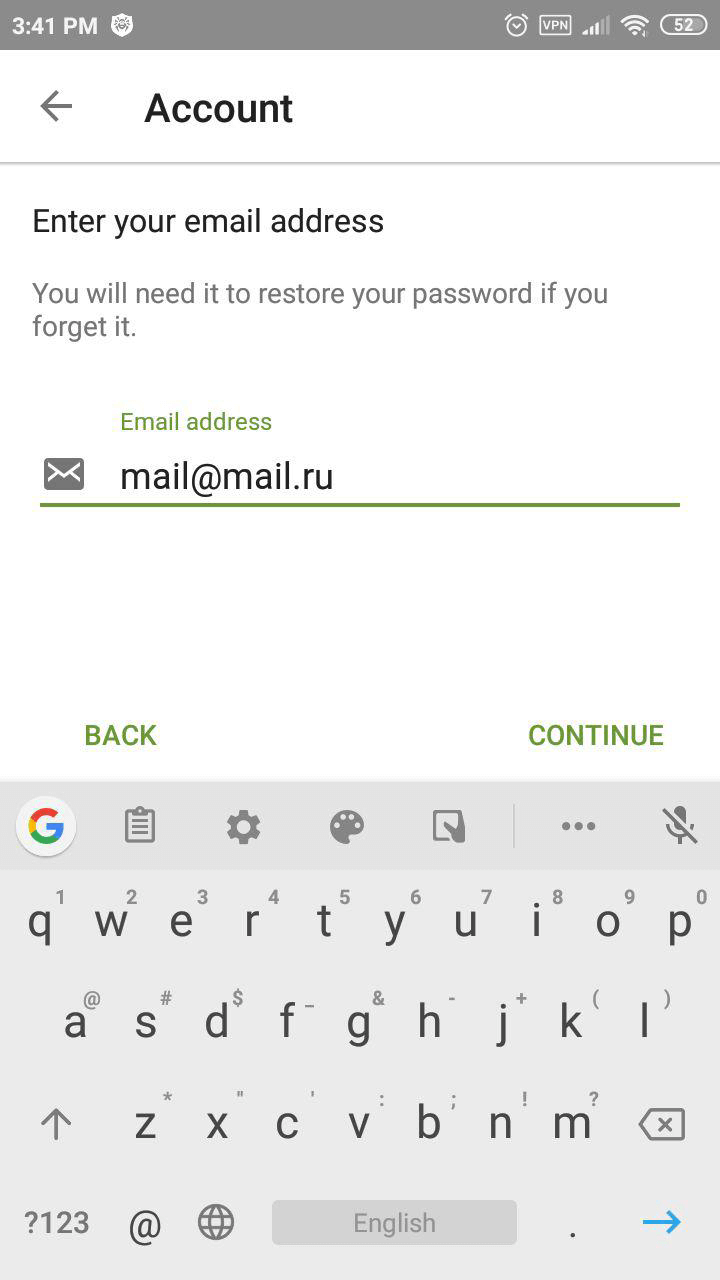

Specify a valid email address. Click on Continue.
Specify an account password. It must consist of at least 4 characters.
Cybercriminals almost instantly hack passwords containing fewer than 8 characters.
Re-enter the password, and click on Continue.
You will see confirmation that you have created an account. Click on Continue.
This same password will work both to protect the settings of certain Dr.Web components and to permit access to other applications installed on the device if the Parental Control blocks access to them.
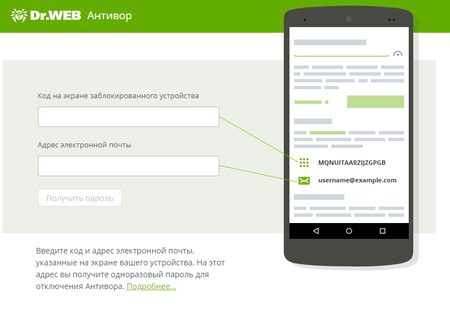
What is the online anti-theft unlock service for Android devices?
The service is available at https://acs.drweb.com.
-
In the appropriate fields, enter the code displayed on the screen of your locked device and the email address you used to register Dr.Web Anti-theft on www.drweb.com.
-
Press the Get password button. A special code that you can use to unlock the device and disable Dr.Web Anti-theft will be sent to the email address you specified.
Enter the code you receive in the Enter password field on the screen of your locked device. The device will be unlocked and Dr.Web Anti-theft will be disabled. To resume using Dr.Web Anti-theft, you need to enable and configure it again.

How can I recover my Dr.Web account password via SMS?
Ask your friend from the Buddies list you created when you configured Dr.Web Anti-theft to send your mobile phone an SMS message containing the text #RESETPASSWORD#.

When you receive the SMS with the command, the password reset will occur automatically. If your mobile phone is not blocked, you will see the Change password screen, where you can set a new password.
If your device was blocked, it will be unblocked.
All SMS commands for remotely controlling Dr.Web Anti-theft
How can I recover my Dr.Web account password via email?
Click on Forgot your password? on any screen that prompts you to enter your password. Read the instructions.
Open the Dr.Web account page https://acs.drweb.com and enter the key and email address you specified in the Forgot your password? window.
If the code is entered correctly, you will see this window.
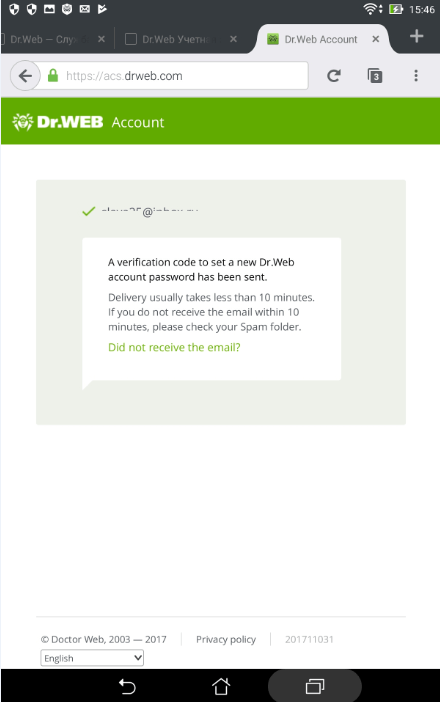
Check your incoming messages—you will receive an email containing a confirmation code.
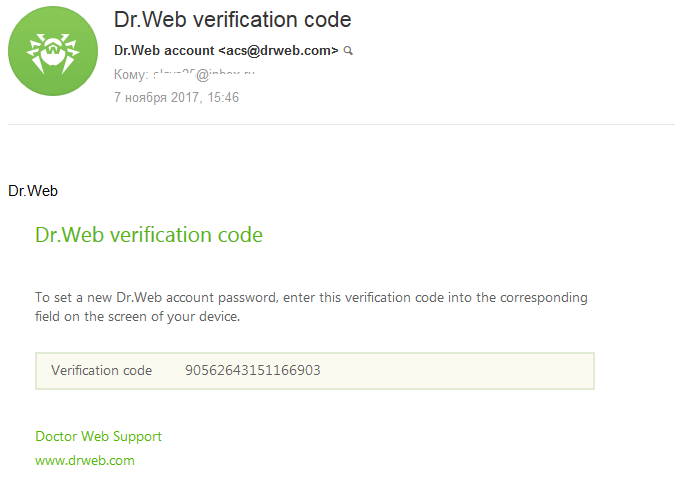
Enter this code in the Forgot your password? window, and click on Next.
Create a new password and remember it.
If you did not receive the email, click on the line Did not receive the email?, and you will automatically be redirected to the Doctor Web technical support page.
How can I recover my Dr.Web account password via the technical support service?
If you failed to unlock the Anti-theft via the anti-theft unlock service or using SMS commands, submit a written request to the technical support service.
The technical support specialists DO NOT provide the anti-theft unlock service by phone.
Due to the features of anti-theft, which task is to prevent unauthorised access of other persons to the device management, the unlock service is provided only to device owners. When requesting, you will need to verify that you are the owner of the device.
In the support request:
- Specify the device IMEI (the unique identifier for your device; typically, this is 15-digit number written in decimal digits. To see it, type in the phone * # 06 #).
-
Attach to your request:
- the corresponding receipt and a photo of the filled out warranty certificate (if you have your device's box/packaging and it features a readable IMEI, attach a photo of the box to your request);
- proof of purchase of your Dr.Web license (an email from the eStore, a scanned copy of the payment document, or other). If you won your license during a Dr.Web auction—specify your Doctor Web account login. If you are using a trial version, please ignore this subitem.
- a screenshot of the lock screen (specifying the email address or Google account that has been used to register the anti-theft) displaying the code while tapping "Forgot your password?"
How can I delete my Dr.Web account on my Android device?
If you no longer have access to the email you used to register your account, you will need to remove your old account and create a new one.
If you no longer have access to the email you used to register your account, you will need to remove your old account and create a new one.
Select Account.
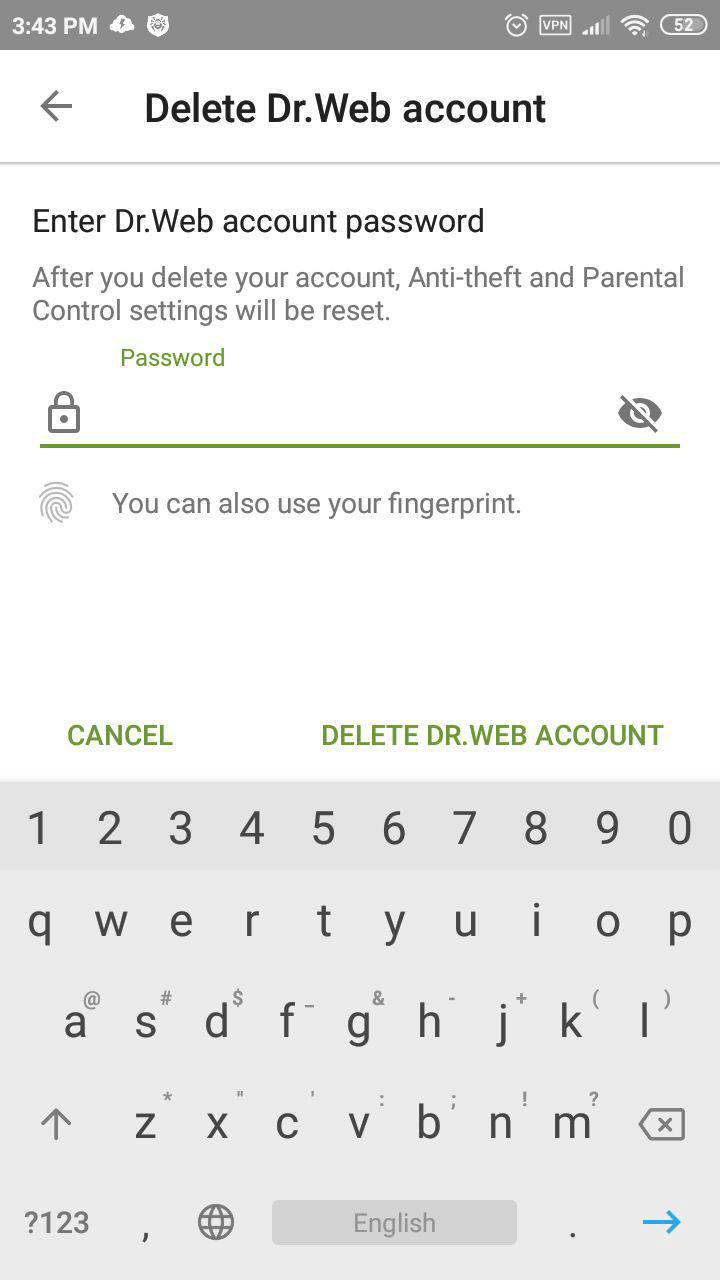
Click on Delete account.
Delete account Delete account.
When an account is deleted, the Anti-theft and Parental Control settings will reset—you will need to reconfigure them.
Parental Control
How can I enable Parental Control on my Android device?
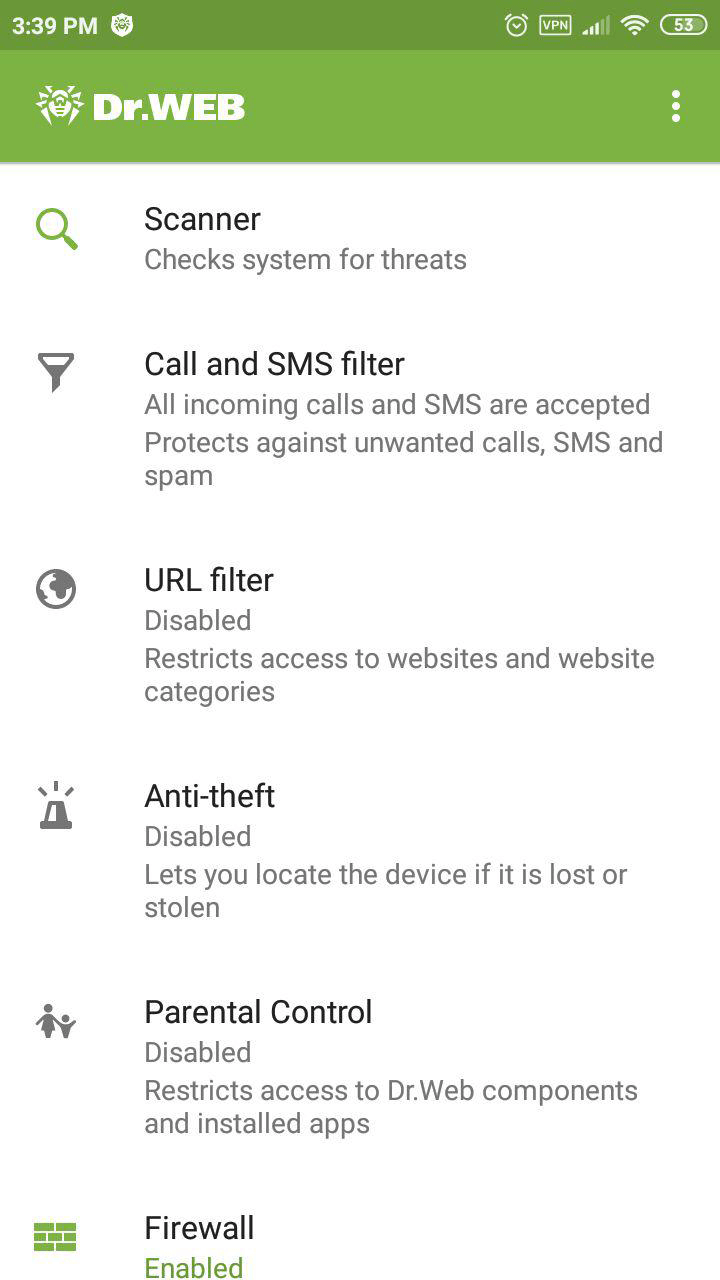
Dr.Web for Android Parental Control will protect applications from unauthorised access and anti-virus settings from tampering by outsiders or children. But first Dr.Web Parental Control must be enabled.
Select Parental Control in the Dr.Web menu.
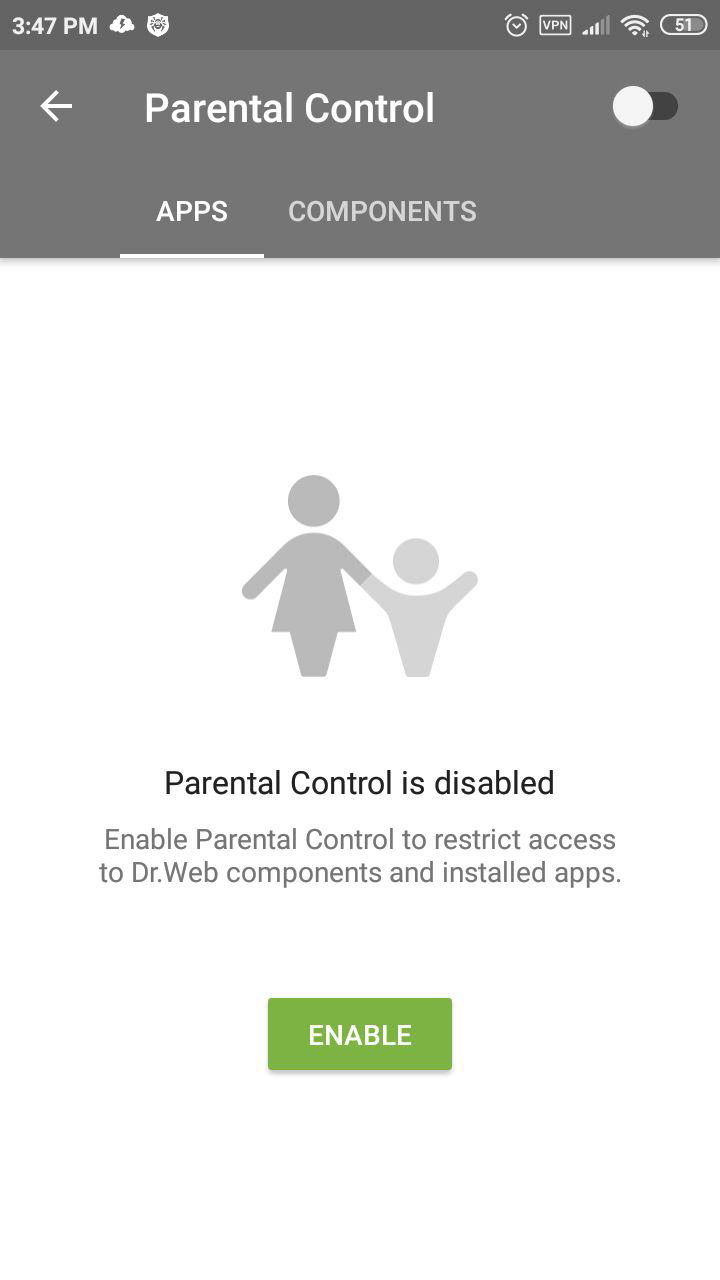
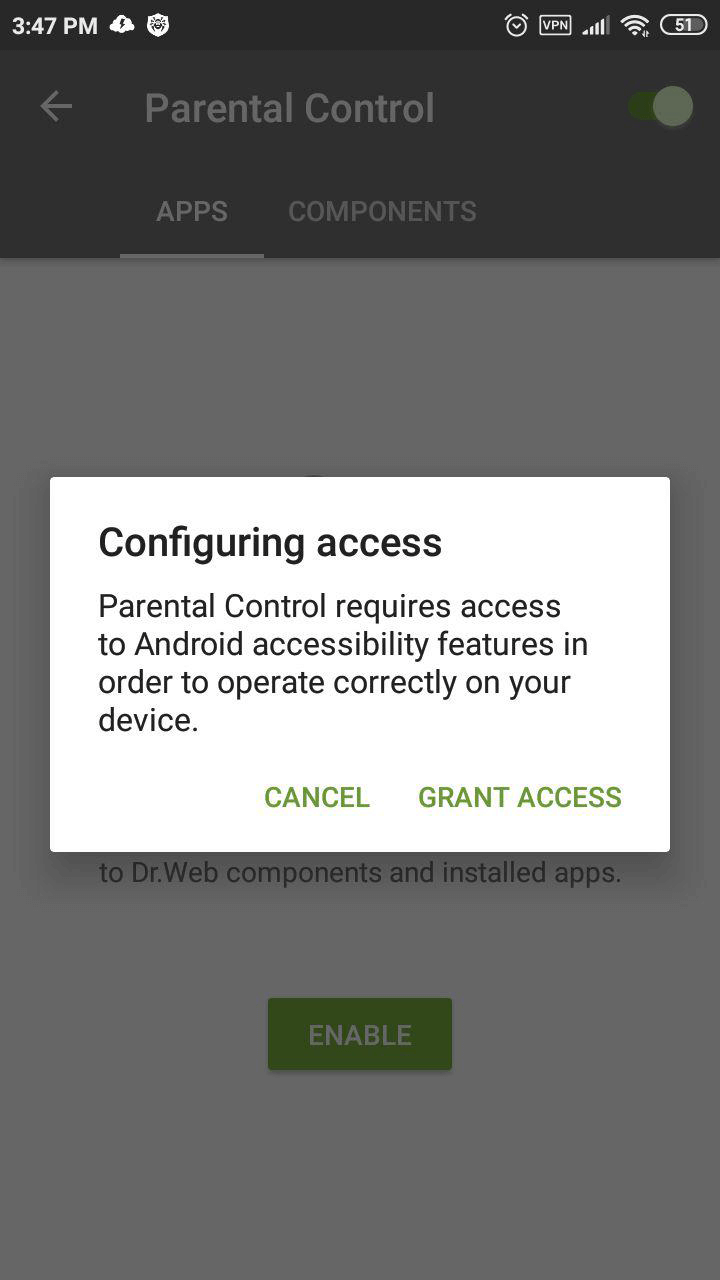
Click on the Enable button or on the switch in the upper-right corner of the window.
Grant Parental Control access to Android’s special features by clicking on Grant access.
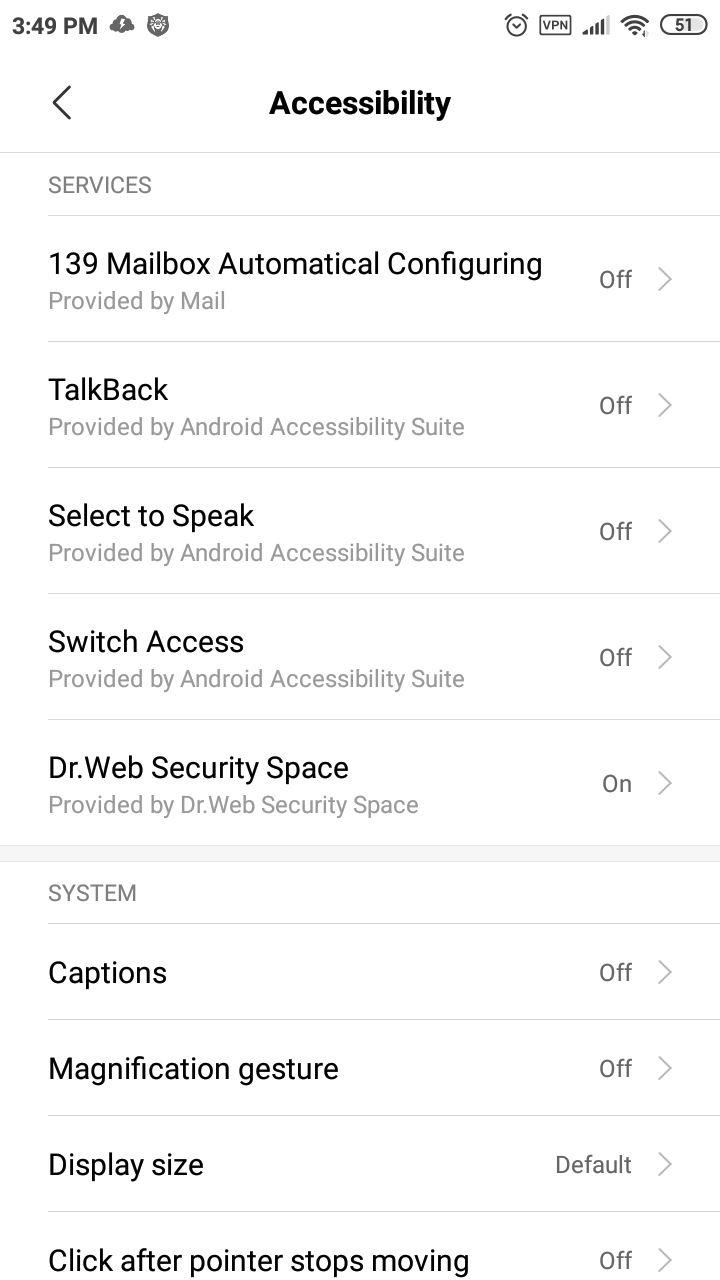
In the Special features settings window, click on the Dr.Web Security Space button.
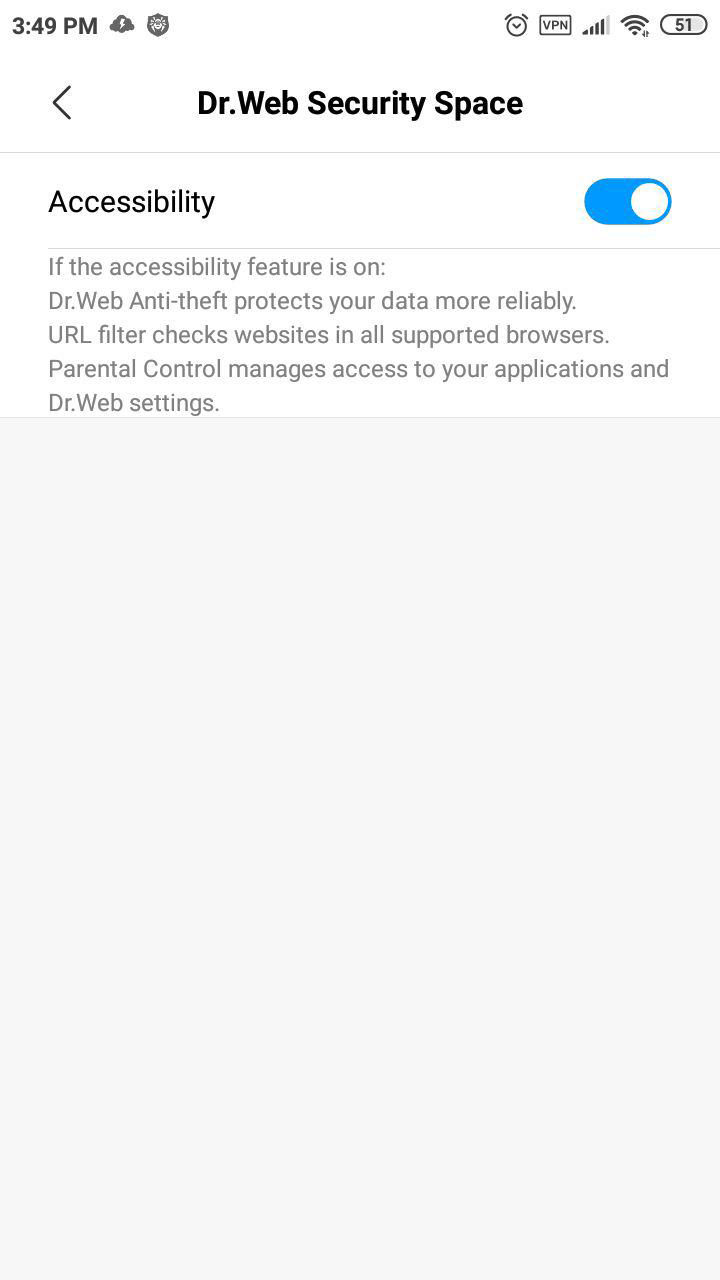
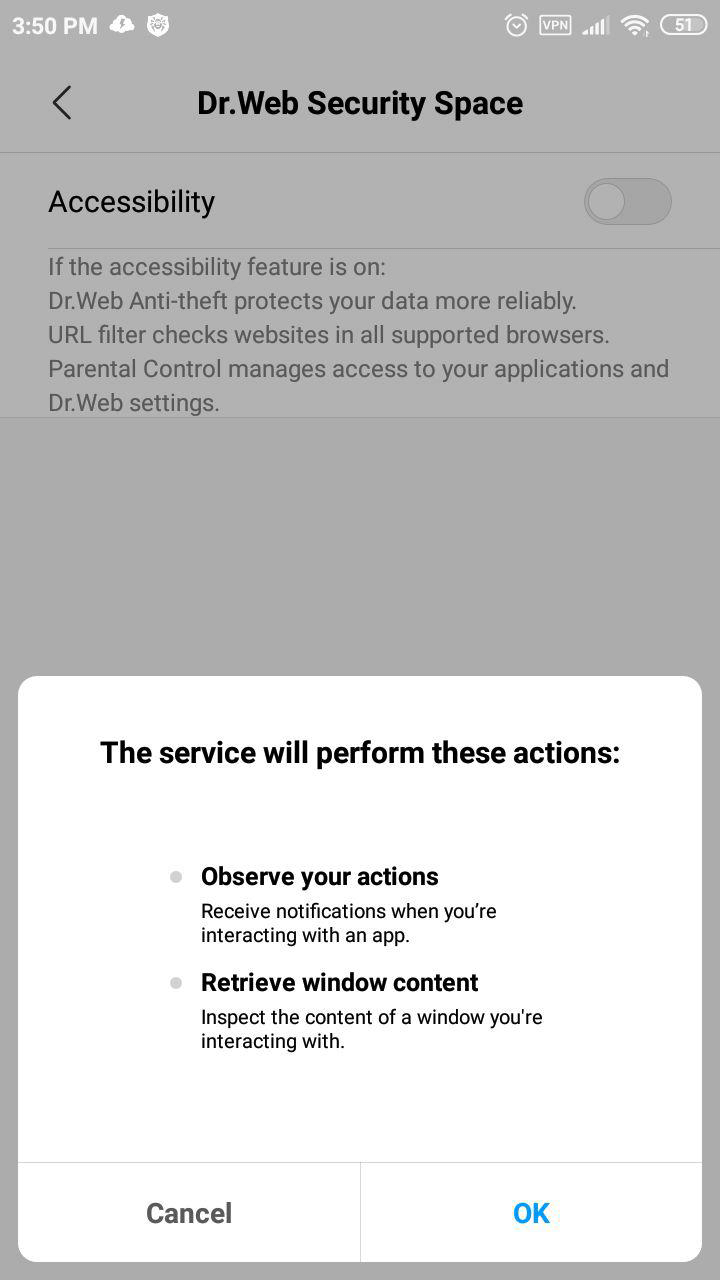
Use the switch to enable Android’s special features.
Close the configuration window for special features.
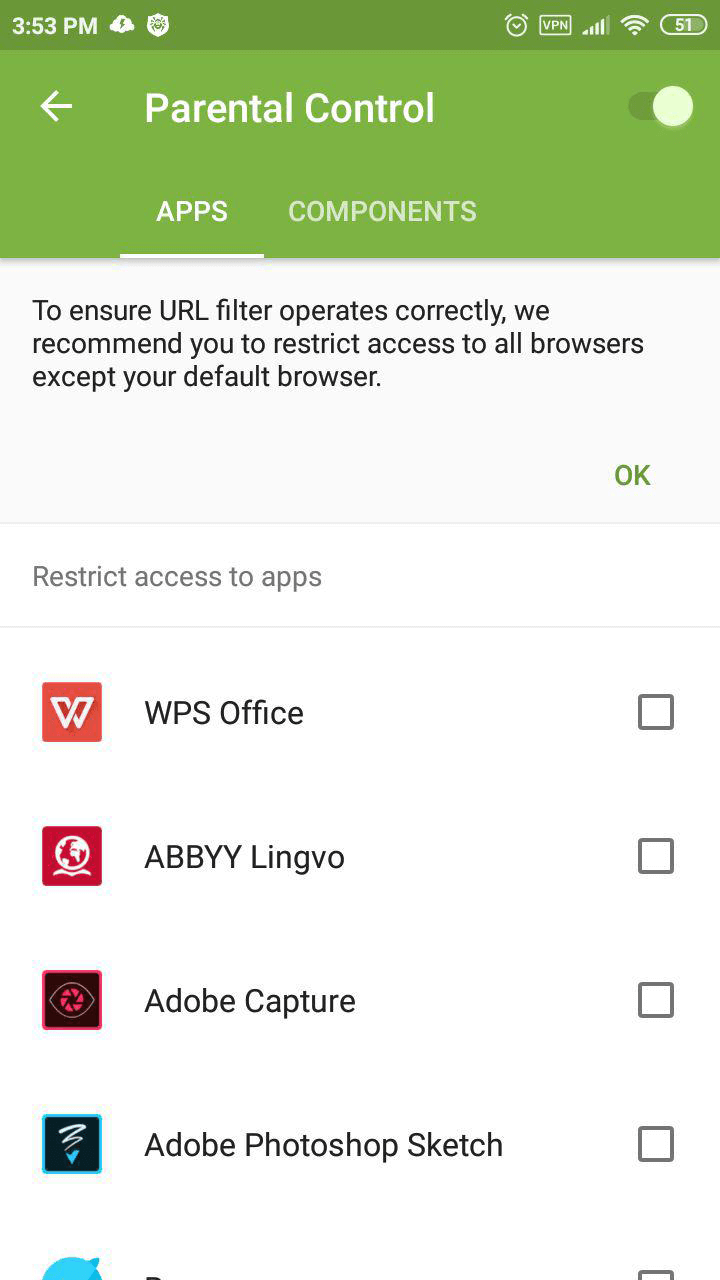
Go to the Applications tab, and select Settings — this will block unauthorised access to the system’s settings.
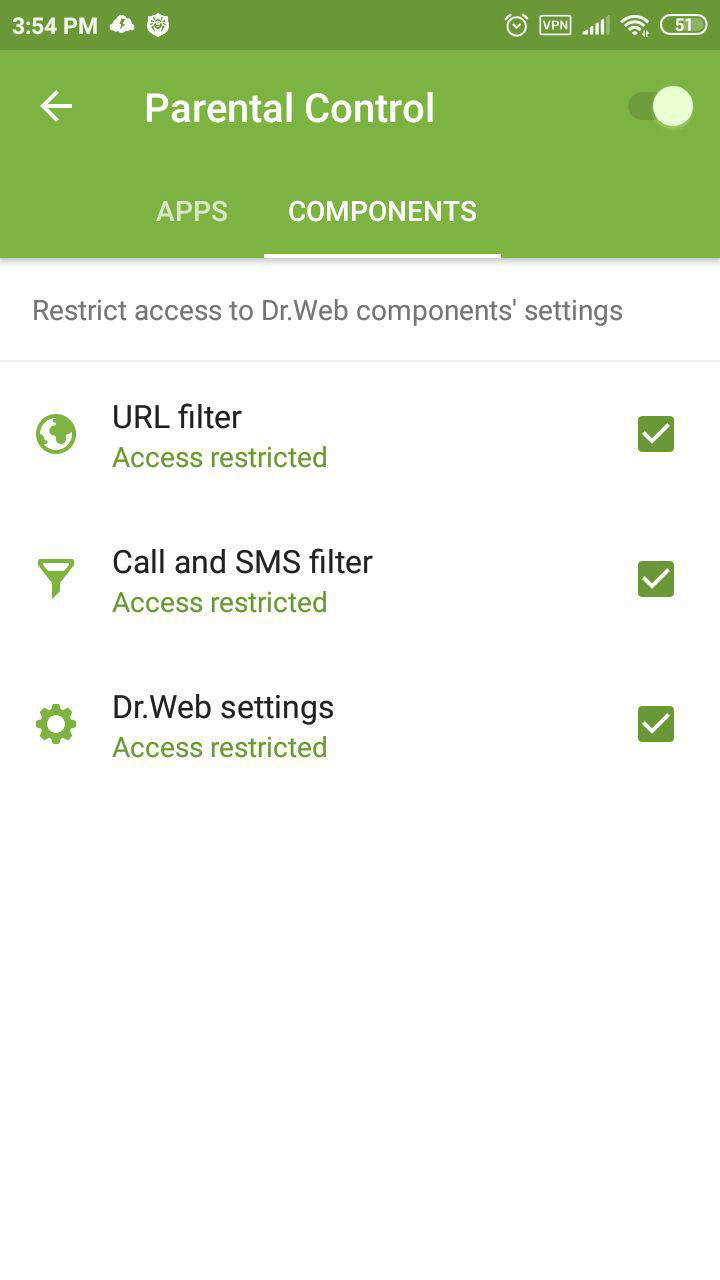
In the Components tab, select all the items—after this, a password will have to be entered to access the selected Dr.Web protection components.
How can I protect my Android device against unauthorised downloading and the use of other programs?
Dr.Web Security Space for Android can protect against both the downloading of new applications and the use of applications that have already been downloaded.
To prevent other users—your children, another family member, or outsiders—from downloading programs or using programs that have already been downloaded but have been determined by you to be harmful for them, use the special Parental Control feature to block those options.
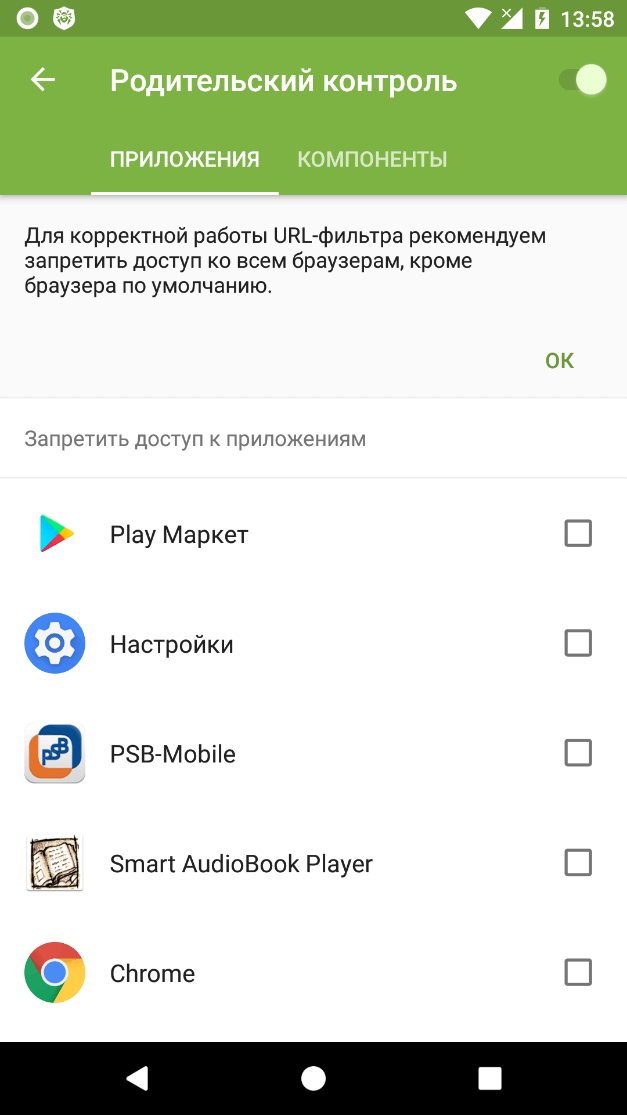
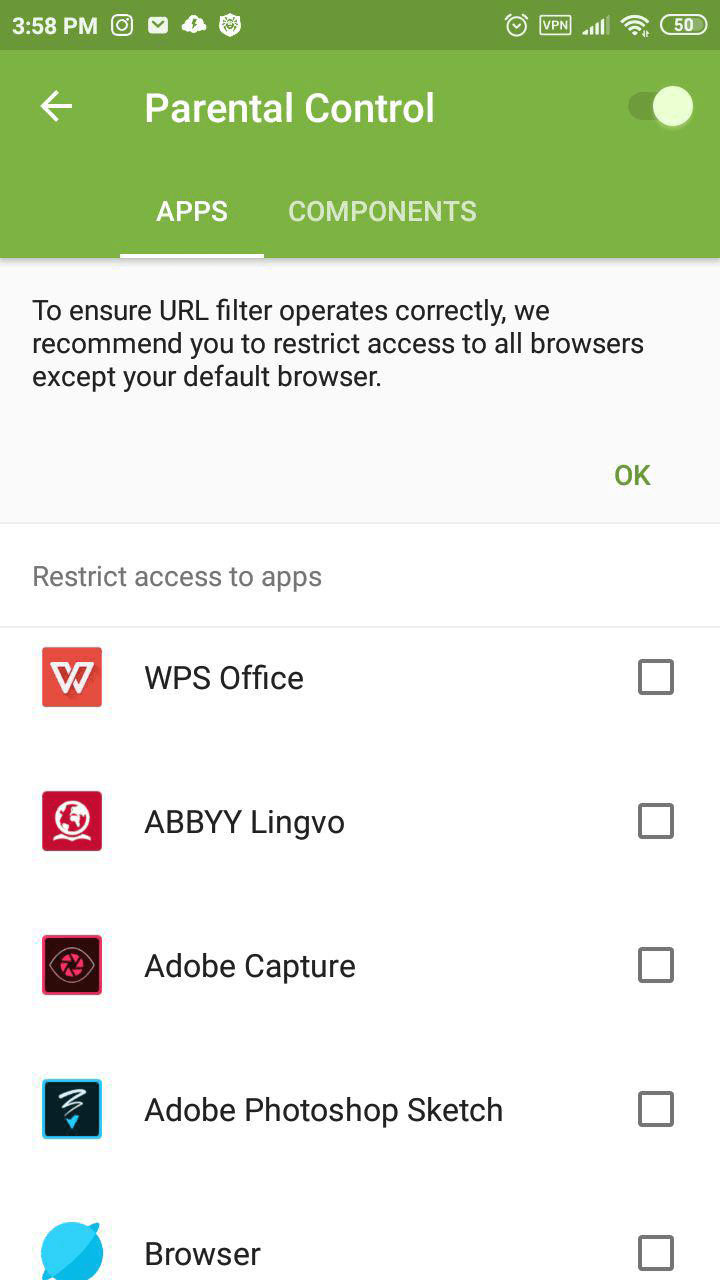
Open the Applications tab in Dr.Web Parental Control. You will see a list of all the applications installed on your device. Select the applications you want to block access to.
This is only sufficient to prevent anyone who does not know the Dr.Web account password from using already installed applications. You must also prohibit anyone from downloading new applications to your device.
Go to the Components tab of the Parental Control. Check the box next to Dr.Web settings.
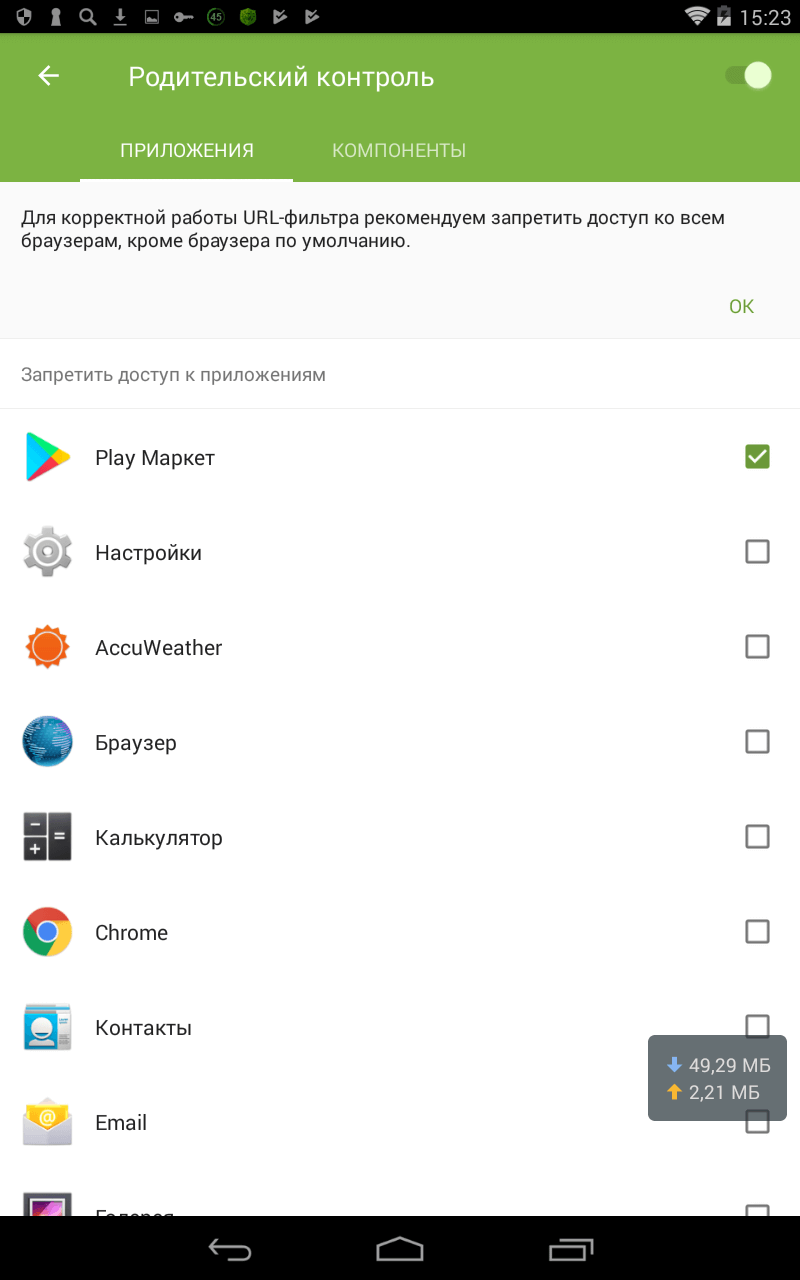
In the Components tab of the Parental Control, select Play Market.
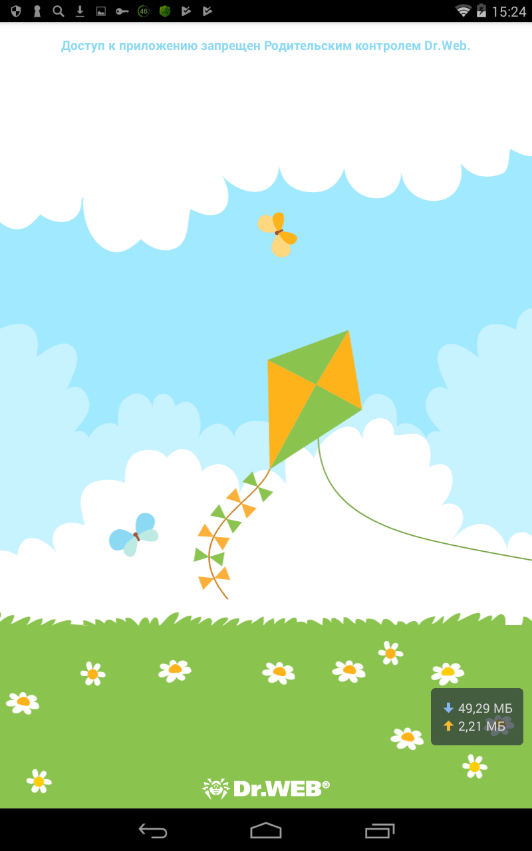
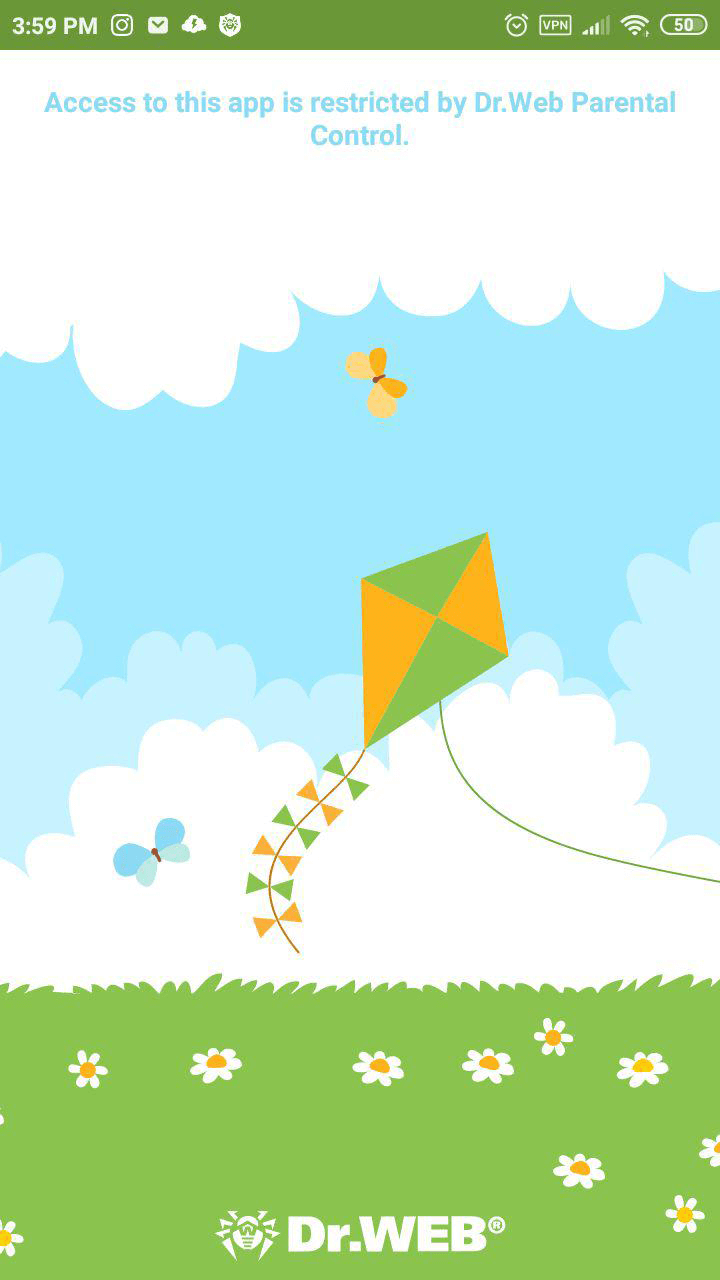
And then if anyone attempts to download a new application, this window will appear:
Why doesn’t Parental Control ask for a password before running blocked applications?
Dr.Web doesn’t block the launch of an application. It only blocks the user from accessing the application window.
URL filter
How can I configure Dr.Web URL filter on my Android device?
The URL filter in Dr.Web Security Space for Android 12 is disabled by default. We recommend that you configure it right after you install Dr.Web and that you password-protect access to it using Dr.Web Parental Control—this will prevent those close to you from visiting malicious and fraudulent websites.
In addition, you can configure website blacklists and whitelists or block access according to thematic groups of sites.
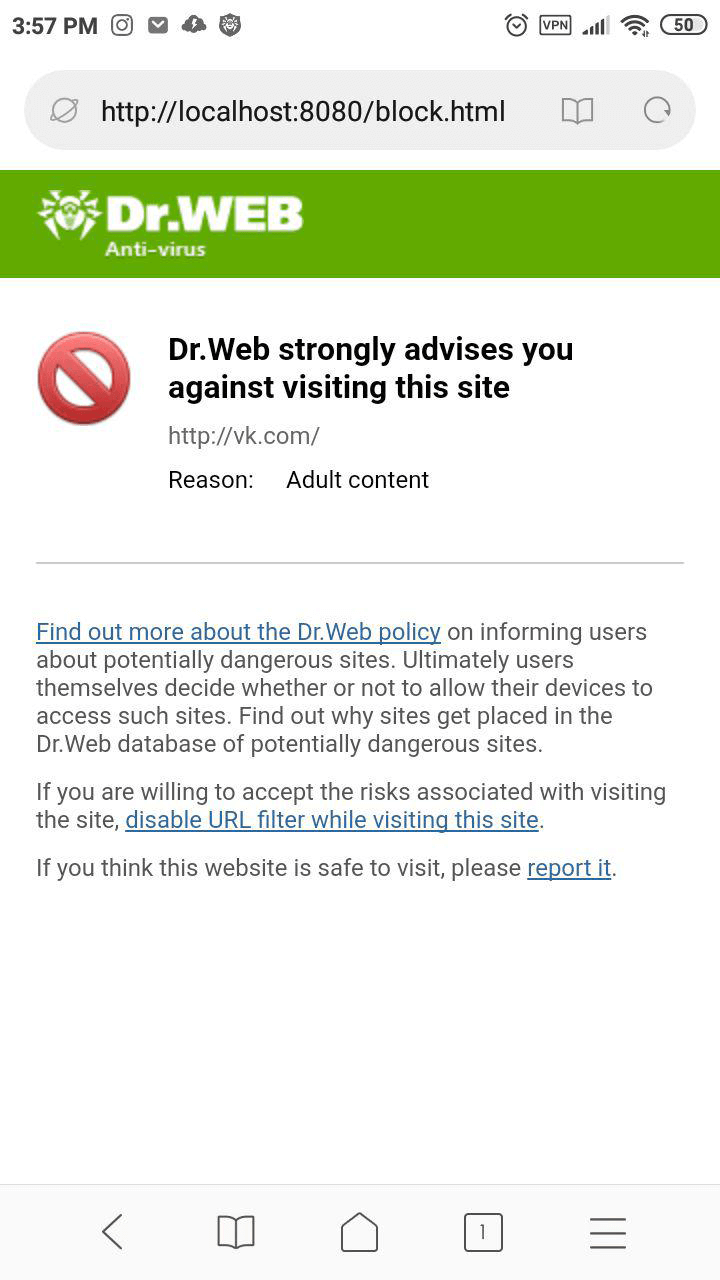
Only then will you be able to keep your children (or anyone else who has access to your device) from disabling the blocking options in the URL filter and visiting webpages you deem to be undesirable; they will be protected from fraudsters’ attempts to lure them to dangerous sites.
To prevent anybody from tampering with the settings you established for the URL filter.
In the Parental Control's Components tab, check the box next to URL filter.
When trying to open a website from the banned websites list, the user will see this window.
Learn more about the URL filter settings from our video tutorial.
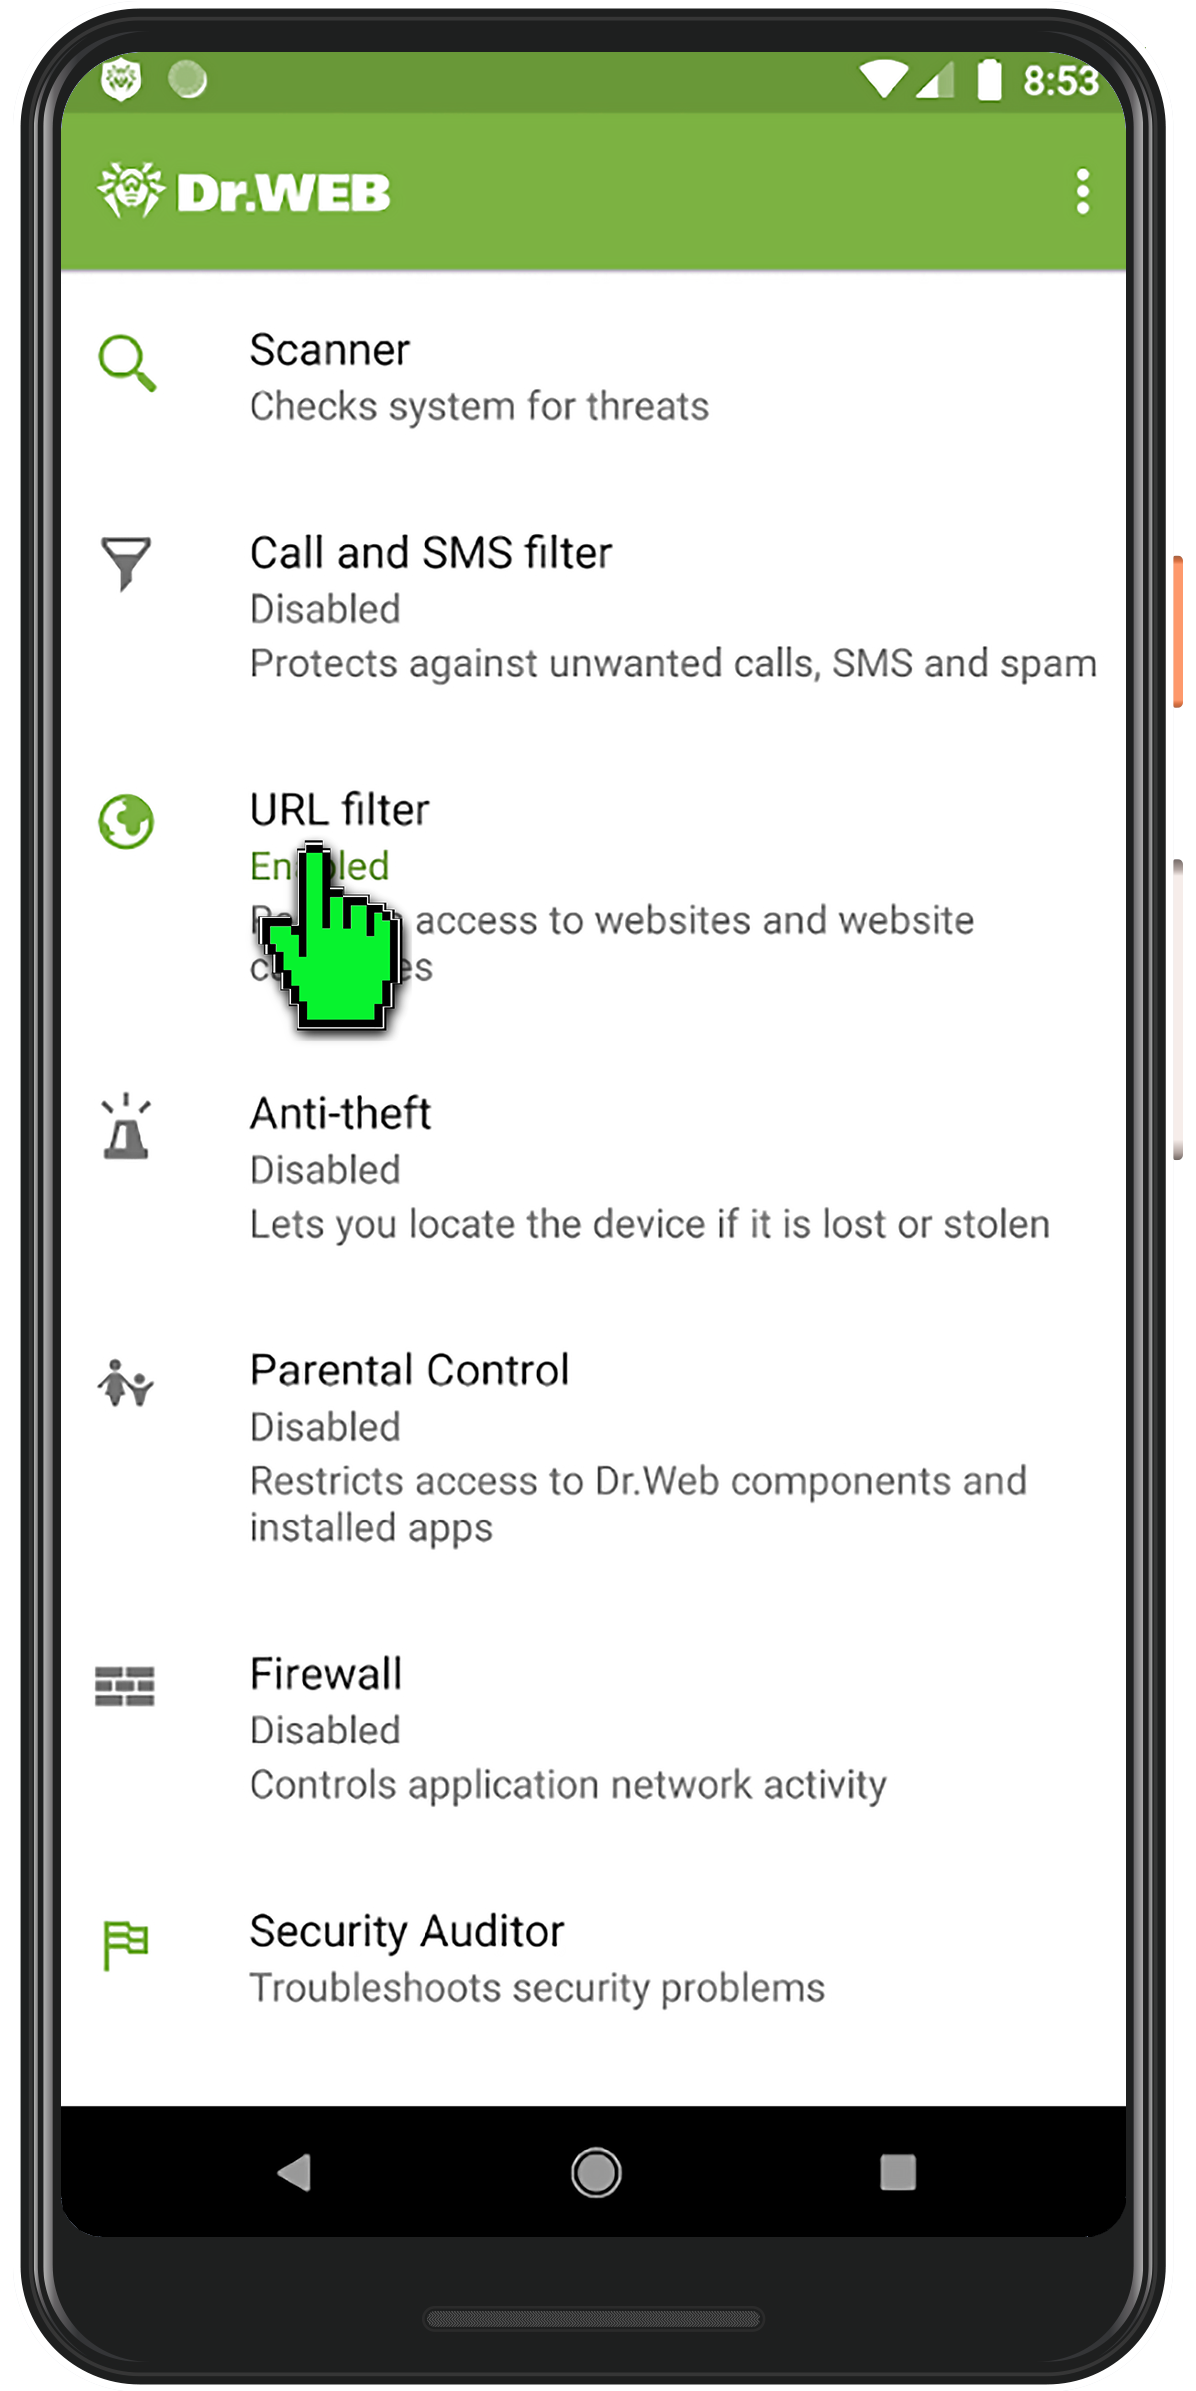
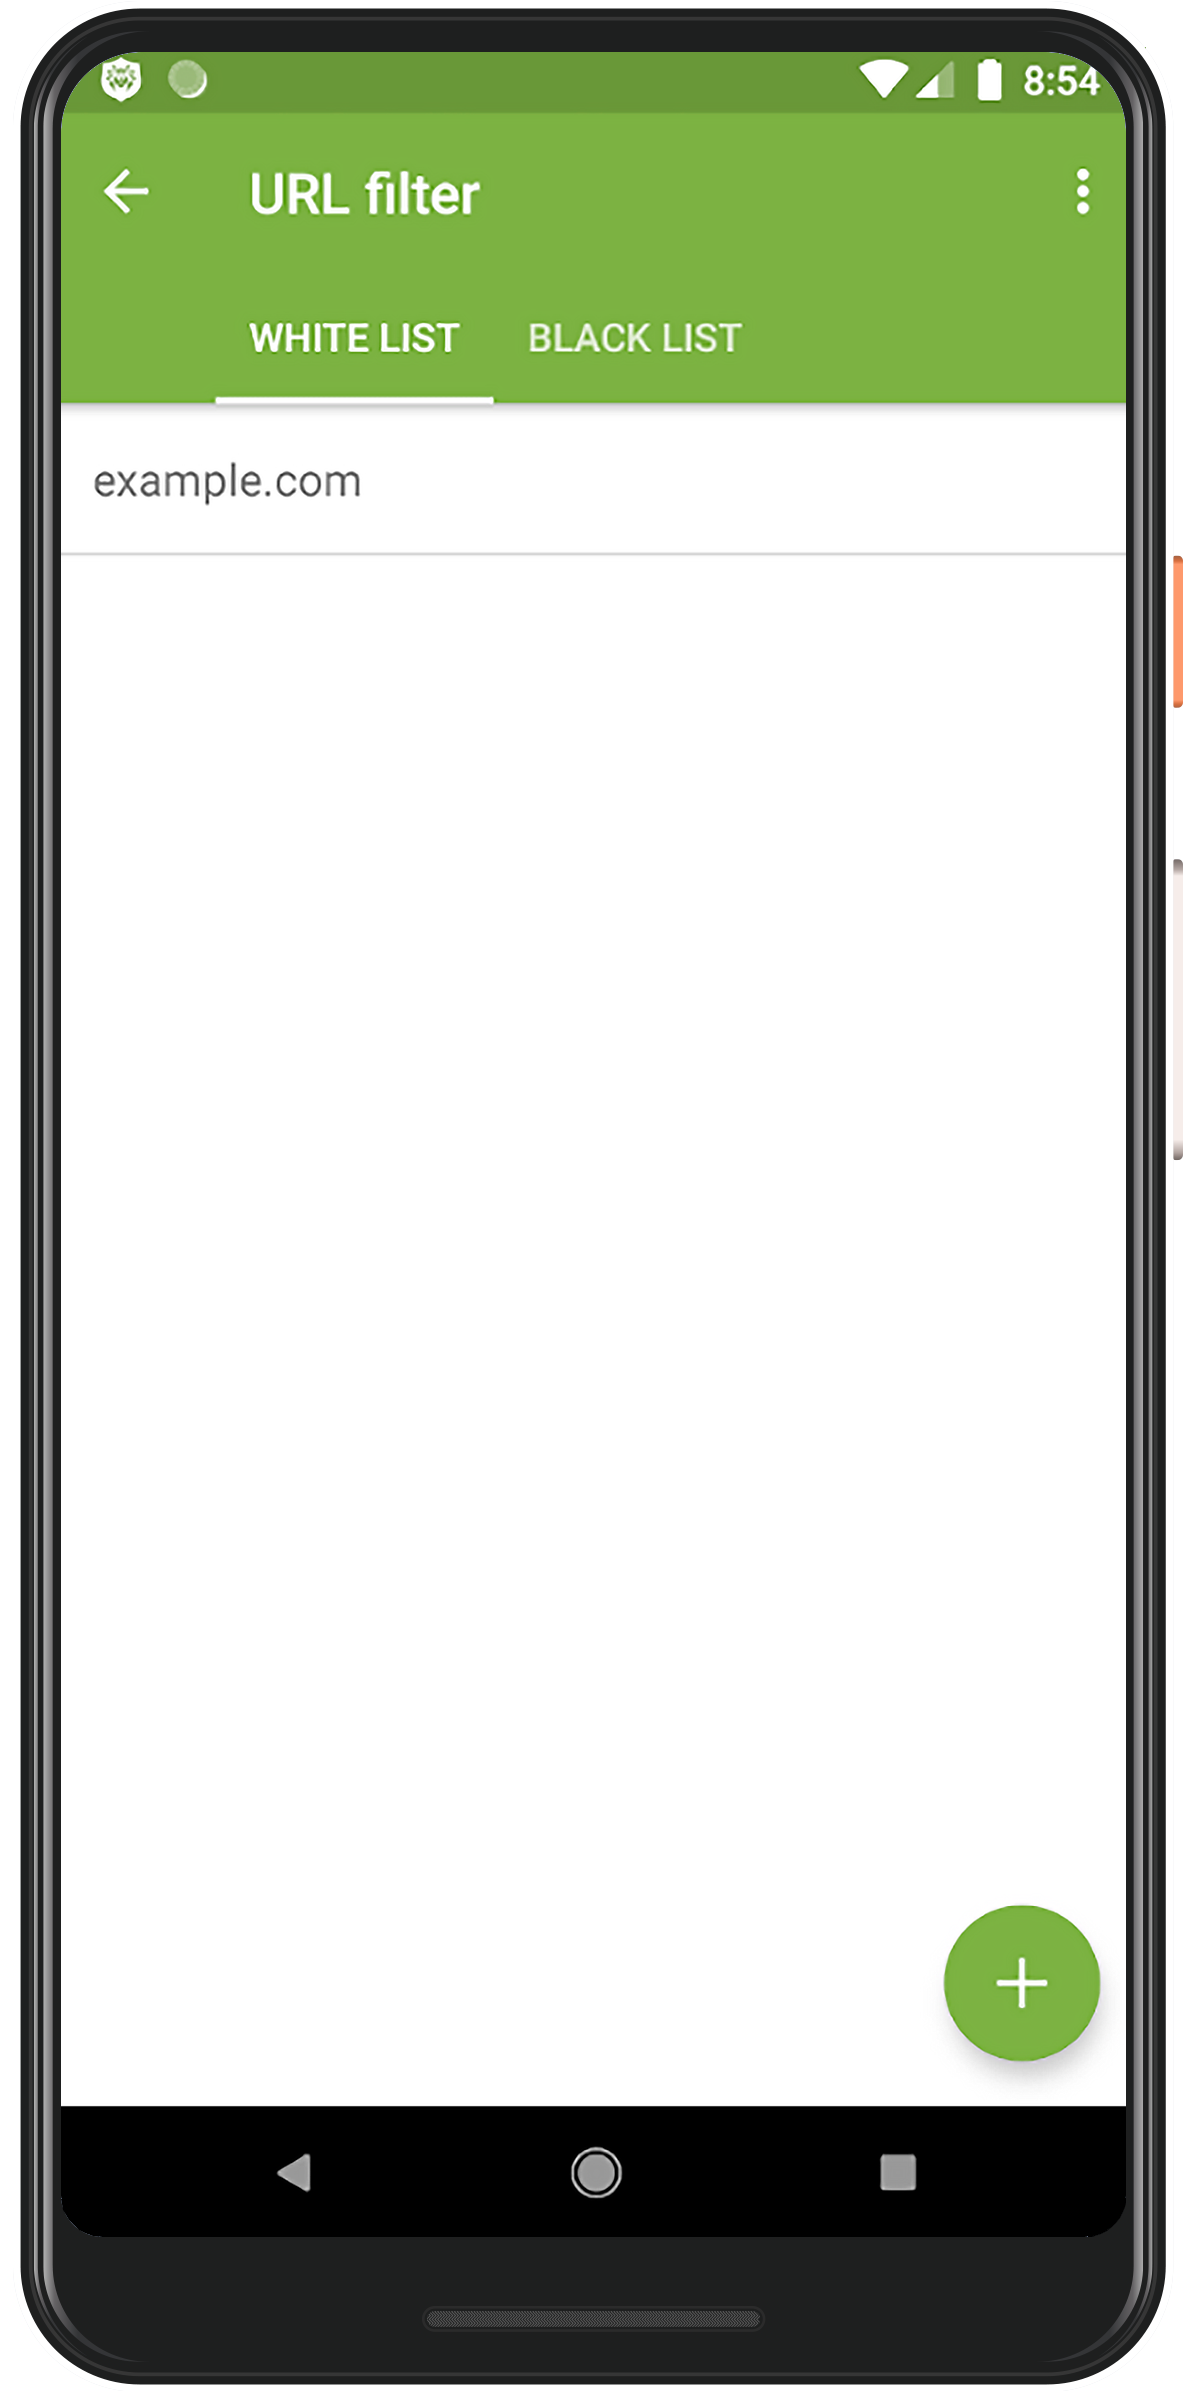
How to add a site to Dr.Web Security Space for Android’s white list
Open Dr.Web Security Space and click on the URL filter.
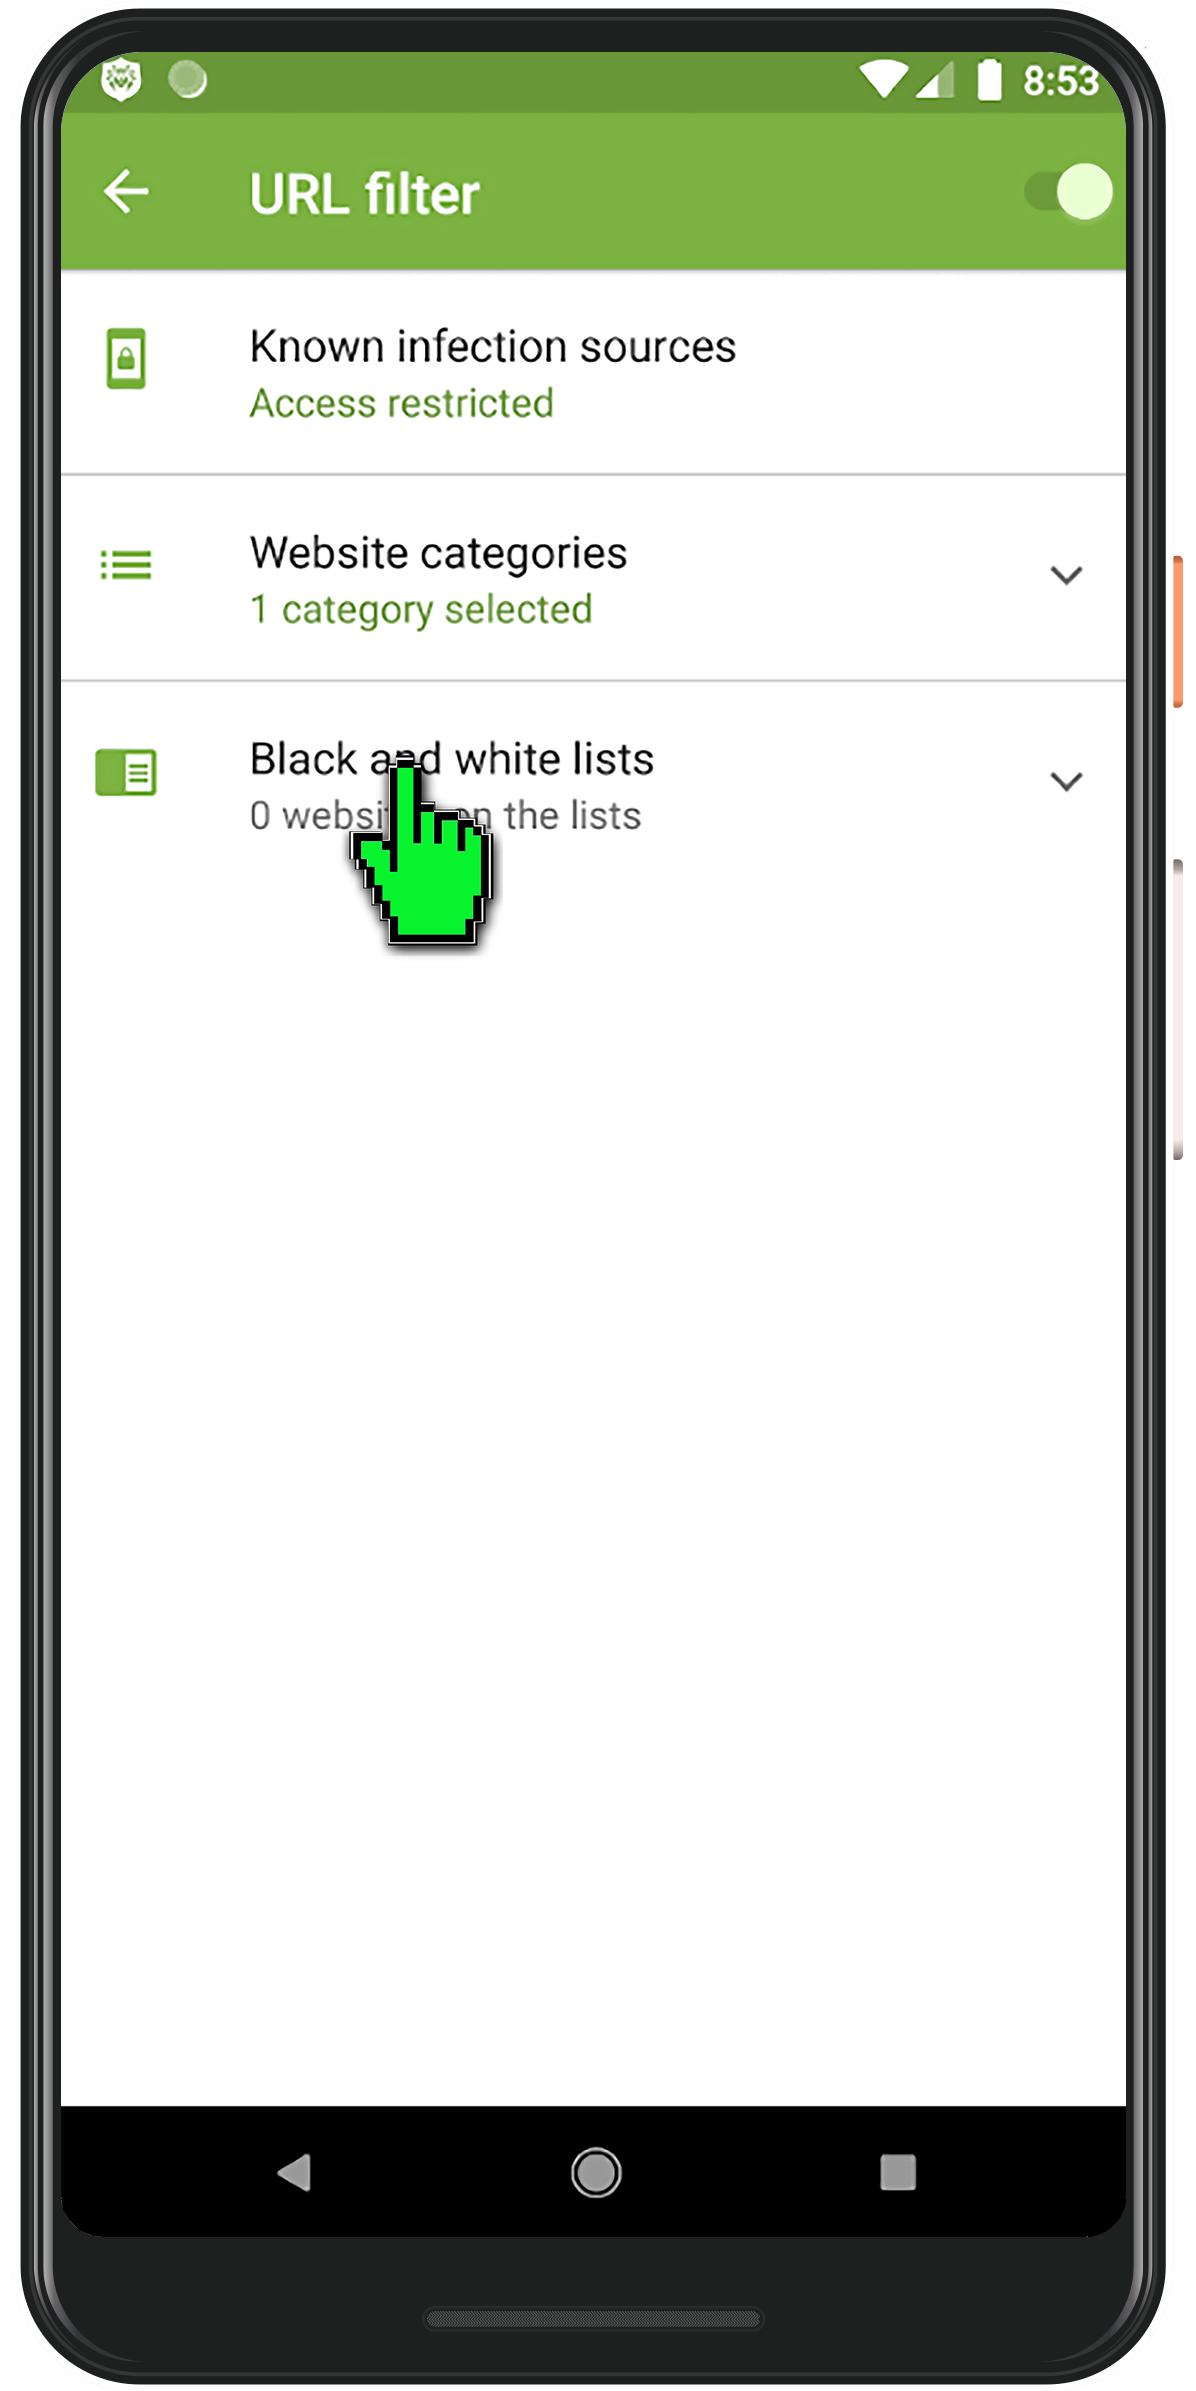
Click on the "Black and white lists" button.
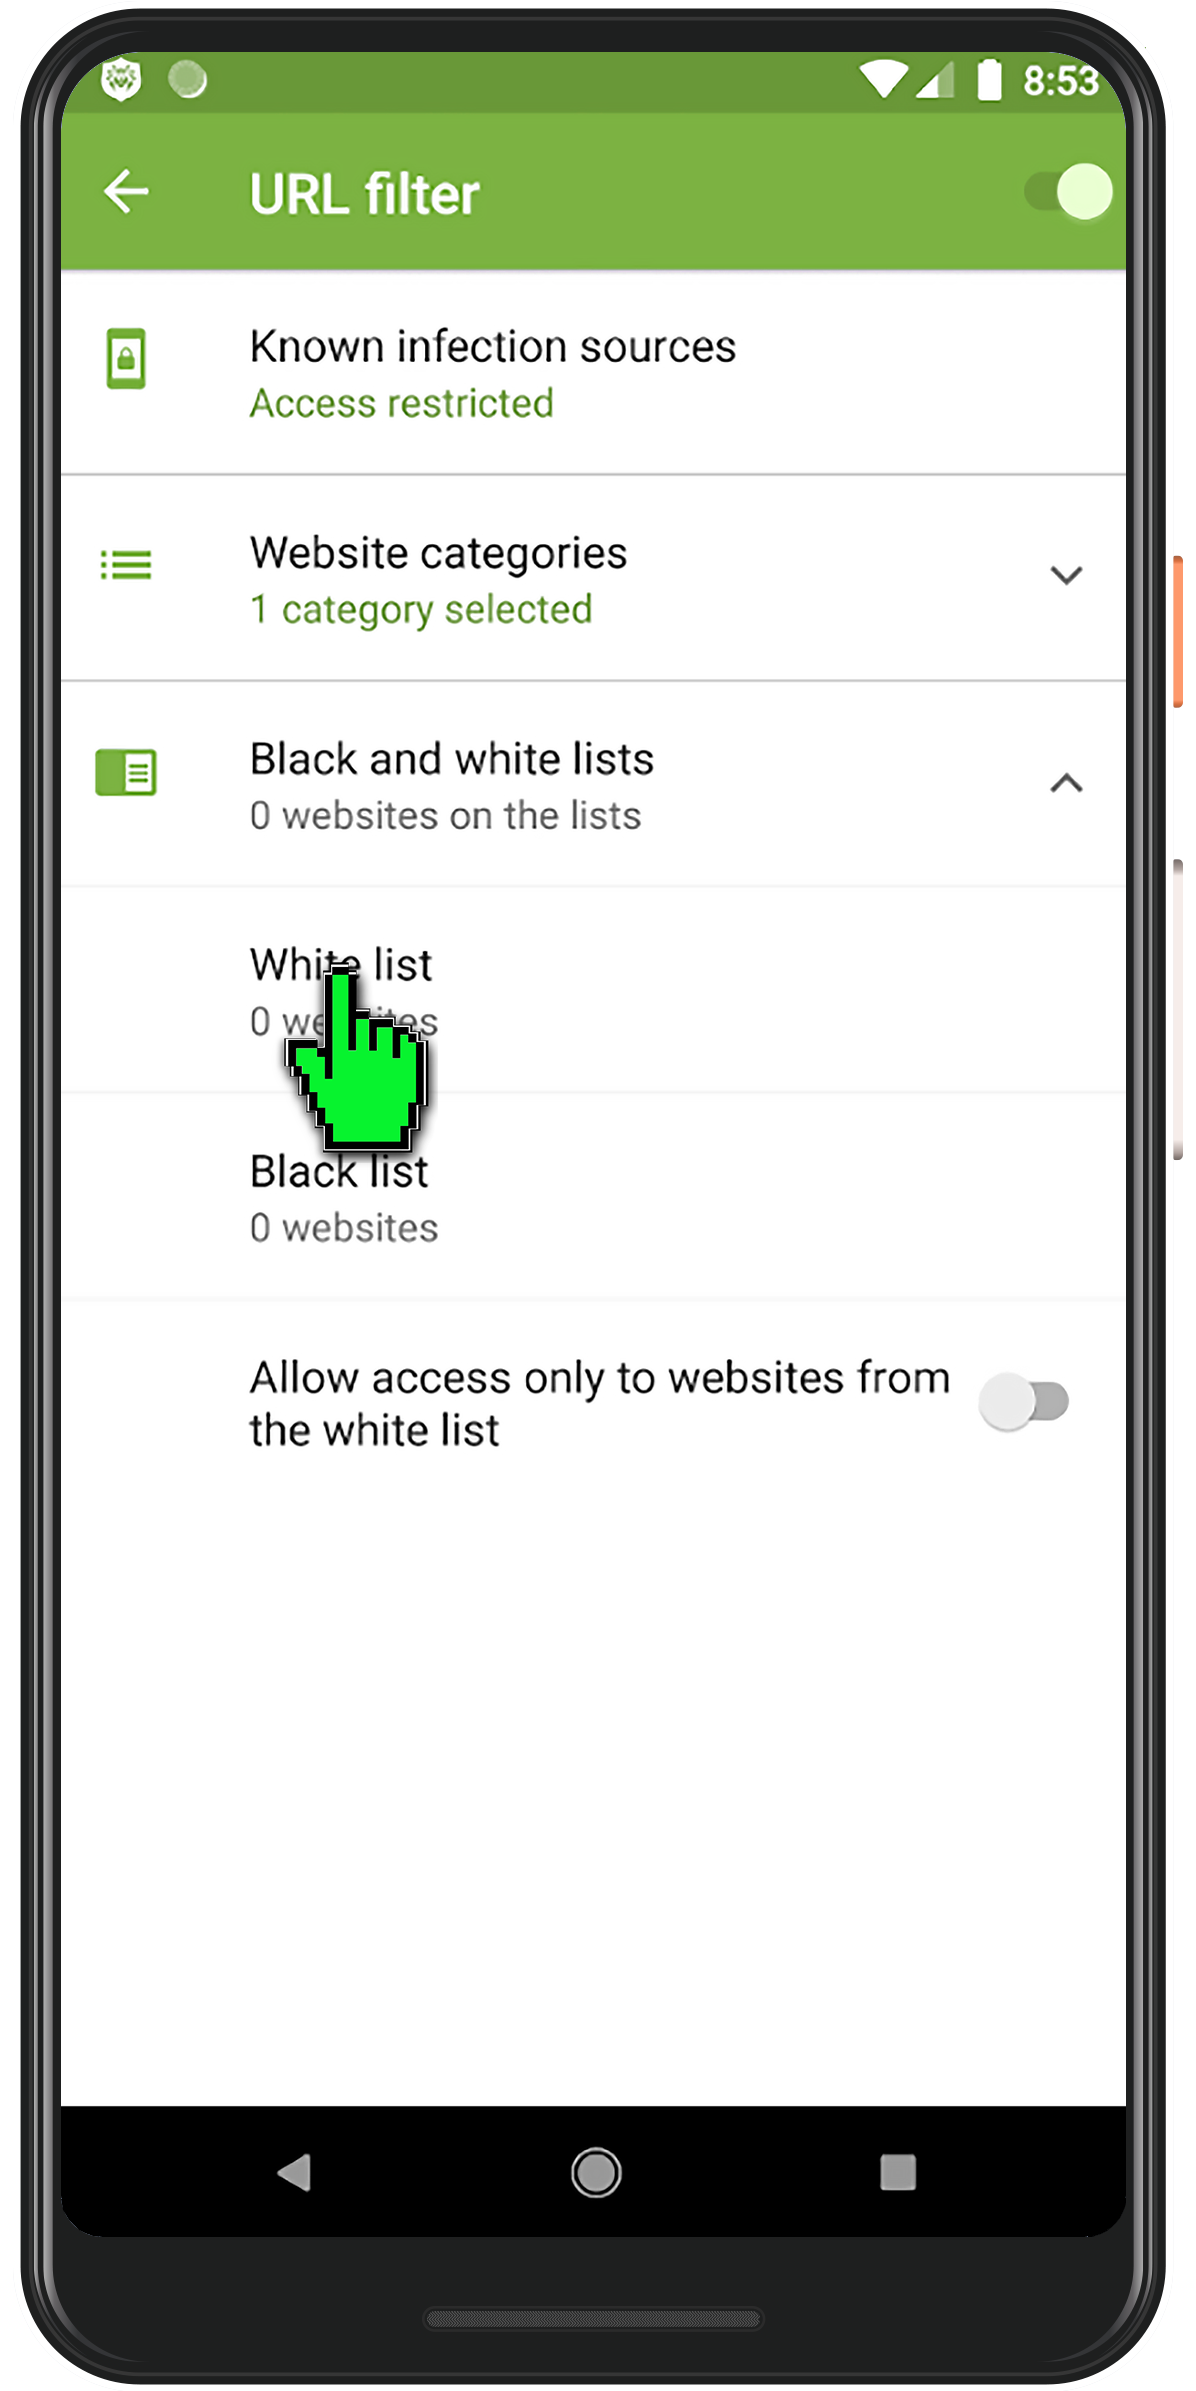
Then, click on "White list".
Click on the "+" button.
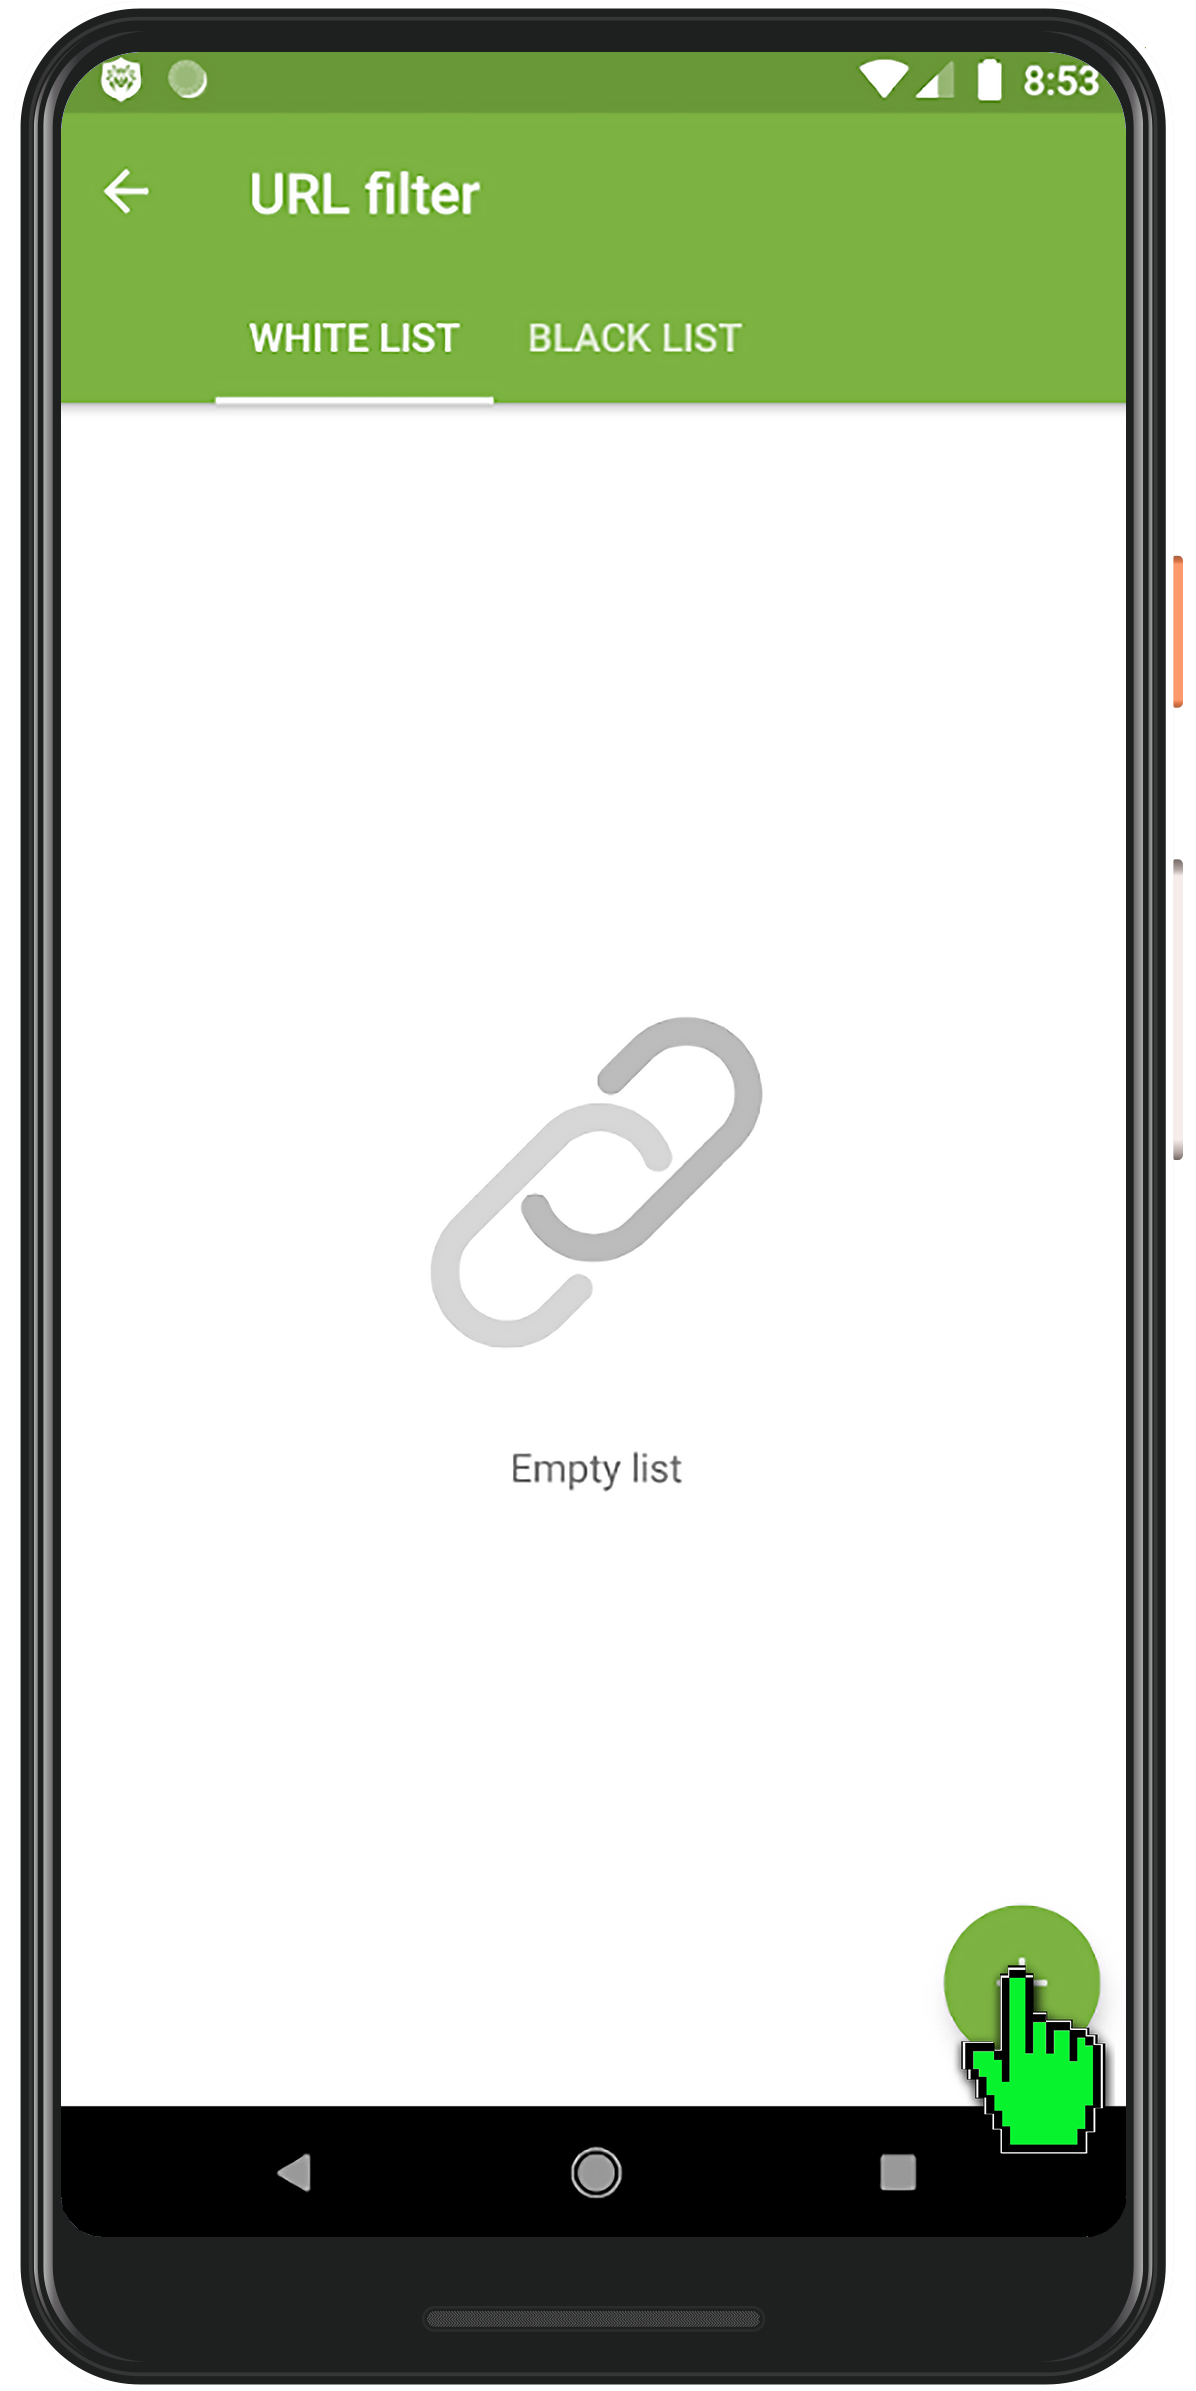
Enter the site address to which you want to allow access and click on "Add URL".
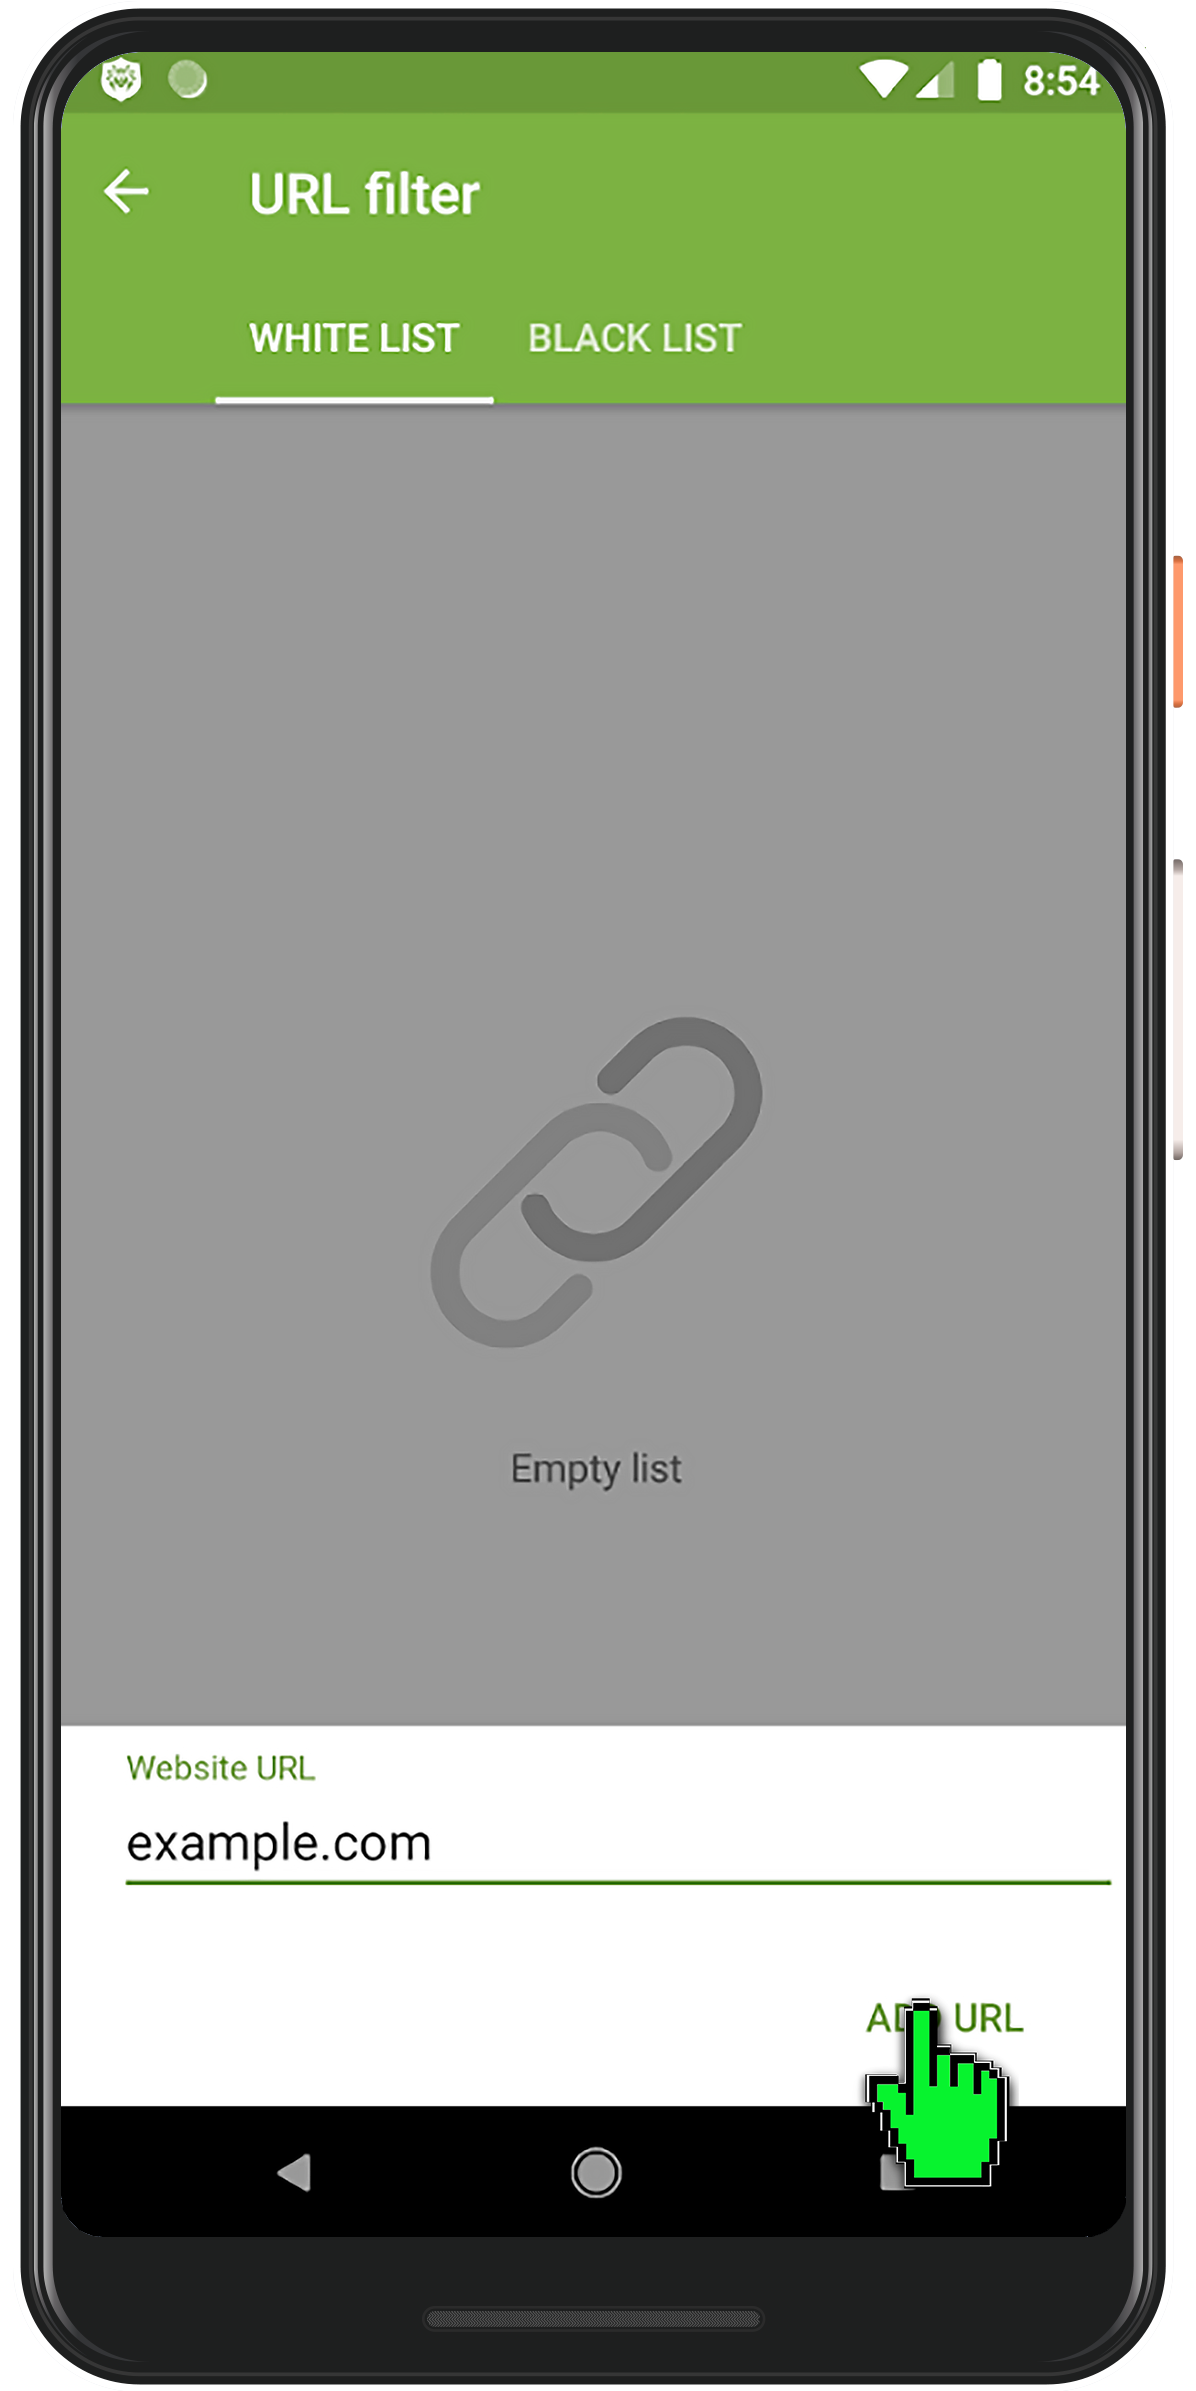
This site will not be blocked by the URL filter provided that its address is not contained in the thematic group "Known infection sources".
Dr.Web Anti-theft
Why do I need the Anti-theft?
Dr.Web Ant-theft performs three principle tasks. It:
- Helps honest people return your smart phone or tablet to you if you ever lose it.
- Prevents your data from being stolen if a thief gets hold of your device.
- Helps you find your device on your own.
What is the online anti-theft unlock service for Android devices?
The service is available at https://acs.drweb.com.
-
In the appropriate fields, enter the code displayed on the screen of your locked device and the email address you used to register Dr.Web Anti-theft on www.drweb.com.
-
Press the Get password button. A special code that you can use to unlock the device and disable Dr.Web Anti-theft will be sent to the email address you specified.
Enter the code you receive in the Enter password field on the screen of your locked device. The device will be unlocked and Dr.Web Anti-theft will be disabled. To resume using Dr.Web Anti-theft, you need to enable and configure it again.
SMS commands for Dr.Web Anti-theft
Send the trusted friends on your Dr.Web Anti-theft contact list a memo containing the SMS commands used to remotely control the Anti-theft in emergency situations—that way they’ll know how to help you when needed.
What devices can Dr.Web Anti-theft be used on?
Your device must be running Android 4.0 or a later version; and for the Anti-theft to work properly, it must also have a SIM card.
How is the Anti-theft connected with the other anti-virus components?
The Anti-theft uses Dr.Web account information—a password is required to unlock the device. If a password hasn't been specified (or if a Dr.Web account hasn't been created), the feature won't work.
Meanwhile, if the Anti-theft is enabled, some Dr.Web and device settings become password-protected automatically—some key parameters (such as the device administrator list, Dr.Web Account, etc.) can't be changed without entering the password.
The only Dr.Web component that interferes with the Anti-theft's operation directly is the Parental Control. Both components use the same password, and if Parental Control is enabled, the fingerprint reader (if available on the device) can't be used to unlock a device that has been locked with the Anti-theft. The password will need to be entered.
If Parental Control is disabled, the fingerprint reader can be used to unlock the Anti-theft.
How can I activate and configure the anti-theft in Dr.Web for Android?
In the application's main menu, select Anti-theft. In the Configuration Wizard window, enter and confirm a password. If necessary, create a friends list (a list of trusted numbers).
More detailed information about configuring the anti-theft can be found in the corresponding section of the documentation.
Then you can adjust anti-theft security parameters: set blocking conditions and the actions that the program will perform if those conditions are met. More information about this can be found here.
To activate the anti-theft, use the previously specified password.
Can Dr.Web Anti-theft be used without a password?
No, a password is required. Efficient blocking can only be accomplished by setting a strong password or enabling the fingerprint reader (if this feature is available on your device).
How can I find out the phone numbers of trusted SIM cards?
Trusted SIM cards — this is the list of SIM cards you use on your device. By default, if Dr.Web Anti-theft detects a SIM card that is not on its trusted list, it will block access to the device. In this case, if your device gets stolen and your SIM card is replaced, no one will be able to use the device. If one trusted SIM card gets replaced with another one on the list, the Anti-theft won't lock your device.
The card is identified by its unique ICCID identification number (this is the SIM card number in international format). You can see it on your SIM card or on the card on which it was delivered. You can also find out the SIM ID using special programs available on Google Play.
Each SIM card's ID is unique—unlike a phone number, which can be changed. There is no universal way to find out the ID that corresponds to a cardholder's phone number.
You can edit the trusted list at any moment by entering a name for each SIM card on the list.
Dr.Web Anti-theft is enabled on my device. How can I add a new SIM card onto the trusted list?
To add a SIM card onto the trusted list, do the following:
- Once you’ve inserted the SIM card you want to add onto the trusted list, the smart phone will be locked. Enter the Anti-theft password to unlock it.
- A notification prompting you to add the new SIM card onto the list will appear in the top menu. Tap on the notification.
- Select Confirm to add the SIM card onto the trusted list.
- Enter the Anti-theft password for confirmation.
You can edit the trusted list whenever you like by entering a name for each SIM card or deleting a SIM card from the trusted list.
You can find out more about the Anti-theft and SIM cards here.
When can a SIM card be added onto the trusted list?
Once all the Dr.Web components are downloaded, the Anti-theft verifies whether the inserted SIM cards are on its trusted list. If they are not, the device is locked until a password is entered.
After you've entered the password and unlocked your device, you will be able to use a notification dialogue to add a new SIM card onto the trusted list.
Upon the Anti-theft’s initial launch, the SIM card currently in use on a device is regarded as trusted by default. This may come in handy if you’ve installed Dr.Web for Android but haven’t been using the Anti-theft and now want to enhance your device's security.
Important! If your device is running Android 5.1 or later and two SIM cards are installed on it, both SIM cards will be added onto the trusted list automatically when the Anti-theft is run for the first time. For earlier Android versions, only the active SIM card appears on the list automatically. The second one must be added onto the list manually.
How can an Anti-theft password be restored?
- Try to recall the password by picking several of the most likely possibilities. Take note of each attempt you make, and don't try more than 5-7 times. You only get 10 attempts to restore your password.
- Contact some of your friends whose numbers are on your "buddies" list, and ask them to send the SMS command #RESETPASSWORD# to your number. Once the password is reset, enter a new one, and make sure that you will remember it.
- If you are unable to contact any of your friends or your Anti-theft buddies list is empty, use the password-recovery service on Doctor Web's site.
- If you can't recover the password on your own, contact Doctor Web's technical support service. You will need to provide our support engineers with your license's serial number as well as documentation confirming that the locked device really belongs to you.
I forgot the anti-theft password. How can I unlock my phone?
There are three ways to choose from to unlock the device depending on the version of Dr.Web for Android you use and availability of the friends list.
- If you are using Dr.Web for Android 7.0 and higher, use the special service at.
- If, when configuring the anti-theft (any version), you created a list of friends, you can disable the anti-theft by sending a corresponding SMS command from a trusted number. For more information about SMS commands, please follow this link.
- If you use Dr.Web for Android 6.0 and didn't create a list of friends, you need to send a request to Doctor Web's Technical Support Service. In your request, you will need to provide the following information:
- Your Dr.Web serial number
- a photo of the box, warranty card, or other document that concerns the blocked device and contains a readable IMEI.
What will happen if an incorrect Anti-theft password is entered multiple times?
The password dialogue is temporarily locked, and there is no way to unlock the device during this period.
To make sure that your information never gets stolen, you can configure the Anti-theft to wipe all of your user data from the device after the tenth failed attempt and reset the device to its default settings.
Can Dr.Web Anti-theft turn a stolen device into a “useless brick”?
Dr.Web Anti-theft is not equipped with a kill switch that would render the device non-operational. It can only wipe all the user information (after receiving the corresponding SMS command, or automatically, after 10 failed password-entry attempts if the Remove data option was on). At the same time, if Dr.Web does not have administrator rights on the device, it will not be able to reset all the settings and delete the installed applications, so the smartphone will remain locked. But, overall the device will remain operational.
What contact information can be added onto the Anti-theft's buddies list?
You can add numbers from your phone book and call and SMS history or enter them manually.
You can find out more about how numbers can be added onto the buddies list here.
Can the Anti-theft be used if the SIM card is unavailable, has been removed, or has become unusable?
Some Anti-theft features are only available if an active SIM card is being used on the device. Those features include the buddies list, location services, and remote SMS commands. All other key Anti-theft features—locking the device, wiping user data after ten failed password-entry attempts (if that option had been enabled), showing a message on the lock screen—will be available.
More information about the "no SIM card" mode can be found in the documentation.
Can the Dr.Web Anti-theft operate in centralised protection mode?
Yes. In this case, the anti-virus security is managed by the Dr.Web Server administrator who oversees the security of their company’s entire information infrastructure, including employee handhelds.
To learn how you can get your personal Dr.Web-protected device connected to your company's anti-virus protection system, read here.
How can I remove Dr.Web from my device if Anti-theft is enabled?
- Start the Dr.Web anti-virus.
- On the main screen, select Anti-theft.
- Enter your Dr.Web account password.
- In the Anti-theft window, in the top-right corner of the screen, disable the component.
- In the newly opened window, click on OK.
- In the device settings, select Applications or Application Manager.
- In the list of installed applications, select Dr.Web and click on Remove.
How can I unlock the Anti-theft if I did not receive the email containing the password reset code?
Start the Dr.Web Anti-virus application, and click on Anti-theft — Forgot password. At the bottom of the application screen, you’ll see the list of contacts who can help you change your Anti-theft password. Ask any person whose phone number appears on this list to send you an SMS message with the text #RESETPASSWORD#. Create a new password.
Scanner
How can I view a scanning report?
Launch Dr.Web for Android and select Statistics. The statistics window displays the number of processed files and information about all actions performed by the anti-virus components. It is possible to reset the statistics (Menu→Clear statistics), or save the log to a file (Menu→Save log).
How can I send a scanning report to Doctor Web?
Launch Dr.Web for Android and select Statistics. Tap Menu and choose Save log on SD card. The DrWeb_Log.txt file will be saved into the /Andoroid/data/com.drweb/files/ directory and a corresponding notification will be displayed. If you want to send a support request, use the web-form at https://support.drweb.com/support_wizard/. To attach a file to your request, tap Browse, select the file you need and press Open. To send the request, tap the Send button.
Firewall
How can I avoid downloading a huge amount of data to my Android device via the mobile Internet?
To avoid downloading a huge amount of data via the mobile Internet, temporarily disable it for an application. To do this:
- run Dr.Web;
- open the Firewall component;
- click on the “Applications” tab;
- select the application you need;
- in the “Access to data transfer” section, click on "Mobile Internet" so that it becomes inactive.
When you need to download a major update, for example, via free or home Wi-Fi, you can use this same method to allow the application to use mobile traffic to connect to the Internet.
How can I view the applications whose network access parameters were specified in the Firewall?
To view applications whose network access parameters were specified in the Firewall:
- run Dr.Web;
- open the Firewall component;
- click on the “Applications” tab;
- take note of the applications marked with the red gear icon.
If present, this icon indicates that the application settings in the Firewall were changed or that an active rule was set for it.

How can I get the floating window to be displayed in Dr.Web for Android?
The floating window containing traffic-usage information is disabled by default because it takes up screen space, which may not always be convenient when working with a mobile device. When no acute need to control traffic exists, the window can be disabled, but when the amount of traffic and where it is coming from is important to know, it is better to have this data on view.
To enable the display of the floating window:
- run Dr.Web;
- open the Firewall component;
- click on the “Limit” tab;
- select "Current traffic information";
- place the floating window on the screen so that it does not bother you while you are working with your mobile device.

Immediately after this option is selected, the floating traffic-information window will appear; in the future, it will appear on top of other windows.
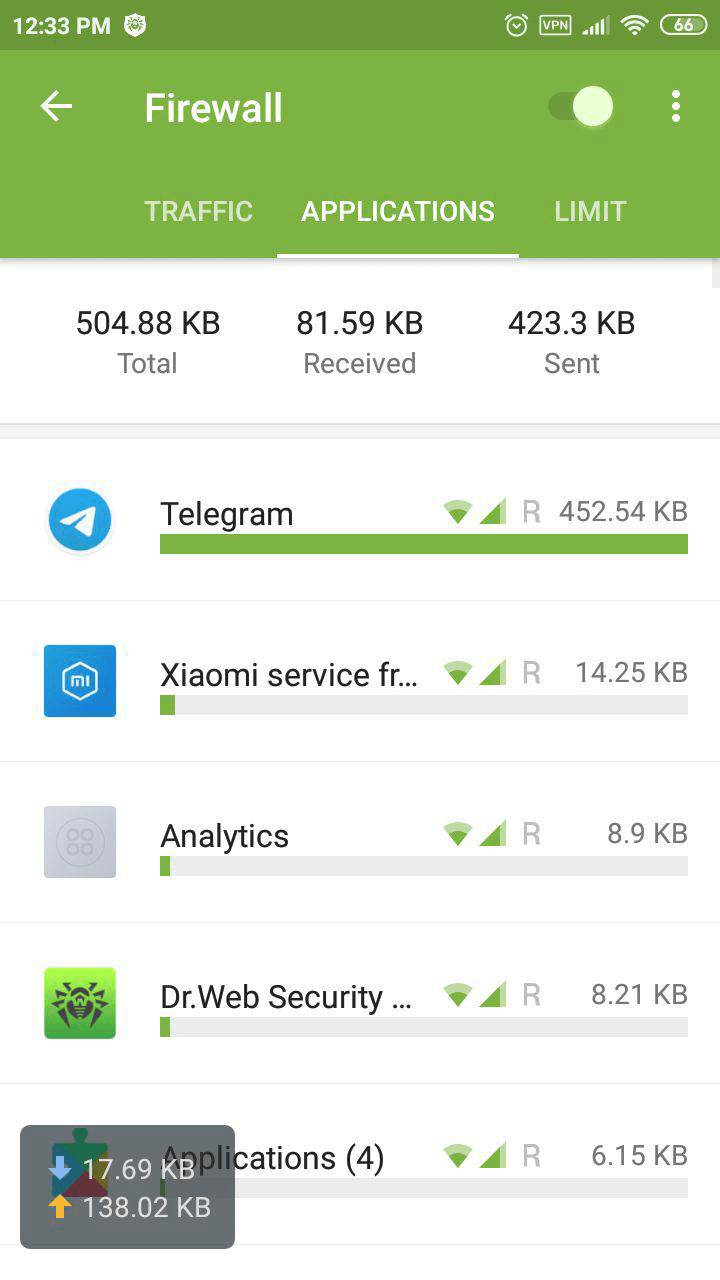
How can I obtain full information on application network activity while the Dr.Web Firewall is in operation?
For user convenience, network traffic-usage information is displayed in two ways.
To obtain full information on application network activity while the Firewall is in operation:
- run Dr.Web;
- open the Firewall component;
- click on the "Applications" tab.
To view data pertaining to an application you are interested in, select the application from the list—the settings window, containing complete information, will open.
The user can also control this information via the floating window—we've described how to enable it here.
How can I use Dr.Web Firewall to prevent my Android device from accessing a specific website?
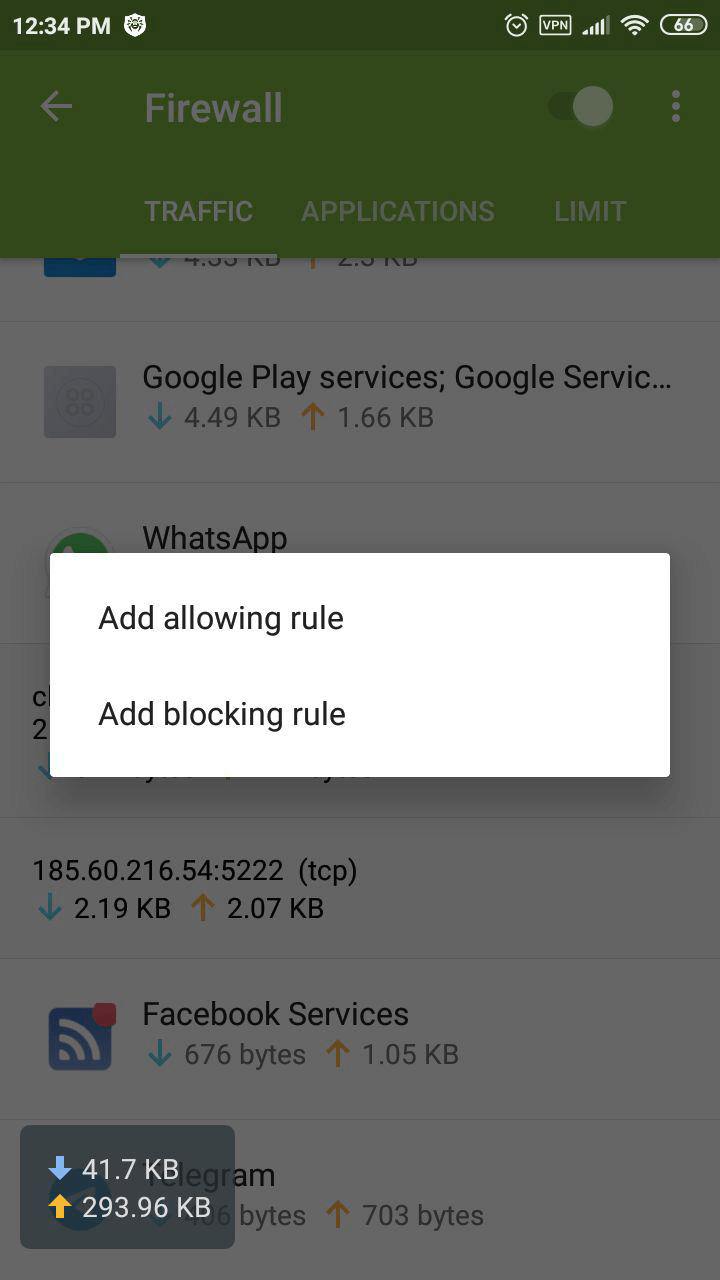
If you need to prevent an application from accessing a website, you can do this on the Dr.Web Firewall’s "Traffic" tab:
- run Dr.Web;
- open the Firewall component;
- click on the "Traffic" tab;
- select the application you want to prevent from accessing the website;
- from the drop-down list containing connections used by applications, select the connection that needs to be blocked;
- you will see a pop-up menu that lets you add an “allow” or “block” rule. Select "Add blocking rule".
The firewall will now automatically block access to this resource.
If you want to restore access to a previously blocked resource, you can do this by removing the corresponding blocking rule.
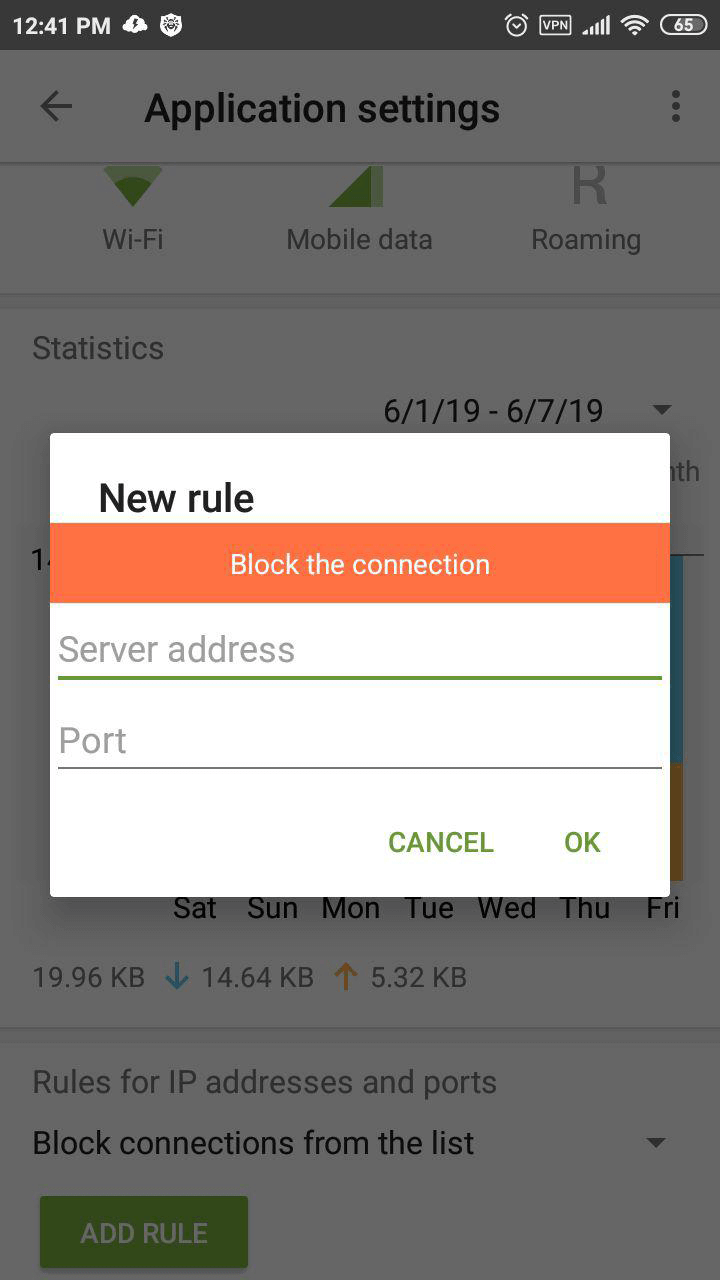
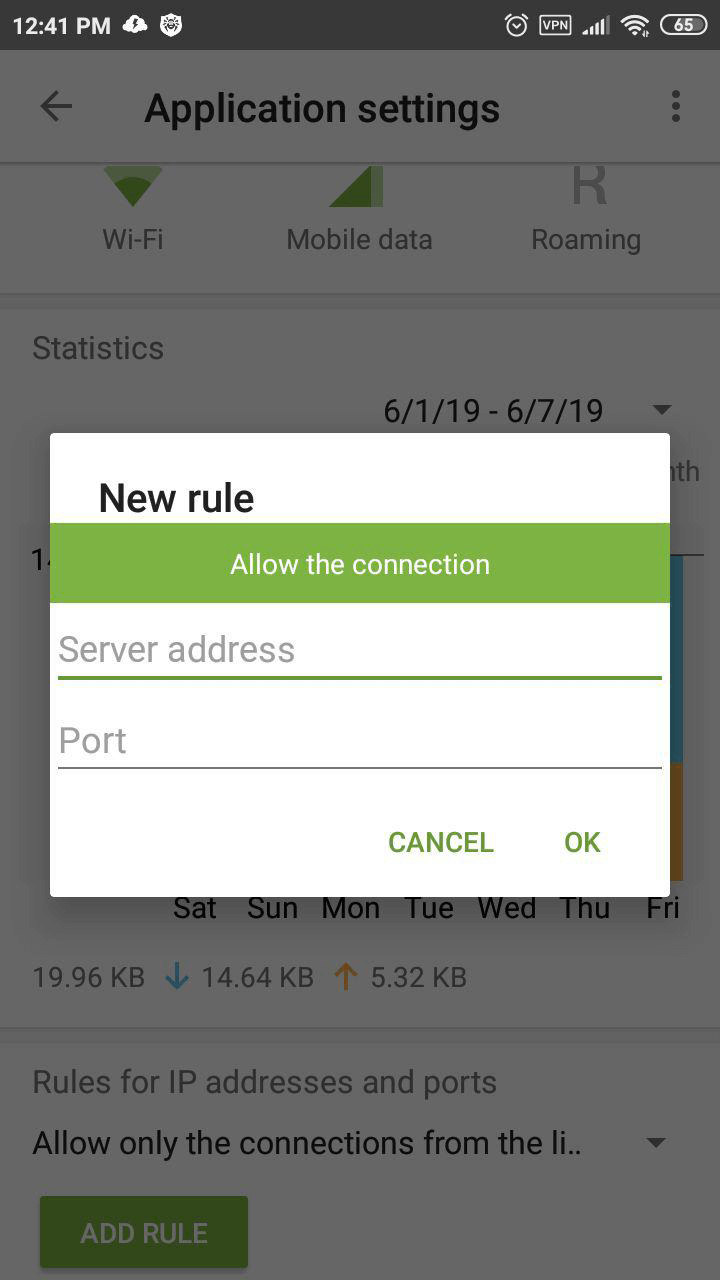
You can also explicitly specify an address that you don’t want any programs connecting to. To do this:
- run Dr.Web;
- open the Firewall component;
- click on the "Applications" tab;
- select the program you want to keep from accessing the website;
- in the newly appeared window, in the "Rules for IP addresses and ports" section, select "Block connections from list";
- click on "Add rule", and in the "New rule" window, specify the server address and the connection port you need to block access to;
- click OK to finish creating the rule.
How can I use Dr.Web to limit the amount of traffic consumed on my Android device?
The firewall can restrict the use of mobile traffic and, if necessary, block an application's access to the Internet via a selected connection type: Wi-Fi, mobile Internet, and in roaming.
To configure the connection types that applications can use to connect to the Internet:
- run Dr.Web;
- open the Firewall component;
- click on the "Applications" tab;
- select the application you need;
- in the "Access to data transmission" section, specify the connection types that the application can use to connect to the Internet.
To limit the use of mobile traffic:
- run Dr.Web;
- open the Firewall component;
- click on the "Limit" tab;
- select "Limit mobile Internet";
- in the newly appeared window, indicate how much mobile traffic (in megabytes or gigabytes) you can use for a specific period (day, week, or month), and click “OK”.
- you will see a window where you can specify the amount of traffic you’ve already used prior to the current moment—if you’ve already used some traffic from the current period (for example, you installed Dr.Web in the middle of the month). Specify the amount that you have used, and click “OK”.
With this option, you’ll find it very convenient to receive notifications informing you that you are reaching your limit. To enable these notifications, select the “Notifications” checkbox in the “Limit” tab.
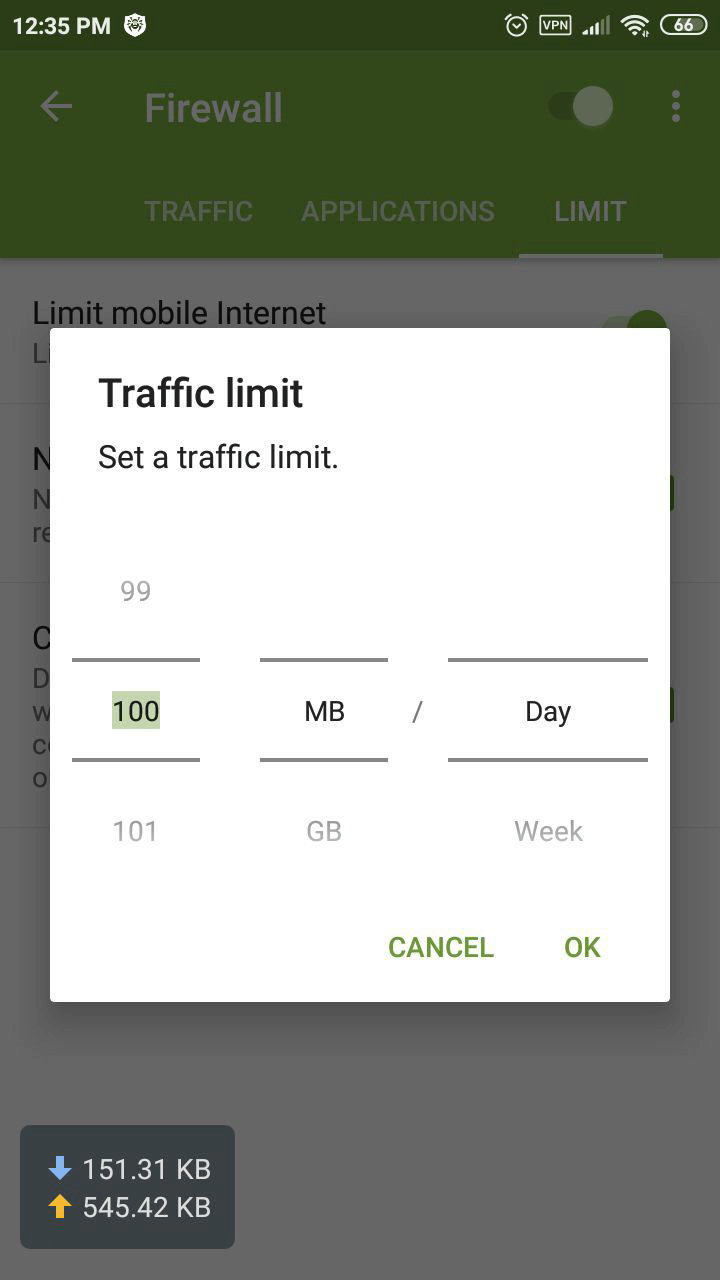
I’m on a limited plan; how can I limit traffic consumption?
Since limited Internet plans are usually offered for a specific amount over a specific period (for example, 100 MB per 24 hours or 5 GB per month), the traffic limitation option can be configured to prevent users from suddenly and significantly exceeding their usage limits.
To configure a limit for the mobile traffic you use
- run Dr.Web;
- open the Firewall component;
- click on the "Limit" tab;
- select "Limit mobile Internet";
- in the newly appeared window, indicate how much mobile traffic (in megabytes or gigabytes) you can use for a specific period (day, week or month), and click “OK”.
- you will see a window where you can specify the amount of traffic you’ve already used prior to the current moment—if you’ve already used some traffic from the current period (for example, Dr.Web was installed in the middle of the month). Specify the amount that you have used, and click “OK”.
With this option, you’ll find it very convenient to receive notifications informing you that you are reaching your limit. To enable these notifications, select the “Notifications” checkbox in the “Limit” tab.
How can I track an application’s current network activity on my Android device?
Two of the tools incorporated into the Firewall can be used to view current network activity.
The first one is the floating window, which, in minimised format, displays the total amount of traffic used and, in expanded format, displays the list of applications currently using an Internet connection.
If the floating window is disabled, do the following to get the latest network activity information:
- run Dr.Web;
- open the Firewall component;
- click on the Firewall's "Traffic" tab.
Here, the user can find information about the applications and services currently using an Internet connection and the amount of traffic they are using.
How can I limit network activity for an application on my Android device?
If, for some reason, you have to completely block an application’s access to the Internet, the best solution will be to prevent the application from being able to transfer data.
To limit any kind of network activity for an application, do the following:
- run Dr.Web;
- open the Firewall;
- click on the "Applications" tab,
- select the program whose Internet access you want to limit;
- in the newly appeared window, in the "Access to data transmission" section, disable the use of Wi-Fi, mobile Internet, and roaming for each application in the list.
How can I create a rule for an application?
To create a rule that restricts or allows an application to engage in any kind of network activity, do the following:
- run Dr.Web;
- open the Firewall component;
- click on the "Applications" tab,
- select the program for which you want to create the rule;
- in the newly appeared window, go to the "Rules for IP addresses and ports";
- create an “allow” or “block” rule, as described below.
To create a blocking rule:
- select "Block connections from the list" from the drop-down list;
- click on "Add rule";
- in the newly appeared window, enter the IP address (in the ххх.ххх.ххх.ххх format) and the number of the port (e.g., 225) to which you need to block access;
- click "OK".
If necessary, you can repeat this operation for all the addresses you want to block access to. All other connections will be enabled by default. This operation mode can conveniently be called "Using the blacklist".

To create an allowing rule:
- select "Allow only the connections from the list " from the drop-down list;
- click on "Add rule";
- in the newly appeared window, enter the IP address (in the ххх.ххх.ххх.ххх format) and the number of the port (e.g., 225) to which you need to allow access;
- click "OK".
If necessary, you can repeat this operation for all the addresses you want to have access to. Please note that all other connections will be disabled by default. This operation mode can conveniently be called "Using the whitelist".
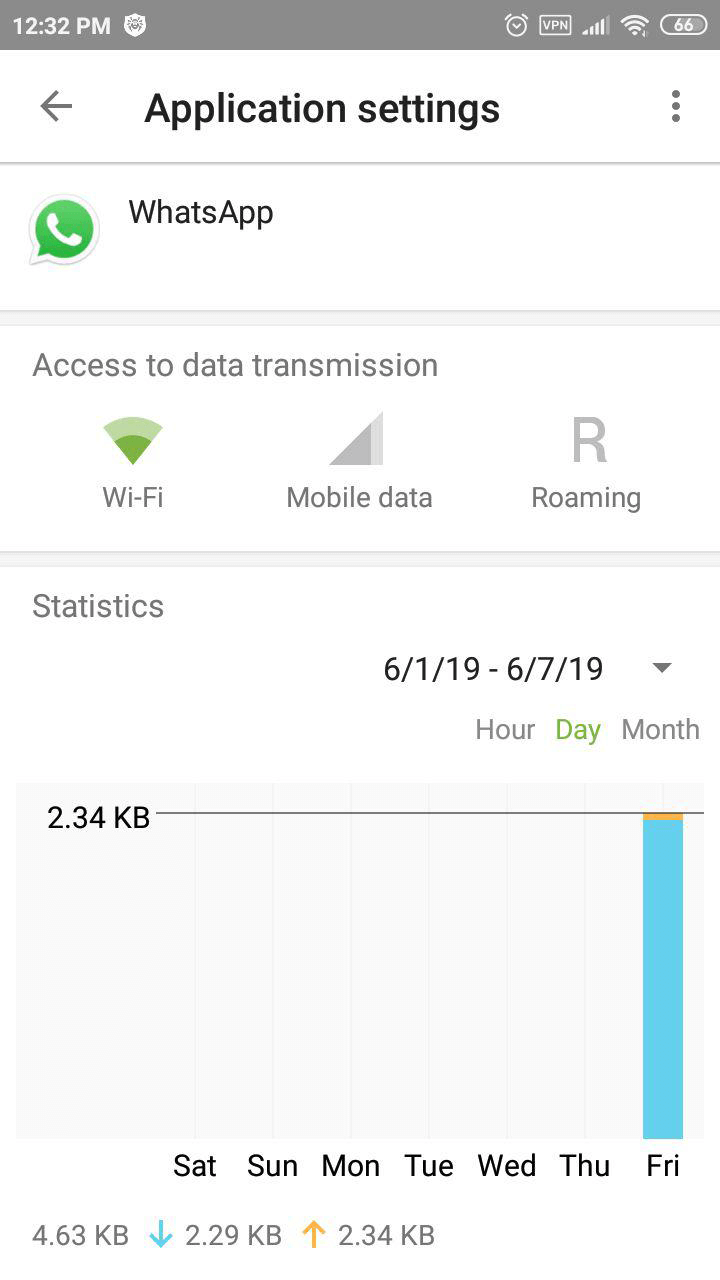
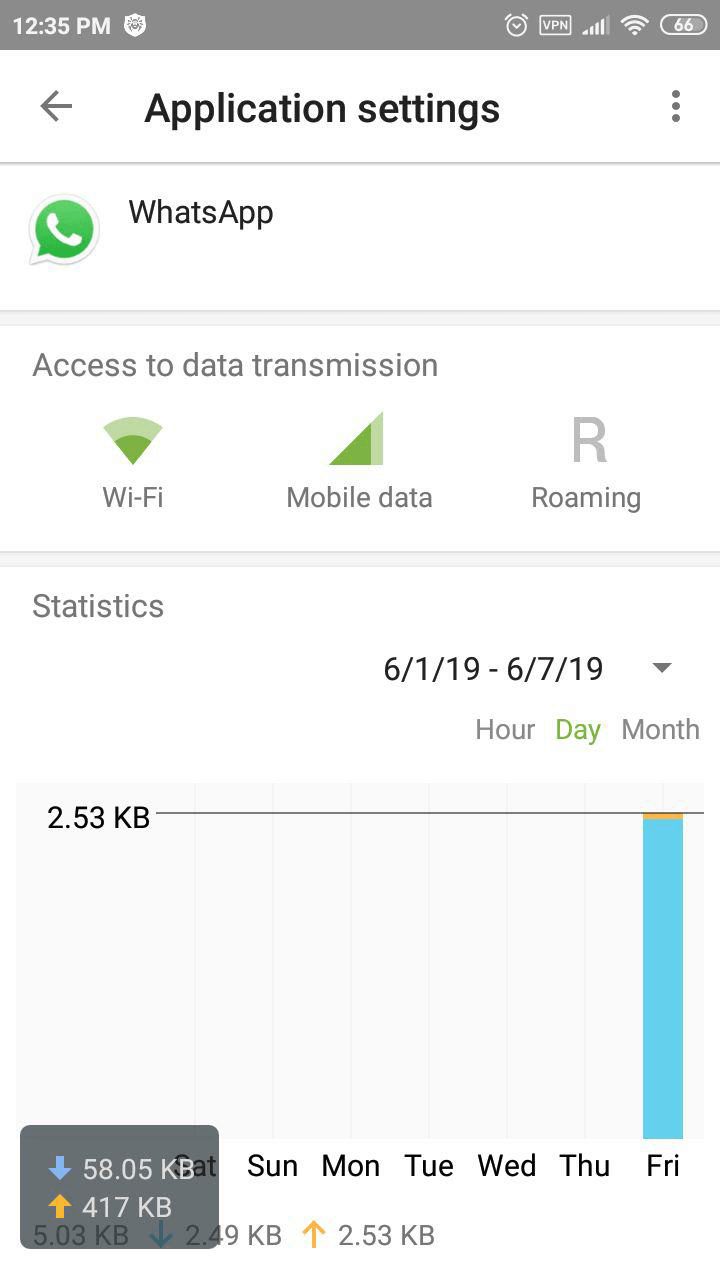
What kind of statistics does the Firewall collect for each application?
For each application that uses Internet access, the Firewall collects statistics related to incoming and outgoing traffic.
To view statistics:
- run Dr.Web;
- open the Firewall component;
- click on the "Applications" tab;
- select an application you are interested in, and in the newly opened window, go to the "Statistics" section.
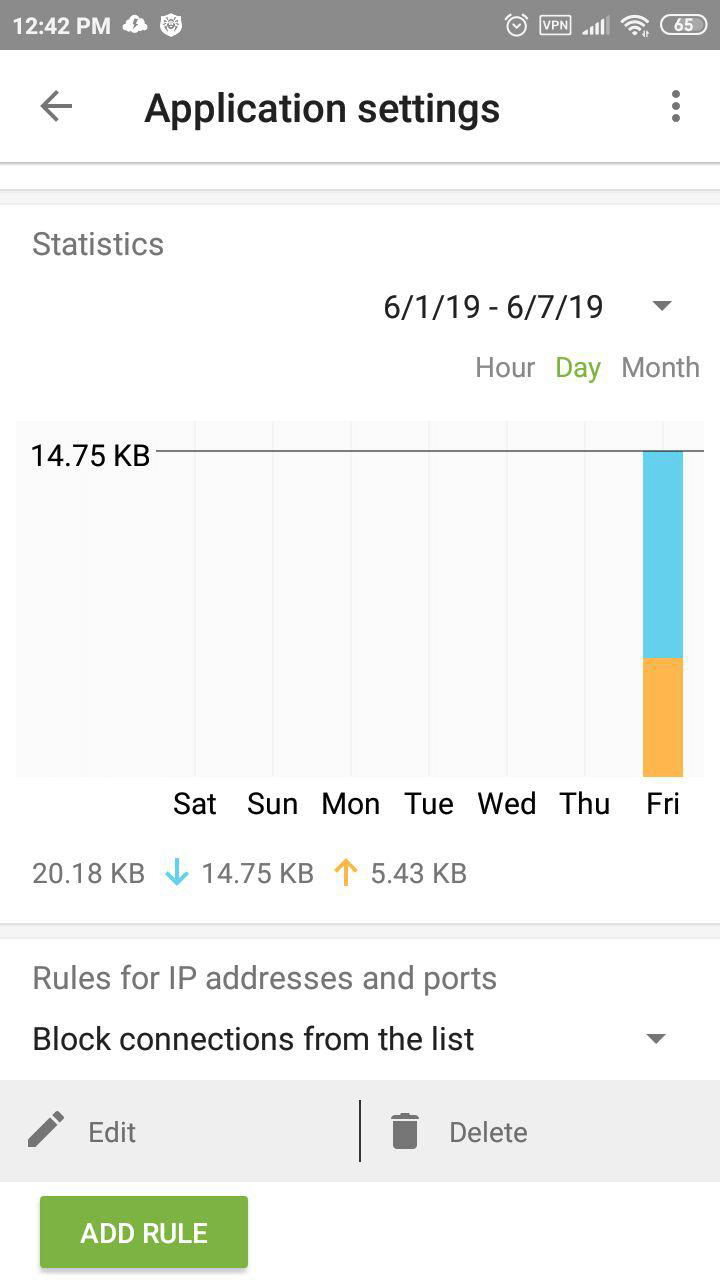
Here, users can find complete traffic information (incoming and outgoing) for the application and a network-usage diagram. Users can see how much data the application received during a defined period.
How can I delete an application rule?
If you need to delete an existing rule:
- run Dr.Web;
- open the Firewall component;
- click on the "Applications" tab;
- select the application for which you want to change the rule;
- in the list of rules visible in the newly appeared window of the "Rules for IP addresses and ports" section, tap the line that you want to delete, and drag it in any direction. The line will switch to the choice "Edit" or "Delete";
- click on "Delete" to remove the rule or on "Edit" to replace it with a new one.
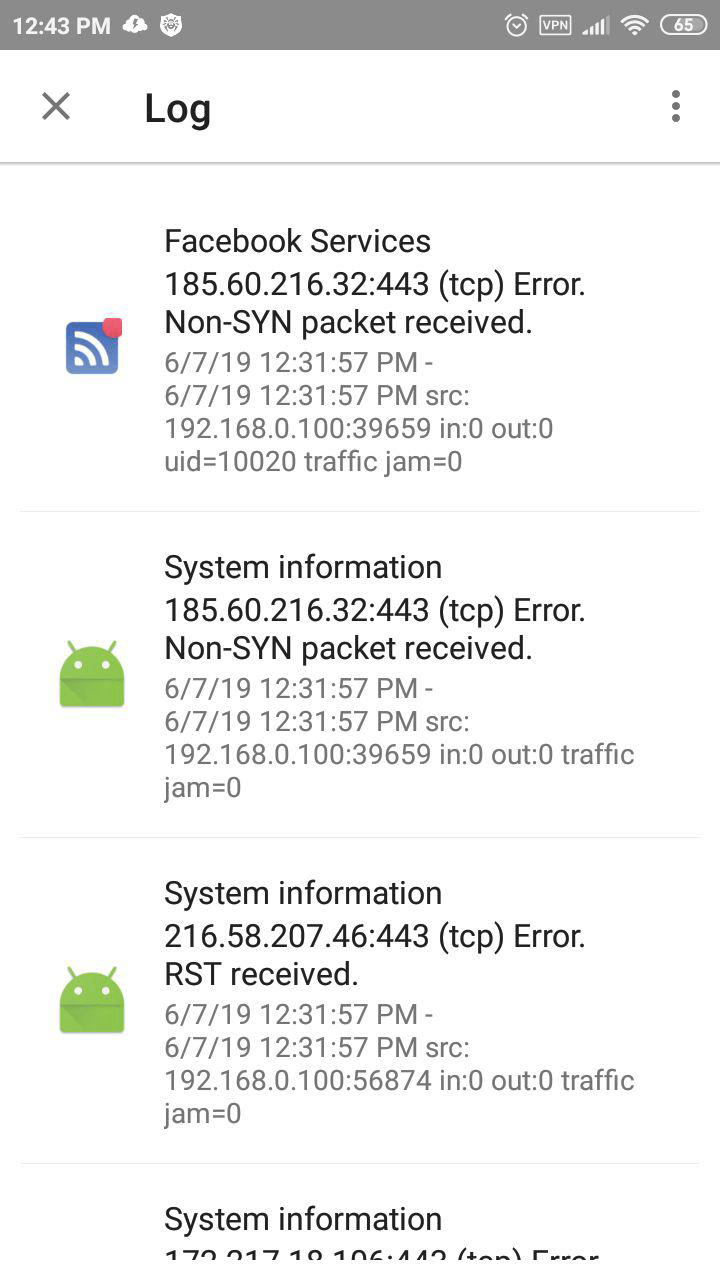
What information is displayed in the Firewall Log?
All Firewall actions are logged and recorded in the Firewall Log. The report contains the following information about applications and actions involving them:
- Application name.
- IP address, port, and protocol via which the data was exchanged.
- Date and time of connection (for TCP) or time taken to receive data packets with the corresponding amount of traffic (for UDP). For example: 21/11/2017 22:19:39 — 21/11/2017 22:19:42.
- Local address and local port. For example: src: 192.168.0.102:55512.
- Incoming and outgoing traffic (bytes) or the number of blocked packets. For example: in:124 out:79 or blocked packets:1.
- The identifier of the application on the device associated with this traffic (User ID). For example: uid=10011.
- Number of network congestion incidents (for TCP only). For example: traffic jam=0. Traffic congestion is a special situation when a client program fails to offload a TCP buffer, and that can be the cause of data transfer slowdowns over the network.
To open the Firewall Log, run Dr.Web, open the firewall, and then click on the icon in the form of the vertical ellipsis. Select "Log".

Note that data related to application network activity is stored in a separate Application log that is created separately for each application.
After this, the Firewall starts operating. By default, all network activity is allowed except the use of the Internet in roaming. To manage traffic at your own discretion, you will need to configure the Firewall.
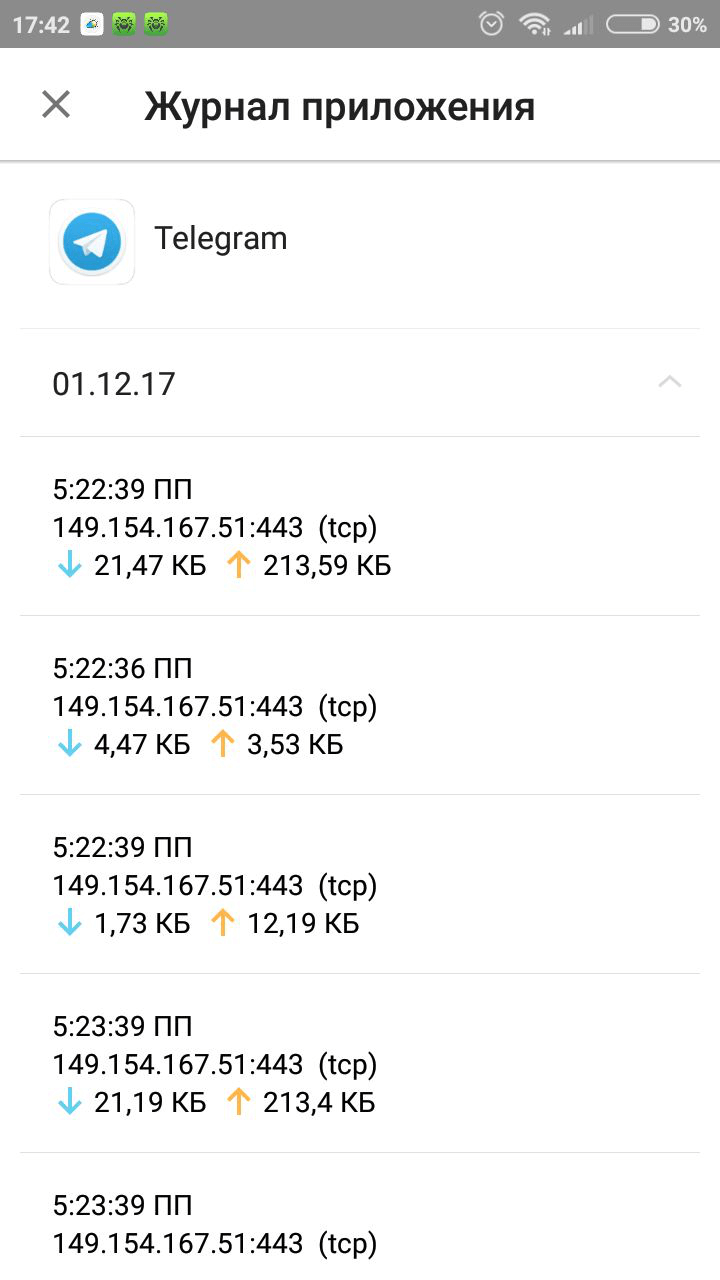
What does the Application Log contain?
Since monitoring and recording all network application activity is one of the main tasks of the Firewall, the Application Log stores all the information about application-specific network activity:
- Time an event occurred
- Resource name
- Resource IP address
- Protocol via which the connection was established
- Connection status
- Amount of incoming traffic
- Amount of outgoing traffic
To access the Application log, do the following:
- run Dr.Web;
- open the Firewall;
- click on the "Applications" tab;
- select the application you need, and in the newly appeared window, click on the icon that looks like a vertical ellipsis. Select "Application Log".
Call and SMS Filter
How can I protect my Android device from phishers and vishers?
The Call and SMS Filter protects against phishers and vishers. But fraudsters can ask children to disable the restrictions their parents have established in this component.
Dr.Web Parental Control will reliably protect your children provided you ensure that they cannot tamper with the Call and SMS Filter settings.
In the Parental Control's Components tab, check the box next to Call and SMS Filter.
This setting won't allow the user to bypass Call and SMS Filter restrictions, and the user will receive calls and SMS according to the settings established for this component. For example, if the Filter is configured to allow calls and messages from the whitelist only, the user will only receive calls from numbers on that list.
When trying to sign in to the Filter settings, the user will see this window:
Learn more about the Call and SMS Filter settings from our video tutorial.
Can I use the anti-virus to bar calls to certain numbers from my mobile device?
Dr.Web for Android doesn't block outgoing calls.
Quarantine
What is the quarantine for?
The anti-virus places suspicious and infected files into the quarantine folder. Suspicious files are quarantined to be sent to Doctor Web's virus laboratory for analysis, infected ones are isolated if curing is not possible for some reason.
How can I send a quarantined suspicious file to Doctor Web?
To send a suspect file, use the form on our website: https://vms.drweb.com/sendvirus/. To attach a file to your request, tap Browse, select the file you need and press Open. To send the request, tap the Send button.
How can I restore a file to its original location after it has been quarantined by the anti-virus?
Launch Dr.Web for Android and select Quarantine. Tap the file you want to restore. In the succeeding window you will see all the information about this file and malicious code contained in tt. Tap the Restore button - the file will be moved to the original folder.
Errors
The error "server internal error" occurs when the anti-theft/account/Parental Control unlock service in Dr.Web for Android is accessed at acs.drweb.com
This error can occur due to server overload. Please visit this page later. Or send a written unlock request to our technical support service. Please attach and specify the following data and documents.
Error 2
Possible reasons:
- problems with the Internet connection;
- no settings were specified for the proxy server, if one is used.
Solution:
- connect to the network in another way (via another Wi-Fi point, via a mobile operator). Or submit your request to our technical support service.
Nothing found